There is a unique kind of excitement that comes with unboxing a brand-new pair of heavy-duty, full-grain leather hiking or mountaineering boots. They smell like rich leather, look ruggedly indestructible, and promise countless miles of high-alpine adventures across the jagged granite of California, the damp wooded trails of Washington and New York, the sun-baked expanses of Texas, or the steep coastal ridges around San Francisco.
However, that excitement often turns to dread within the first mile. Unlike soft synthetic mesh trail runners that feel broken in straight out of the box, traditional stiff leather boots are built like medieval armor. Their thick hides, rigid heel counters, internal shanks, and unyielding leather uppers require a grueling break-in period. During this phase, friction, pressure points, and stiff seams wage war against your skin, turning minor hot spots into agonizing, fluid-filled blisters that can derail a trip instantly.
Can you enjoy stiff leather boots without sacrificing your feet? Absolutely. This comprehensive, highly optimized guide explores the exact anatomy of boot-induced friction, proactive skin-prep strategies, professional break-in methods, and step-by-step techniques to break in your leather boots completely pain-free.
The Anatomy of a Blister: Why Stiff Leather Causes Trouble
Before looking at prevention, it is crucial to understand why blisters form. A friction blister is your body’s emergency response to mechanical stress.
When your skin rubs repeatedly against the rigid interior wall of a stiff leather boot or an internal seam, the friction creates shear stress between the outer layers of your skin (the epidermis) and the deeper layers (the dermis). Your body responds by pumping blood plasma into the separation, creating a fluid-filled cushion to protect the damaged tissue below.
Why Full-Grain Leather is Unforgiving
- Zero Initial Flexibility: Full-grain leather is dense, thick, and stiff. Until it stretches, softens, and molds to the exact bony contours of your feet, it acts like a rigid clamp.
- Moisture Amplification: Sweaty feet soften skin tissue (maceration), making it far more vulnerable to friction tear. Stiff leather boots, even waterproof ones, can trap heat during early wear sessions, accelerating sweat accumulation.
- Aggressive Heel Counters: The internal plastic or fiber heel counter designed to lock your foot in place is notoriously abrasive during the first few dozen miles.
Phase 1: Pre-Hike Preparation and Proper Sizing
Prevention begins long before you step foot on a trail. Many “break-in blisters” are actually the direct result of wearing boots that do not fit correctly.
1. The Sizing Rule for Stiff Leather
As established in boot-fitting fundamentals, stiff leather boots require careful sizing. Because leather has minimal give lengthwise, you must buy your leather boots a half-size to a full size larger than your casual sneakers. This extra space prevents your toes from jamming into the front box on descents and accommodates the thick, high-density socks required for leather footwear.
2. Choose the Right Sock Architecture
Never wear thin cotton athletic socks or single-layer synthetic socks with stiff leather mountaineering boots. Cotton absorbs sweat, loses its shape, and bunches up, creating friction points.
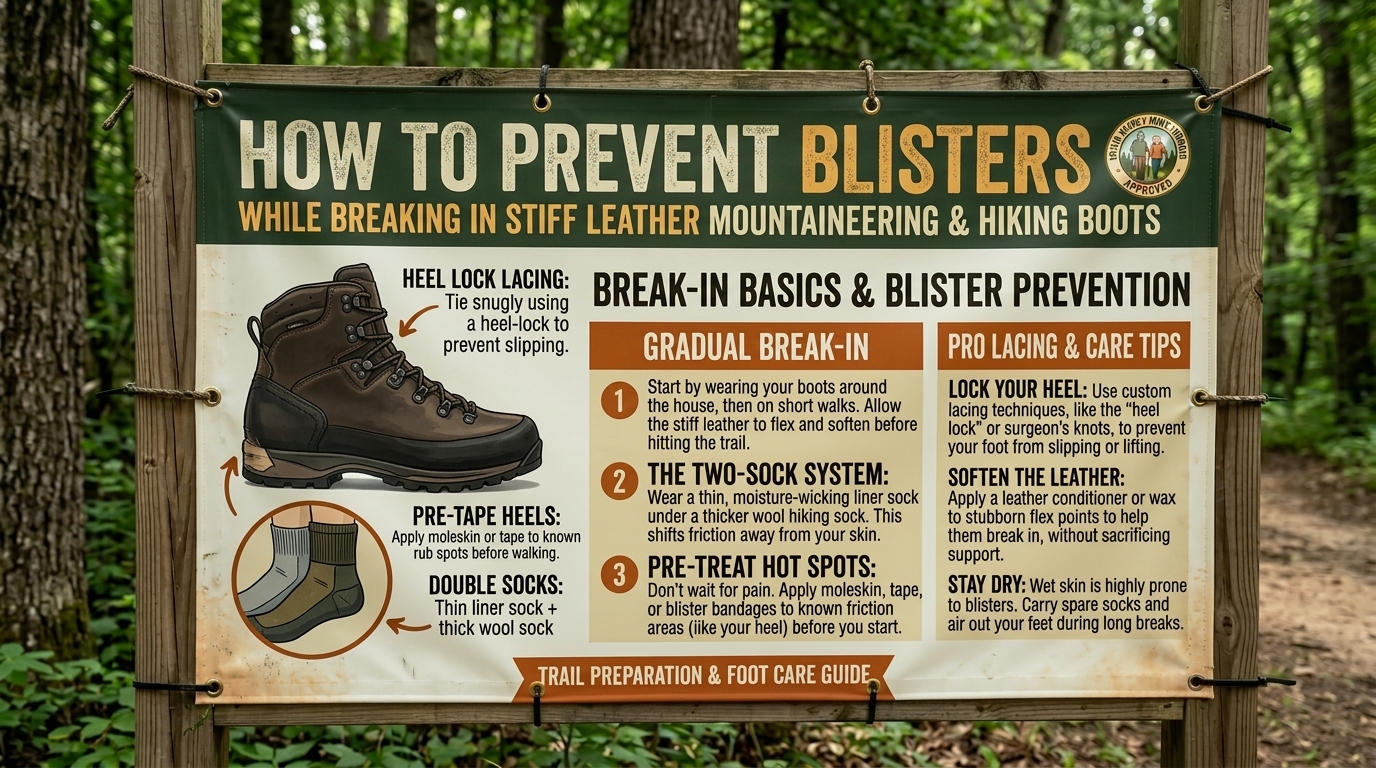
- The Two-Sock System: Many mountaineers swear by wearing a thin, synthetic, moisture-wicking liner sock underneath a thick, high-density merino wool outer sock. The two socks rub against each other instead of your skin, neutralizing friction completely.
Phase 2: Accelerated Softening (How to Break in Leather Without Pain)
You should never take brand-new, stiff leather boots straight out of the box and embark on an 8-mile mountain hike. You must condition and soften the leather to help it mold to your feet safely.
1. The House-Slipper Method (Week 1)
Wear your new leather boots around the house while doing chores, watching television, or working from home for 1 to 2 hours a day. This low-stress environment allows your body heat and slight foot movements to begin softening the leather without generating sweat or sustained friction.
2. Short Neighborhood Walks (Week 2)
Progress to wearing your boots on short, flat walks around your neighborhood (1 to 2 miles max) wearing your proper hiking socks. If you feel even a slight rubbing sensation on your heel or pinky toe, stop immediately before a blister forms.
3. Use Specialized Leather Conditioners and Softeners
Stiff leather can be gently relaxed using specialized leather care products.
- Apply a quality leather conditioner (like Mink Oil, Huberd’s Shoe Grease, or Nikwax Conditioning Wax) to the flex points across the forefoot and ankle collar.
- Warning: Avoid over-softening the heel counter, as you still want the rear of the boot to provide structural stability and lock your heel in place.
Phase 3: Advanced Friction-Fighting Armor (Taping and Barriers)
Even with proper conditioning, certain pressure points (like the Achilles tendon, heel, and outer ankle bones) will experience friction during the break-in phase. Use these professional-grade barrier techniques to protect your skin.
1. Leukotape P (The Ultimate Preventative Shield)
Leukotape P is a rigid, rayon-backed sports tape with an exceptionally strong zinc oxide adhesive that stays stuck to skin even through sweat and water.
- Cut a strip of Leukotape and place it over your heel, big toe joint, or any known hot spot before you put your socks on.
- It acts as an artificial outer skin, taking the brunt of the friction while your skin remains completely unharmed.
2. Moleskin and Gel Blister Pads
If you feel a warm “hot spot” developing on the trail, stop immediately. Wipe the skin dry, and apply a piece of moleskin or a hydrocolloid blister bandage (like Compeed) over the area. Hydrocolloid bandages cushion the pressure point and accelerate healing if a blister has already begun to form.
Phase 4: Mastering Lacing Zones to Prevent Heel Rub
Heel slippage is the number one cause of blistering on the back of the heel during the break-in phase. As leather flexes, if your heel lifts up and down inside the boot, it rubs raw against the heel counter.
- Utilize the Surgeon’s Knot: As covered in advanced lacing techniques, loop your laces twice around each other at the ankle eyelets before tying your bow. This creates a friction lock that holds your heel firmly back in the boot pocket, stopping vertical slip dead in its tracks.
- Vary Tension Across the Instep: Keep the forefoot snug to prevent sliding, but don’t over-tighten the very top ankle collar until the leather softens, as excessive rigid pressure can bruise the tendon.
Frequently Asked Questions (FAQs)
1. How long does it typically take to break in stiff leather mountaineering boots?
Depending on the thickness of the leather (e.g., 2.8mm full-grain leather vs. lighter nubuck), it typically takes between 15 to 30 miles of gradual walking and hiking to fully soften the leather and mold it to the unique contours of your feet.
2. Should I soak my leather boots in water to break them in faster?
No! The old myth of soaking leather boots in warm water and wearing them dry will ruin the leather, cause premature rotting of stitching threads, warp the internal shanks, and almost guarantee severe, infected blisters. Always break them in dry with gradual wear.
3. What is the difference between a “hot spot” and a blister?
A hot spot is an early warning sign—a localized area of warmth, itching, or minor stinging caused by friction. If caught immediately and covered with Leukotape or moleskin, you can prevent a fluid-filled blister from forming.
4. Can I use alcohol or heat guns to stretch tight leather spots?
Never use chemical rubbing alcohol, as it strips natural oils, dries out the leather, and causes it to crack. While a professional cobbler can use a specialized mechanical stretcher for tight spots, avoid using home hair dryers or heat guns, which melt glues and ruin the hide.
5. Why do my heels always blister during the first few hikes?
Heel blisters happen because the stiff leather heel counter hasn’t flexed yet, causing your heel to lift out of the pocket with every step. Using the Surgeon’s Knot lacing technique and wearing dual-layer socks resolves this immediately.
6. Are synthetic boots easier to break in than leather boots?
Yes. Synthetic mesh and nylon hiking boots feature flexible, soft upper textiles that require virtually zero break-in period, which is why many modern hikers prefer them over heavy leather.
7. Should I pop a blister if one forms on the trail?
Medical professionals generally advise against popping blisters because the unbroken skin roof acts as a sterile, natural barrier against bacteria. If a blister is massive and unbearable, sterilize a needle, puncture the edge carefully to drain fluid, leave the skin flap intact, and cover it with a hydrocolloid bandage.
8. What kind of socks stop leather boot blisters best?
High-density merino wool socks paired with thin synthetic liner socks provide the ultimate friction-management system. Avoid 100% cotton socks completely, as they trap moisture and cause skin tearing.
9. How do I know if my leather boots are broken in or simply too small?
If a boot is simply stiff, the pain will be concentrated on the surface skin where friction occurs. However, if your toes are jammed against the front hard wall or your entire foot is cramped laterally with zero wiggle room, the boots are simply too small and cannot be broken in to fit.
10. Can I wear blister prevention tape directly over broken skin?
You should never place aggressive adhesive tapes (like Leukotape) directly onto an open, popped blister, as tearing the tape off will rip the delicate new skin away. Use a non-stick sterile pad or a hydrocolloid bandage first, then secure the edges with tape.
Conclusion
Breaking in stiff leather mountaineering and hiking boots is a rite of passage for serious outdoor enthusiasts. While the initial break-in phase can feel intimidating, approaching the process with patience and strategy makes all the difference. By sizing your boots correctly, conditioning the leather gradually, utilizing a two-sock system, and deploying preventative barrier tapes like Leukotape, you can bypass the agony of blisters entirely. Take your time softening those rugged hides, and you will be rewarded with lifelong, custom-molded leather boots ready to conquer any trail across Washington, New York, California, San Francisco, Texas, and beyond.
Leave a Reply