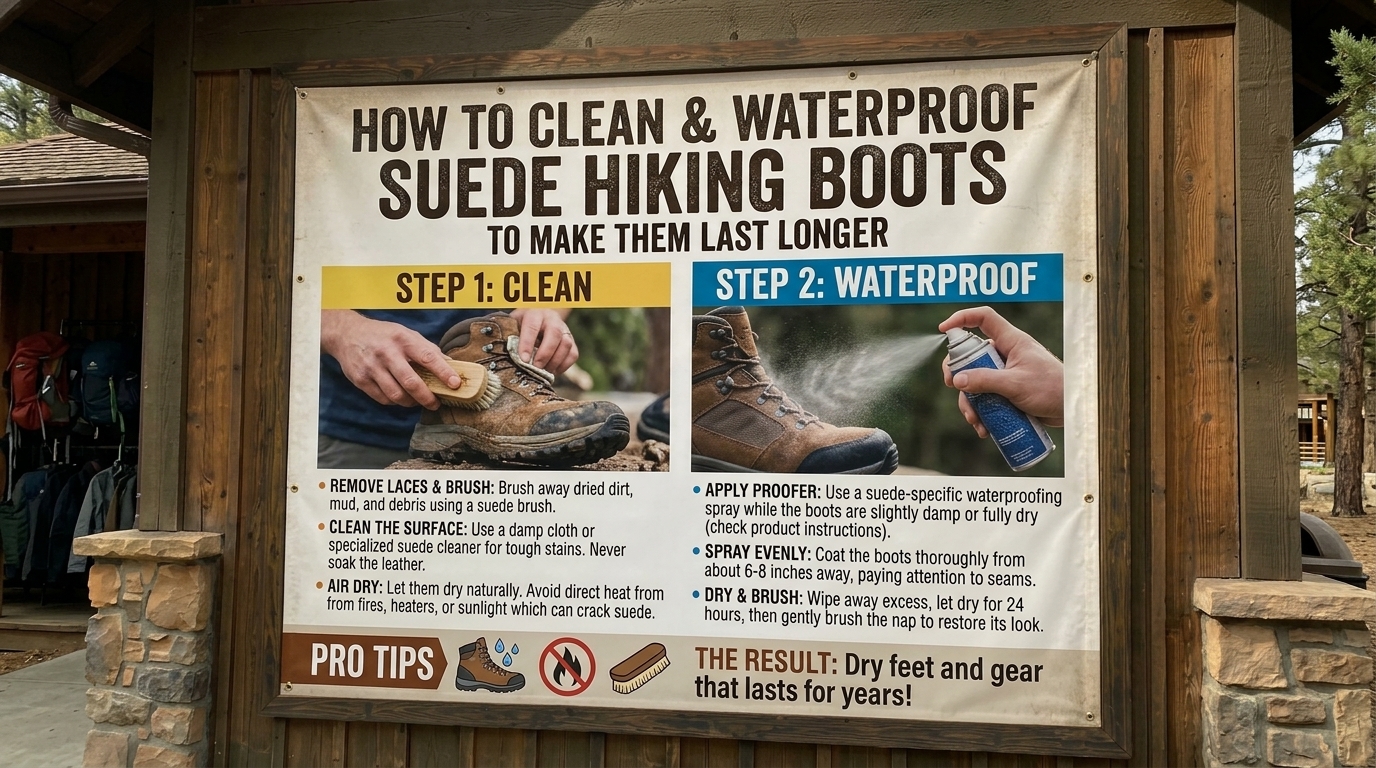
How to Clean and Waterproof Suede Hiking Boots to Make Them Last Longer
Suede hiking boots are the ultimate fusion of rugged durability and refined style on the trail. Unlike stiff, full-grain leather that requires months of painful breaking in, soft suede molds to your feet almost immediately, offering supreme comfort from mile one. However, suede has a notorious reputation: it is delicate, highly sensitive to moisture, and acts as a magnet for fine dust, stubborn mud, and trail debris.
If left unmaintained, water stains, fading, and stiffening fibers can ruin your favorite boots in a single season.
This comprehensive, highly optimized guide will walk you through everything you need to know to properly clean, condition, and waterproof your suede hiking boots. Whether you are trekking through the damp, muddy trails of Washington, navigating unpredictable weather in New York, or kicking up dust on dry California switchbacks, these expert techniques will extend the lifespan of your boots by years.
Why Suede Hiking Boots Require Special Care
Suede is created from the underside of animal hide, giving it a characteristic nap—a fuzzy, velvety texture made of fine protein fibers. Unlike smooth leather, suede lacks a protective top grain. This porous structure means moisture, oils, and dirt can penetrate deep into the material quickly.
When moisture enters suede without a protective barrier, it flattens the fibers and leaves water rings as it evaporates. Furthermore, caked-on mud acts like a sponge, drawing natural oils out of the hide as it dries, which leads to cracking, splitting, and premature aging.
The Environmental Challenge Across Regions
- New York & Washington: High humidity, frequent rain, and muddy autumn trails demand rigorous waterproofing to prevent water logging and mold growth.
- California & San Francisco: Coastal fog introduces heavy moisture, while dry interior trails create fine, abrasive dust that settles deep into the suede nap.
- Texas: Caliche dust, dry heat, and sudden downpours require a balance of dust removal and durable moisture barriers.
Essential Tools and Supplies
Before you begin the restoration and waterproofing process, gather the proper tools. Using the wrong equipment—such as a household scrub brush or standard leather saddle soap—can permanently ruin suede.
- Suede Brush: Look for a dual-sided brush featuring brass or nylon bristles for heavy mud removal and rubber crepe bristles for restoring the nap.
- Suede Eraser / Cleaning Block: Perfect for lifting scuffs, salt stains, and stubborn localized dirt without water.
- Dedicated Suede Cleaner: A specialized, foaming cleaner formulated specifically for napped leather. Avoid multi-purpose detergents.
- Suede Conditioner / Reconditioner: A spray-on or liquid conditioner designed to replenish lost oils without flattening the texture.
- Fluoropolymer or Silicone-Based Waterproofing Spray: High-performance formulas designed specifically for suede and nubuck.
- Microfiber Cloths: For wiping away excess moisture and soap residue.
- Boot Trees or Crushed Newspaper: To maintain the structural shape of your boots during the drying process.
Step-by-Step Guide: How to Clean Suede Hiking Boots
Cleaning suede requires patience and a gentle touch. Never submerge suede boots in water, put them in a washing machine, or dry them next to high-heat sources like radiators or campfires.
Step 1: Remove Laces and Insert Boot Trees
Take off the laces so you can clean the tongue and eyelets thoroughly. Insert wooden boot trees or stuff the toes tightly with crushed newspaper. This absorbs internal moisture and prevents the boots from warping as they dry.
Step 2: Dry-Brush the Surface
Take your dry suede brush and gently brush the entire boot in one direction to remove loose dirt, dust, and dried mud. For heavily caked mud, let it dry completely first, then gently chip away the large chunks before brushing. Vigorous brushing lifts loose debris before it can be ground deeper into the nap.
Step 3: Erase Scuffs and Stains
For localized scuff marks, mud rings, or grass stains, use a specialized suede eraser. Rub the eraser back and forth over the mark with light-to-moderate pressure. Once the stain lifts, brush away the rubber crumbs with your suede brush.
Step 4: Apply Specialized Suede Cleaner
If dry brushing and erasing aren’t enough, use a dedicated suede cleaner.
- Dampen your suede brush slightly with clean water.
- Apply a small amount of suede foam cleaner to the brush or directly onto the boot.
- Gently scrub the entire boot in circular motions, creating a light lather. Work systematically from the toe to the heel to ensure even cleaning.
- Wipe away the dirty foam immediately with a clean, damp microfiber cloth. Do not let the soapy residue sit or dry on the suede.
Step 5: Slow Air Drying
Place your boots in a well-ventilated area at room temperature out of direct sunlight. Let them dry completely for 24 hours. Crucial Rule: Never use a hair dryer, heat gun, or clothes dryer. High heat cooks the leather proteins, causing the suede to shrink, harden, and crack irreversibly.
Step-by-Step Guide: How to Waterproof Suede Hiking Boots
Once your boots are 100% dry, the cleaning process is complete, and the suede fibers are clean and porous, it is time to lock out moisture. Waterproofing creates an invisible shield that repels water, mud, and oils while still allowing the material to breathe.
Step 1: Restore the Nap
Before applying any spray, take your dry suede brush or crepe brush and vigorously brush the suede in multiple directions. This fluffs up the nap, opening the microscopic pores so the waterproofing treatment can penetrate deeply.
Step 2: Choose the Right Waterproofing Product
Select a spray specifically formulated for suede and nubuck. Avoid heavy waxes, pastes, or heavy-duty greases meant for smooth full-grain boots; these will mat down the suede nap permanently and turn your boots smooth and shiny. Look for aerosol or pump sprays containing fluoropolymers or silicone.
Step 3: Test a Small Area
Always test your waterproofing spray on a small, inconspicuous spot near the heel of the boot. Let it dry completely to ensure it does not cause unwanted discoloration or darkening of the suede shade.
Step 4: Apply the First Coat
- Take your boots outside or into a very well-ventilated area.
- Hold the spray can approximately 8 to 12 inches away from the boot.
- Apply a light, even mist across the entire surface. Ensure uniform coverage, paying close attention to seams, stitching, and the rand where the upper meets the rubber sole, as these are the primary entry points for water.
- Do not saturate the boot to the point of dripping; multiple light coats are far more effective than one heavy soaking.
Step 5: Dry and Apply a Second Coat
Let the first coat dry for 20 to 30 minutes until it feels dry to the touch. Apply a second light coat to ensure complete, microscopic coverage.
Step 6: Final Curing
Allow the boots to cure undisturbed for at least 24 hours in a cool, dry place before taking them out onto wet trails. Once cured, give them one final gentle brush with a dry suede brush to restore the soft, velvety nap.
Advanced Maintenance Tips for Longevity
To ensure your suede hiking boots survive hundreds of miles of rugged terrain, incorporate these proactive maintenance habits into your routine:
- Post-Hike Routine: Never store your boots muddy. Brush off dust and dried dirt immediately after every single hike before it sets into the fibers.
- Reapply Regularly: Waterproofing wears off over time due to abrasion and UV exposure. Reapply your waterproofing spray every 1 to 2 months if you hike frequently, or whenever you notice water no longer beads up on the surface.
- Storage Matters: Store your boots in a cool, dry, temperature-controlled environment. Avoid damp basements or hot attics, and never store them inside plastic bags, which trap residual moisture and encourage mold growth.
- Address Salt and Chemical Stains: If you hike in winter conditions where roads or trails are treated with salt, clean the salt stains immediately using a 1:1 mixture of white vinegar and water on a cloth, followed by brushing.
Frequently Asked Questions (FAQs)
1. Can I use regular leather conditioner on suede hiking boots?
No. Standard leather conditioners, mink oils, and heavy waxes will flatten the delicate suede nap, ruin the texture, and permanently alter the appearance of your boots. Always use products explicitly labeled for suede and nubuck.
2. How often should I waterproof my suede hiking boots?
As a general rule of thumb, reapply a protective waterproofing spray every 1 to 2 months of active use, or whenever you notice water soaking into the suede instead of beading up on the surface.
3. What should I do if my suede boots get soaking wet on the trail?
Remove the insoles, take out the laces, and stuff the boots with dry newspaper or paper towels to absorb internal moisture. Let them air dry naturally at room temperature. Never place them near a campfire, heater, or direct sunlight.
4. Can I use water to clean mud off suede boots?
You should avoid soaking suede in water. However, a lightly dampened brush or specialized foam suede cleaner can be used for spot cleaning. Always dab and wipe away moisture immediately with a microfiber cloth.
5. Will waterproofing spray change the color of my suede boots?
Some waterproofing sprays can slightly darken the shade of light-colored suede. Always test the product on a small, hidden area near the heel and let it dry completely before applying it to the entire boot.
6. How do I get oil or grease stains out of suede?
Blot excess oil immediately with a clean cloth, then cover the stain generously with cornstarch or talcum powder. Let it sit overnight to absorb the oil, then brush the powder away thoroughly the next day using your suede brush.
7. Why is my suede stiff after cleaning?
Stiffness usually occurs if the boots dried too quickly under heat or if too much cleaning solution was used without proper conditioning. Use a suede-safe conditioning spray and brush the nap vigorously once dry to restore flexibility.
8. Are suede hiking boots durable enough for rough terrain?
Yes, high-quality suede hiking boots are exceptionally durable and often more breathable than full-grain leather. However, they require proactive maintenance and regular waterproofing to withstand abrasive rocks, sharp brush, and wet environments.
9. Can I wear suede hiking boots in the snow and rain?
Yes, provided they have been thoroughly cleaned and treated with a high-performance waterproofing spray. Without waterproofing, snow and rain will quickly saturate the suede, ruining the material and freezing your feet.
10. How do I fix a matted or flat suede nap?
If areas of your suede look flat or shiny, take a clean suede brush, brass-bristle brush, or even a clean pencil eraser and gently rub the area back and forth to lift and rejuvenate the crushed fibers.
Conclusion
Suede hiking boots offer unmatched comfort, flexibility, and rugged charm on the trail. While they demand a little more maintenance than synthetic or smooth leather alternatives, taking the time to properly clean, condition, and waterproof your boots pays massive dividends. By following this step-by-step care routine, you will protect your investment, keep your feet dry through unpredictable weather from coast to coast, and ensure your favorite hiking boots accompany you on countless adventures for years to come.
Leave a Reply