Category: Blog

  • How to choose between mid-cut hiking boots and low-cut hiking shoes for backpacking

    How to choose between mid-cut hiking boots and low-cut hiking shoes for backpacking

    How to Choose Between Mid-Cut Hiking Boots and Low-Cut Hiking Shoes for Backpacking

    When preparing for a multi-day backpacking trip across the rugged alpine tracks of Washington, the rocky switchbacks of New York, the sun-baked backcountry of Texas, or the coastal ridges of California and San Francisco, you face one of the most critical gear decisions in outdoor sports: Should you wear mid-cut hiking boots or low-cut hiking shoes?

    Your footwear is the literal bridge between your body and the earth. Choosing the wrong pair can lead to agonizing blisters, exhausted leg muscles, or unstable footing when carrying a heavy 35-to-50-pound pack. For decades, traditional backpacking wisdom dictated that heavy, stiff mid-cut leather boots were mandatory for survival on the trail. Today, lightweight trail runners and low-cut hiking shoes have revolutionized backpacking, leading many long-distance hikers to ditch ankle support altogether in favor of agility and weight savings.

    Which philosophy is right for you? This comprehensive, highly optimized guide analyzes the structural differences, pros and cons, biomechanics, and specific terrain applications of mid-cut boots versus low-cut shoes to help you make the best choice for your next backpacking adventure.

    The Great Debate: Mid-Cut Boots vs. Low-Cut Shoes

    To make an informed decision, you must understand how each design impacts your body over miles of continuous weight-bearing movement.

    1. Mid-Cut Hiking Boots: The Stability Fortress

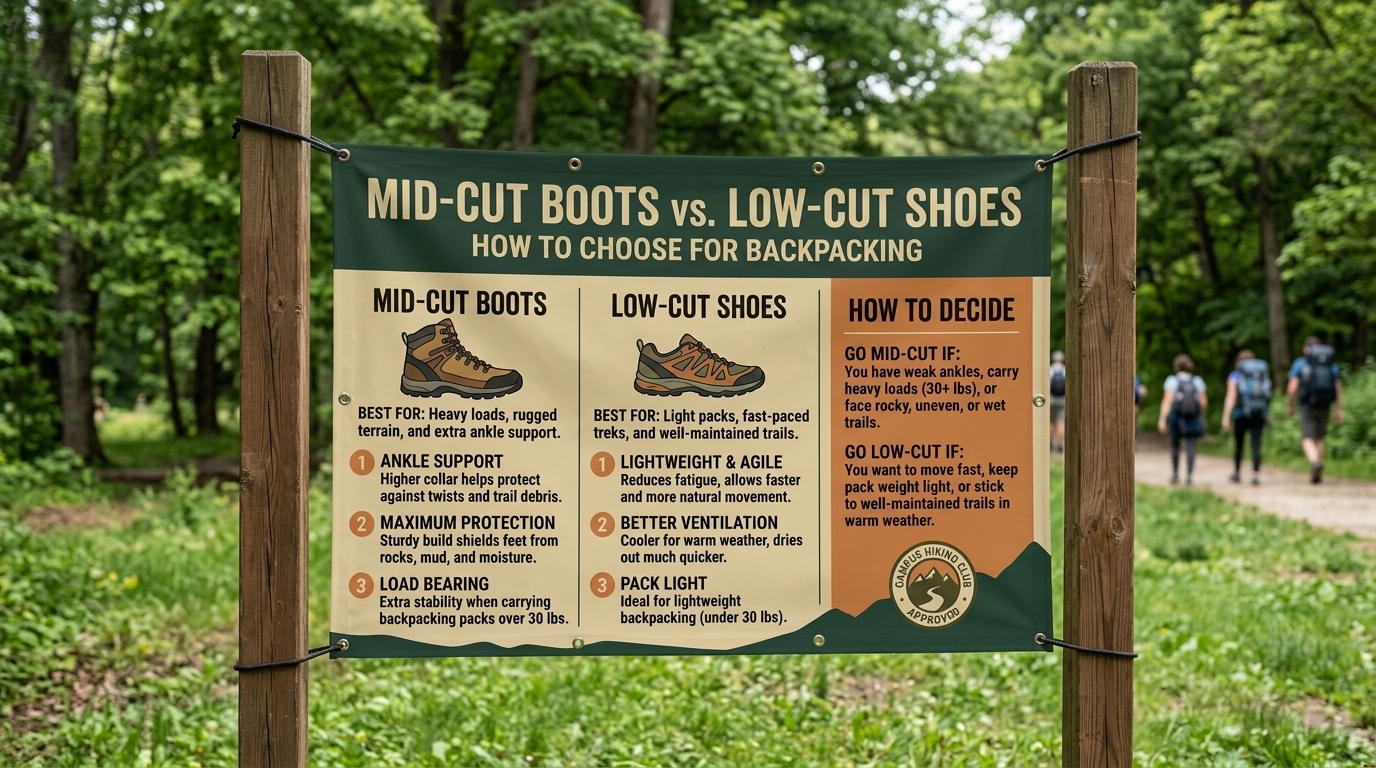
    Mid-cut boots typically rise 5 to 7 inches above the ground, providing physical coverage over and around your malleolus (ankle bones). They are built with stiffer midsoles, more durable uppers (often leather or heavy synthetic textiles), and deeper protection.

    • The Core Benefit: External mechanical support and debris protection. The collar of a mid-cut boot acts as a physical barrier preventing mud, scree, small rocks, and twigs from sliding down into your socks.
    • The Trade-Off: Weight. On average, heavier footwear increases leg fatigue. Studies show that a pound on your feet feels like five pounds on your back, meaning heavy boots sap more energy over long distances.

    2. Low-Cut Hiking Shoes / Trail Runners: The Agile Athlete

    Low-cut hiking shoes look and feel much like running sneakers, featuring flexible mesh uppers, lightweight foam midsoles, and cutlines sitting below the ankle bone.

    • The Core Benefit: Featherlight agility and instant flexibility. Low-cut shoes reduce foot fatigue, dry out exceptionally fast when wet, and allow your natural ankle muscles to flex and stabilize your stride.
    • The Trade-Off: Reduced external protection. Without an ankle collar, rocks can easily bounce into your shoes, and your ankles receive zero mechanical assistance if you step awkwardly on loose stone.

    Biomechanical Comparison: Ankle Support Exploded

    The most common misconception in backpacking gear is that mid-cut boots “prevent ankle sprains.”

    The Reality of Ankle Roll Mechanics

    When your foot rolls outward (an inversion sprain) on a loose rock while carrying a 40-pound backpack, forces easily exceed 100 foot-pounds of torque. A soft fabric or flexible leather mid-cut boot collar does not have the rigid structural rigidity of a ski boot or medical brace. It cannot physically stop your ankle from rolling if the torque is severe enough.

    Instead, true ankle stability comes from proprioception (your brain’s awareness of your foot’s position) and the strength of the stabilizing muscles surrounding your lower leg and ankle joint.

    • Low-cut shoes enhance proprioception because your foot interacts naturally with the terrain, allowing your ankle muscles to react instantly.
    • Conversely, some hikers argue that mid-cut boots provide a psychological and mild physical buffer that dampens minor wobbles and keeps lateral fatigue at bay.

    When to Choose Mid-Cut Hiking Boots

    Mid-cut boots are not obsolete; they remain the superior choice for specific environments and hiker profiles:

    • Heavy Backpacking Loads: If your base weight is high and your total pack weight exceeds 40 to 45 pounds, the rigid underfoot shanks and structural support of a mid-cut boot help distribute the load, preventing your feet from getting bruised by sharp stones.
    • Rugged, Off-Trail Mountaineering: If your route involves scree fields, boulder hopping, talus slopes, or snowy alpine passes (common in Washington and parts of California), mid-cut boots protect your ankles from direct impacts against sharp rock edges.
    • Cold, Wet, and Sloppy Weather: When hiking through deep mud, slush, or freezing rain, mid-cut boots paired with waterproof membranes and gaiters keep your feet significantly drier and warmer than mesh low-cut shoes.
    • Hikers with Chronic Ankle Weakness: If you have a history of previous ankle injuries and feel psychologically more secure with material touching your ankle bones, a lightweight mid-cut boot provides valuable confidence.

    When to Choose Low-Cut Hiking Shoes

    Low-cut hiking shoes and trail runners have become the dominant choice for modern backpackers, especially thru-hikers tackling massive mileage:

    • Lightweight and Ultralight Backpacking: If your total pack weight is under 30 pounds, low-cut shoes eliminate unnecessary leg fatigue, keeping your stride light and energetic.
    • Hot and Arid Climates: When backpacking through hot environments (like dry Texas trails or sunny Southern California paths), breathable mesh low-cut shoes prevent your feet from overheating and excessive sweating.
    • High-Mileage Days: If you plan on logging 15 to 25 miles per day, the featherlight weight of low-cut shoes reduces cumulative leg lift fatigue by thousands of pounds over the course of a week.
    • Stream Crossings and Wet Climates: Low-cut mesh shoes let water in easily, but they also let water out and dry in minutes. Heavy waterproof boots, once breached by water, trap moisture internally for days.

    Comprehensive Comparison Matrix

    FeatureMid-Cut Hiking BootsLow-Cut Hiking Shoes
    Average WeightHeavier (2.5 – 3.5 lbs per pair)Lighter (1.5 – 2.2 lbs per pair)
    Ankle CoverageCovers and protects ankle boneSits below the ankle bone
    Load CapacityExcellent for heavy packs (40+ lbs)Best for light-to-moderate packs (<35 lbs)
    BreathabilityModerate (often insulated/waterproof)High (open mesh uppers available)
    Break-in PeriodVaries (can require 15-30 miles)Minimal to none (instant comfort)
    Debris ProtectionHigh (keeps out dirt, pebbles, twigs)Low (pebbles can enter collar easily)
    Drying TimeSlow (if waterproof membrane floods)Fast (mesh drains and dries rapidly)

    Expert Tips for Making Your Decision

    1. Assess Your Pack Weight First: Weigh your fully loaded backpack with food and water. If your pack weighs under 30 pounds, lean toward low-cut shoes. If you are carrying a heavy expedition pack over 45 pounds, lean toward mid-cut boots.
    2. Evaluate Your Local Terrain: Are you walking on smooth forest dirt paths (New York, East Texas), or scrambling over jagged granite boulder fields (Sierra Nevada in California, Washington Cascades)? Rugged stone favors mid-cuts; smooth dirt favors low-cuts.
    3. Consider Adding Gaiters: If you love the lightweight agility of low-cut shoes but hate getting dirt and pebbles inside your socks, pair your low-cut shoes with low trail gaiters. They seal the gap effortlessly.
    4. Build Ankle Strength: If you want to transition from mid-cut boots to low-cut shoes, don’t jump straight into a 40-pound trip. Train your ankles beforehand with single-leg balance exercises and short day hikes to build supporting tendon strength.

    Frequently Asked Questions (FAQs)

    1. Do mid-cut boots completely prevent ankle sprains?

    No. While mid-cut boots offer minor lateral support and a psychological buffer, they cannot prevent a severe ankle roll under the heavy momentum of a loaded backpack. True stability comes from ankle strength and trail awareness.

    2. Why do long-distance backpackers prefer low-cut trail shoes?

    Thru-hikers (like those on the Pacific Crest Trail or Appalachian Trail) prioritize weight savings. Reducing weight on your feet saves massive amounts of energy over thousands of miles, and trail shoes dry out much faster than heavy boots.

    3. Can I wear low-cut shoes with a heavy backpack?

    You can, but it requires stronger lower-leg muscles and careful foot placement. If your pack is excessively heavy (>40 lbs) and you lack ankle stability, low-cut shoes can leave your feet feeling fatigued and sore.

    4. Are waterproof low-cut shoes a good idea?

    Waterproof low-cut shoes have a major design flaw: water can easily splash in over the low ankle collar, and once trapped inside the waterproof membrane, it cannot escape. For low-cut shoes, non-waterproof breathable mesh is usually preferred.

    5. Which footwear lasts longer: mid-cut boots or low-cut shoes?

    Traditional full-grain leather mid-cut boots generally last significantly longer (500-800+ miles) than lightweight mesh low-cut shoes (350-500 miles) because dense leather withstands abrasive rock friction better than nylon mesh.

    6. Should I size up when buying mid-cut boots versus low-cut shoes?

    Both styles require sizing up! You should purchase both mid-cut boots and low-cut shoes a half-size to a full size larger than your casual sneakers to accommodate foot swelling and thick hiking socks on the trail.

    7. Do mid-cut boots cause more foot sweat?

    Generally, yes. Mid-cut boots feature higher shafts, more padding, and often waterproof membranes, all of which trap body heat. This makes them warmer and more prone to causing sweaty feet in hot climates like Texas.

    8. Are mid-cut boots harder to break in?

    Yes. Mid-cut boots—especially those featuring leather uppers and rigid internal shanks—require a break-in period of 15 to 30 miles to soften up, whereas synthetic low-cut shoes feel comfortable right out of the box.

    9. Can I use custom orthotics in both styles?

    Yes! Both mid-cut boots and low-cut shoes feature removable factory sock liners, allowing you to easily swap them out for custom podiatrist orthotics or supportive aftermarket insoles (like Superfeet).

    10. How do I choose if I hike in varied climates like Washington and Texas?

    If your backpacking trips span diverse conditions, many hikers own one pair of lightweight low-cut shoes for hot, dry summer trips (Texas/California) and one pair of sturdy mid-cut waterproof boots for wet, rugged alpine conditions (Washington/New York).

    Conclusion

    Choosing between mid-cut hiking boots and low-cut hiking shoes for backpacking ultimately comes down to balancing protection, pack weight, and terrain. If you carry heavy loads over jagged, wet, unpredictable mountain terrain, a supportive mid-cut boot provides vital structural defense and weather shielding. If you value speed, agility, and featherlight comfort under a moderate pack, low-cut mesh shoes will set your feet free. Evaluate your pack weight, respect your personal joint needs, and step out onto the trail with the perfect footwear for your next great adventure across Washington, New York, California, San Francisco, Texas, and beyond!
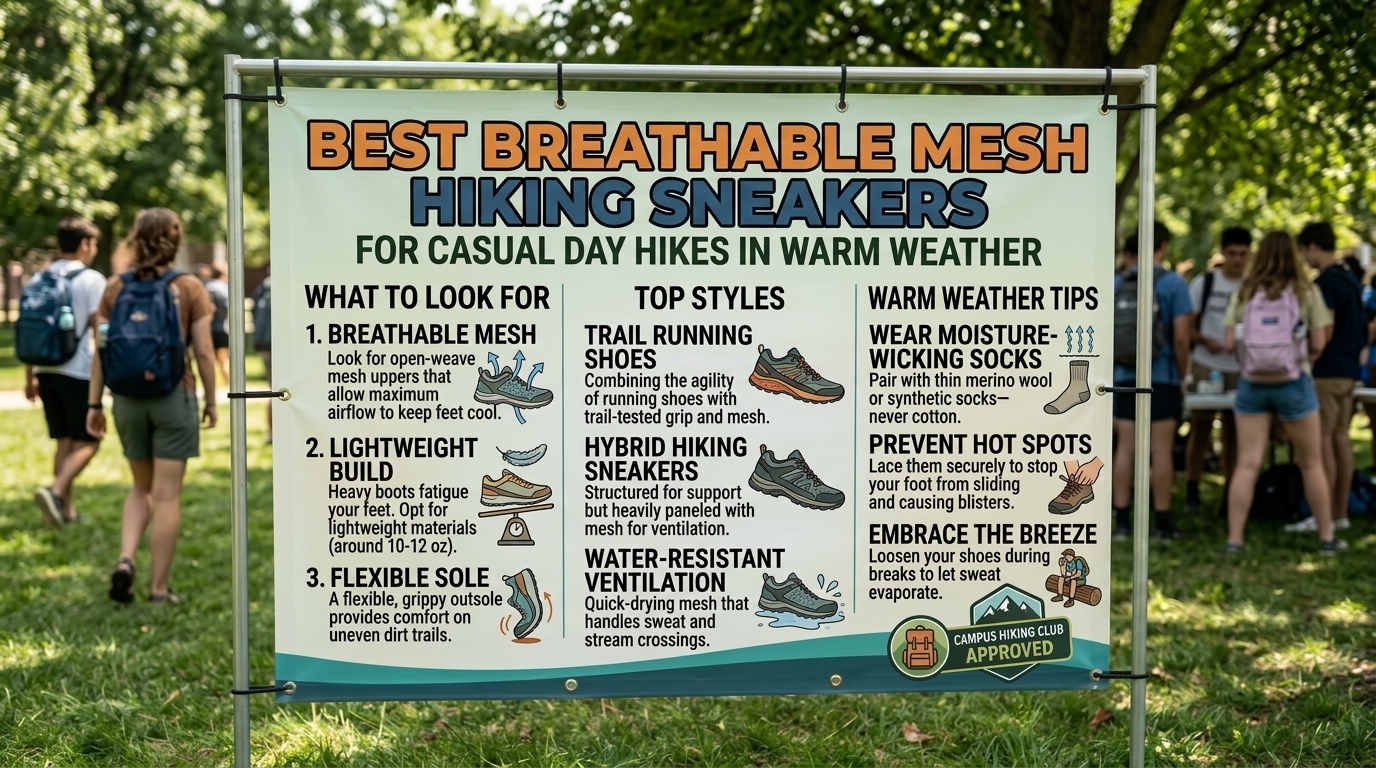
  • Best breathable mesh hiking sneakers for casual day hikes in warm weather

    Best breathable mesh hiking sneakers for casual day hikes in warm weather

    When the summer sun beats down on the trail, nothing ruins a casual day hike faster than trapped heat, heavy footwear, and a pair of boiling, sweat-drenched feet. While rugged leather boots and heavy waterproof membranes are essential for freezing alpine downpours or winter snows, they turn into miniature saunas when you step out onto sun-baked paths.

    Whether you are enjoying an afternoon nature stroll through the dry Texas hill country, exploring sun-drenched coastal bluffs in San Francisco and California, tackling rolling green parkways in New York, or hiking dry valley trails in Washington, warm-weather hiking demands a complete shift in footwear philosophy.

    What you need is maximum airflow, featherlight agility, and dependable traction. Enter the modern breathable mesh hiking sneaker: a hybrid marvel that combines the plush, flexible comfort of your favorite everyday running shoes with the rugged outsoles and toe protection required for dirt trails.

    This comprehensive, highly optimized guide explores why breathable mesh sneakers are the ultimate choice for warm weather, features top-rated models, provides expert trail tips, and answers 10 frequently asked questions to help you elevate your warm-weather hiking game.

    The Physics of Cool: Why Breathable Mesh Matters in Hot Weather

    When ambient temperatures climb and your heart rate spikes during a climb, your feet produce significant amounts of sweat. Under normal circumstances, a human foot can perspire up to a cup of moisture a day.

    1. The Danger of Trapped Moisture (Maceration and Blisters)

    When you wear thick, waterproof, non-breathable footwear in hot weather, that sweat has nowhere to go. It becomes trapped inside the shoe against your skin. This causes maceration—a condition where skin softens and breaks down under continuous moisture. Once your skin softens, friction multiplies exponentially, resulting in painful blisters and hot spots within the first couple of miles.

    2. Temperature Regulation and Fatigue

    Overheating is a real enemy of endurance. Breathable mesh hiking sneakers feature open-weave nylon or engineered mesh uppers that allow rushing air to cool your feet with every step you take. Keeping your feet cool reduces overall physical fatigue, keeping your energy levels high during long day hikes.

    Key Features to Look For in Warm-Weather Hiking Sneakers

    Not all mesh sneakers are built for the trail. While a standard gym sneaker features breathable mesh, it lacks the structural durability and traction needed for unpaved terrain. Look for these four critical features:

    • Engineered Open-Weave Mesh Uppers: Look for durable, abrasion-resistant mono-mesh that allows maximum airflow while preventing sharp twigs and fine dust from passing straight through to your socks.
    • Traction-Focused Rubber Outsoles: Unlike soft foam running shoe soles that wear down quickly on gravel and slip on dirt, hiking sneakers feature multi-directional rubber lugs designed to bite into loose soil and rock.
    • Toe Bumpers and Overlays: Look for lightweight TPU (thermoplastic polyurethane) overlays around the toe box and sides to protect your feet from stubbing against hidden rocks and roots.
    • Balanced Cushioning and Flexibility: A moderate stack height with EVA or responsive foam cushioning absorbs impact on hard-packed trails without feeling stiff or heavy.

    Top-Rated Breathable Mesh Hiking Sneakers for Warm Weather

    To help you choose the ideal pair for your next warm-weather outing, here are the top-rated breathable mesh hiking sneakers on the market.

    1. Salomon X Ultra 4 (Non-GORE-TEX / Mesh Version)

    • Why It Works: The Salomon X Ultra line is legendary for performance. By choosing the standard non-waterproof mesh version instead of the GORE-TEX model, you unlock maximum breathability. It features an Advanced Chassis™ that delivers lateral stability for your ankles, a Contagrip® MA rubber outsole that grips wet and dry surfaces equally well, and a quick-lace system for effortless on-and-off convenience.

    2. Merrell Moab Speed 2 (or Moab Flight)

    • Why It Works: Merrell took the legendary comfort of the classic Moab and re-engineered it into a modern, lightweight, highly breathable athletic hiker. The Moab Speed 2 features a recycled mesh and TPU upper, a float-pro foam midsole for lightweight comfort, and a high-traction Vibram rubber outsole. It feels like an agile running shoe but grips like a serious hiking boot.

    3. Altra Lone Peak (8 or Latest Edition)

    • Why It Works: Altra is famous for two distinct features: FootShape™ toe boxes (which let your toes splay out naturally, preventing bunions and midfoot cramping) and zero-drop platforms. The Lone Peak’s highly breathable quick-drying mesh upper makes it an absolute favorite among warm-weather day hikers and desert trekkers who value supreme comfort and natural foot movement.

    4. Hoka Challenger 7 (or Anacapa Low Breeze)

    • Why It Works: If you want plush, cloud-like maximalist cushioning to protect your joints on hard-packed summer trails, Hoka delivers. The Challenger 7 is a true road-to-trail hybrid featuring a breathable engineered mesh upper and a compression-molded EVA foam midsole that absorbs harsh impacts effortlessly.

    Essential Tips for Warm-Weather Day Hiking

    Wearing breathable mesh sneakers solves heat issues, but warm-weather hiking requires a few extra precautions to keep you safe and comfortable:

    • Embrace Synthetic or Merino Wool Socks: Never wear 100% cotton socks with mesh sneakers. Even though your shoes breathe well, cotton holds onto sweat like a sponge. Pair your sneakers with thin, high-density merino wool or technical synthetic socks to keep your feet dry and friction-free.
    • Expect Dust and Sand: The main trade-off of high-breathability mesh is that fine desert dust, sand, or grit can enter through the weave during dusty Texas or California trail walks. Consider wearing ultra-low trail gaiters if you hike in sandy environments.
    • Wash Your Shoes Regularly: Because dust and sweat pass freely through mesh uppers, salt and dirt can build up in the fabric pores over time, reducing breathability. Rinse your mesh sneakers with a gentle brush and water after dusty hikes to keep them fresh.

    Frequently Asked Questions (FAQs)

    1. Are non-waterproof mesh sneakers better for summer hiking than waterproof boots?

    Yes! For warm, dry, or moderate summer day hikes, non-waterproof breathable mesh sneakers are vastly superior. Waterproof boots trap heat and sweat in warm weather, whereas mesh sneakers allow continuous airflow to keep your feet cool and dry.

    2. Can I wear standard gym running shoes for casual day hikes?

    You can wear gym shoes on flat, paved park paths, but they are not recommended for unpaved dirt trails. Gym shoes lack protective toe bumpers, have shallow tread patterns that slip on loose gravel, and offer zero lateral stability on uneven ground.

    3. Do mesh hiking sneakers let water inside when crossing streams?

    Yes. Because mesh uppers are designed for breathability, water will enter immediately if you step into a deep creek. However, the major advantage is that high-grade technical mesh and synthetic materials dry out extremely fast once you return to dry ground.

    4. How long do mesh hiking sneakers typically last?

    Because mesh is lighter and more flexible than heavy full-grain leather, mesh hiking sneakers generally last between 350 to 500 miles of active trail use, depending on how abrasive and rocky your local terrain is.

    5. Should I size up my mesh hiking sneakers?

    Just like traditional hiking boots, you should generally buy your mesh hiking sneakers a half-size larger than your casual streetwear sneakers to accommodate foot swelling and proper athletic socks during long-distance walks.

    6. Are zero-drop mesh sneakers (like Altra) good for beginners?

    Zero-drop shoes (where the heel and toe are level) promote a natural walking stride, but if you are entirely unaccustomed to them, they can stretch your Achilles tendons and calves during the first few hikes. Transition into them gradually.

    7. How do I clean muddy breathable mesh sneakers?

    Let the mud dry completely, tap the shoes together to knock off large clumps, and then scrub the mesh gently using a soft-bristled brush, warm water, and a mild soap. Never put hiking shoes in a hot washing machine or dryer, as high heat melts the glues holding the soles together.

    8. Do breathable mesh sneakers provide enough arch support?

    Most hiking-specific mesh sneakers offer moderate, supportive arches. However, if you have severe flat feet or high arches, you can easily remove the factory insoles and replace them with custom orthotics or supportive aftermarket insoles (like Superfeet).

    9. Can I wear mesh sneakers in wet or rainy weather?

    You can, but your feet will get wet immediately if it rains heavily or if you step through wet grass. If you frequently hike in wet, rainy climates (like coastal Washington), a waterproof shoe might be a better choice than mesh.

    10. What is the difference between a trail running shoe and a hiking sneaker?

    In modern outdoor gear, the terms “trail running shoe” and “hiking sneaker” overlap heavily. Trail runners are engineered for speed, agility, and running, while hiking sneakers often feature slightly stiffer midsoles and durable toe caps designed specifically for walking under the weight of a day pack.

    Conclusion

    Warm-weather day hiking should be an enjoyable, refreshing escape—not a miserable exercise in overheating. By swapping heavy, sweltering boots for lightweight, high-performance breathable mesh hiking sneakers—such as the Salomon X Ultra, Merrell Moab Speed, Altra Lone Peak, or Hoka Challenger—you give your feet the ultimate gift of airflow, agility, and cool comfort. Whether you are exploring sun-drenched trails in Texas, California, San Francisco, Washington, or New York, gear up with breathable mesh, pair them with technical wool socks, and hit the trail with absolute comfort and confidence!

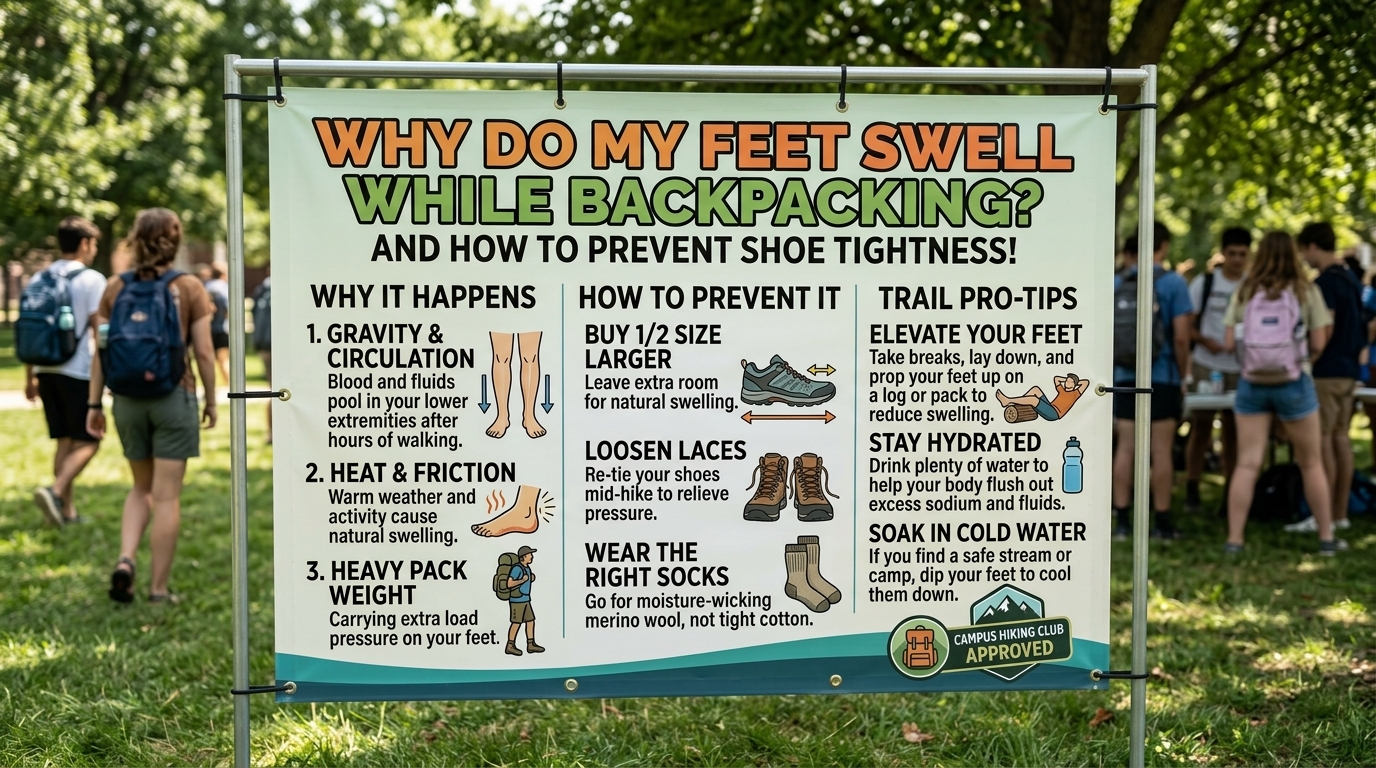
  • Why do my feet swell while backpacking and how to prevent shoe tightness

    Why do my feet swell while backpacking and how to prevent shoe tightness

    Picture this: You are three days into an incredible backpacking expedition. Whether you are traversing the humid, unpredictable terrain of Texas, navigating the damp, root-choked alpine tracks of Washington or New York, or trekking through the coastal marine elevations of California and San Francisco, you feel strong. Your pack weight is dialed in, your breathing is steady, and your morale is high.

    Then, you pause to take a breather, unlace your boots to let your feet air out, and notice something alarming. Your feet look and feel like swollen loaves of bread. When you try to slide your boots back on for the afternoon push, the leather feels aggressively tight, your toes press painfully against the front wall, and your insteps feel choked by the laces.

    What is happening to your body? Foot swelling during backpacking is a universally common phenomenon, but understanding the biomechanics behind it—and knowing how to manage shoe tightness—can save you from excruciating blisters and ruined trips. This comprehensive, highly optimized guide explores the root causes of trail-induced foot swelling, preventative measures, and field-tested strategies to keep your feet comfortable mile after mile.

    The Science of Trail Edema: Why Backpacking Causes Feet to Swell

    Medical professionals refer to exercise-induced swelling in the extremities as peripheral edema. When you carry a heavy multi-day backpack over long distances, a series of physiological and mechanical shifts occur inside your body:

    1. Increased Blood Flow and Heat Dissipation

    When your leg muscles work continuously for hours, your cardiovascular system pumps a massive volume of blood to your lower extremities to supply working tissues with oxygen. Simultaneously, your body generates immense core heat. To cool itself down, your blood vessels dilate (vasodilation). As these vessels widen, fluid naturally seeps through porous capillary walls into the surrounding soft tissues of your feet and ankles.

    2. The Gravity Penalty and Muscle Fatigue

    Every time you take a step while carrying a 35-to-50-pound backpack, gravity pulls interstitial fluids downward. Under normal daily walking conditions, your calf muscles act as a natural biological pump, squeezing veins to push blood back up toward your heart. However, after hours of continuous exertion, your lower leg muscles experience fatigue and minor micro-trauma, reducing the efficiency of this “muscle pump.” Consequently, fluid pools in your feet and lower ankles.

    3. Cumulative Impact and Weight-Bearing Stress

    Studies show that prolonged weight-bearing endurance exercise can increase total foot volume by up to 8%. When your foot expands by nearly a full size in volume by mid-afternoon, a boot that fit perfectly at the trailhead at 8:00 AM will inevitably feel restrictive and tight by 3:00 PM.

    Preventative Strategies: How to Stop Excessive Swelling Before It Starts

    While minor foot expansion is a natural biological response to long-distance trekking, you can take proactive steps to minimize excessive fluid pooling.

    1. Maintain Consistent Hydration and Electrolyte Balance

    It sounds counterintuitive, but drinking less water does not stop swelling—it often makes it worse. When you become dehydrated, your body panics and holds onto sodium and water, exacerbating fluid retention. Drink plenty of water balanced with adequate electrolytes (sodium, potassium, and magnesium) to maintain proper osmotic pressure in your cells.

    2. Take Regular Rest Breaks with Elevation

    Don’t just sit on a rock during your hourly trail breaks. Whenever you stop for a 10-minute rest, take your pack off, loosen or remove your shoes, and prop your feet up on a rock, log, or your backpack so that they rest slightly higher than your heart level. This allows gravity to drain pooled interstitial fluids back into your main circulatory system.

    3. Perform Active Ankle and Calf Pumps During Breaks

    While resting your feet, rotate your ankles in wide circles (both clockwise and counter-clockwise) and point and flex your toes aggressively. This reactivates the calf muscle pump, clearing stagnant fluid out of your lower extremities.

    How to Manage Shoe Tightness on the Trail

    If your feet have already expanded and your boots feel painfully constrictive, continuing to hike in tightly laced boots will cut off surface circulation, cause numbness, and create severe friction hotspots. Use these tactical adjustments to relieve shoe tightness:

    1. Master Alternative Lacing Patterns (Window Lacing)

    Standard criss-cross lacing puts direct, uniform pressure right across the top of your foot (the instep), which swells significantly during backpacking.

    • The Window Lacing Technique: Instead of crossing your laces over the middle of your tongue, run the laces straight up the sides through parallel eyelets, creating an open “window” or box over the top of your foot. This relieves direct pressure on the swollen extensor tendons while still keeping your heel locked safely in the rear.

    2. Loosen Your Forefoot Tension

    When lacing your boots in the morning, remember that your feet will expand. Leave your boots slightly looser across the forefoot and toe box. You only need snug tension at the ankle and instep to prevent heel slip.

    3. Switch to Lightweight Camp Shoes or Sandals Early

    At the end of a long day of hiking, change out of your heavy boots immediately at camp. Slip into breathable sandals or camp shoes. This allows your feet to breathe, cool down, and decompress completely before the next morning.

    Frequently Asked Questions (FAQs)

    1. Is foot swelling while backpacking normal?

    Yes. Mild to moderate swelling in the feet, ankles, and even hands during multi-day backpacking trips is completely normal and expected due to prolonged physical exertion, heat, and gravity (peripheral edema).

    2. Can tight hiking boots cause permanent nerve damage?

    While temporary tightness usually causes localized numbness, tingling, or surface pain (such as Morton’s neuroma flare-ups), hiking thousands of miles in overly constrictive boots can compress superficial nerves and blood vessels, leading to chronic foot pain.

    3. Should I buy my hiking boots larger to accommodate swelling?

    Yes! As covered in foundational boot-fitting guides, you should always buy hiking boots a half-size to a full size larger than your street shoes. This built-in buffer accommodates both thick merino wool socks and late-day foot expansion.

    4. Why do my hands swell while hiking too?

    Hand swelling (“puffy hands”) is caused by the exact same mechanism as foot swelling. As your arms swing downward, centrifugal force and gravity pull blood into your fingers, while vasodilation releases body heat. Using trekking poles keeps your hands elevated and largely prevents this.

    5. Does eating salty trail food make foot swelling worse?

    Yes. Consuming high-sodium freeze-dried meals or salty snacks without drinking enough water causes your body to retain extra fluid to maintain sodium balance, which significantly increases peripheral edema.

    6. Should I compress my swollen feet with tight socks?

    No. While compression socks help venous return in the calves, wearing overly tight socks or compressing your actual feet inside narrow boots will restrict blood flow and worsen localized pain.

    7. How long after a backpacking trip does foot swelling take to resolve?

    Normal trail-induced edema typically subsides within 12 to 24 hours after you finish your hike, rest, and elevate your legs. If swelling persists for days or occurs in only one leg, consult a physician to rule out medical concerns like deep vein thrombosis.

    8. Can custom orthotics help with foot swelling?

    Custom orthotics or supportive insoles provide structural arch support, which prevents your foot from flattening and spreading out even wider under a heavy backpack load, indirectly mitigating excessive volume expansion.

    9. Are trail running shoes better for foot swelling than leather boots?

    Generally, yes. Flexible synthetic mesh trail runners have more give and flexibility than rigid full-grain leather boots, allowing them to accommodate expanded feet more comfortably without creating hard pressure points.

    10. What is the best way to elevate feet inside a backpacking tent?

    When resting inside your tent at night, stack your dry clothing stuff sack, your empty backpack, or a sleeping pad underneath your feet so they are elevated 6 to 12 inches above the level of your heart.

    Conclusion

    Foot swelling is an inevitable physical reality of pushing your body through multi-day backpacking trips. Whether you are tackling rolling hills in New York, alpine switchbacks in Washington, rugged coastlines in San Francisco and California, or sprawling desert trails in Texas, your feet will demand extra care as they expand under load. By staying properly hydrated, elevating your feet during breaks, utilizing window-lacing techniques, and wearing properly sized footwear, you can conquer shoe tightness and keep your feet happy from the trailhead to the summit.

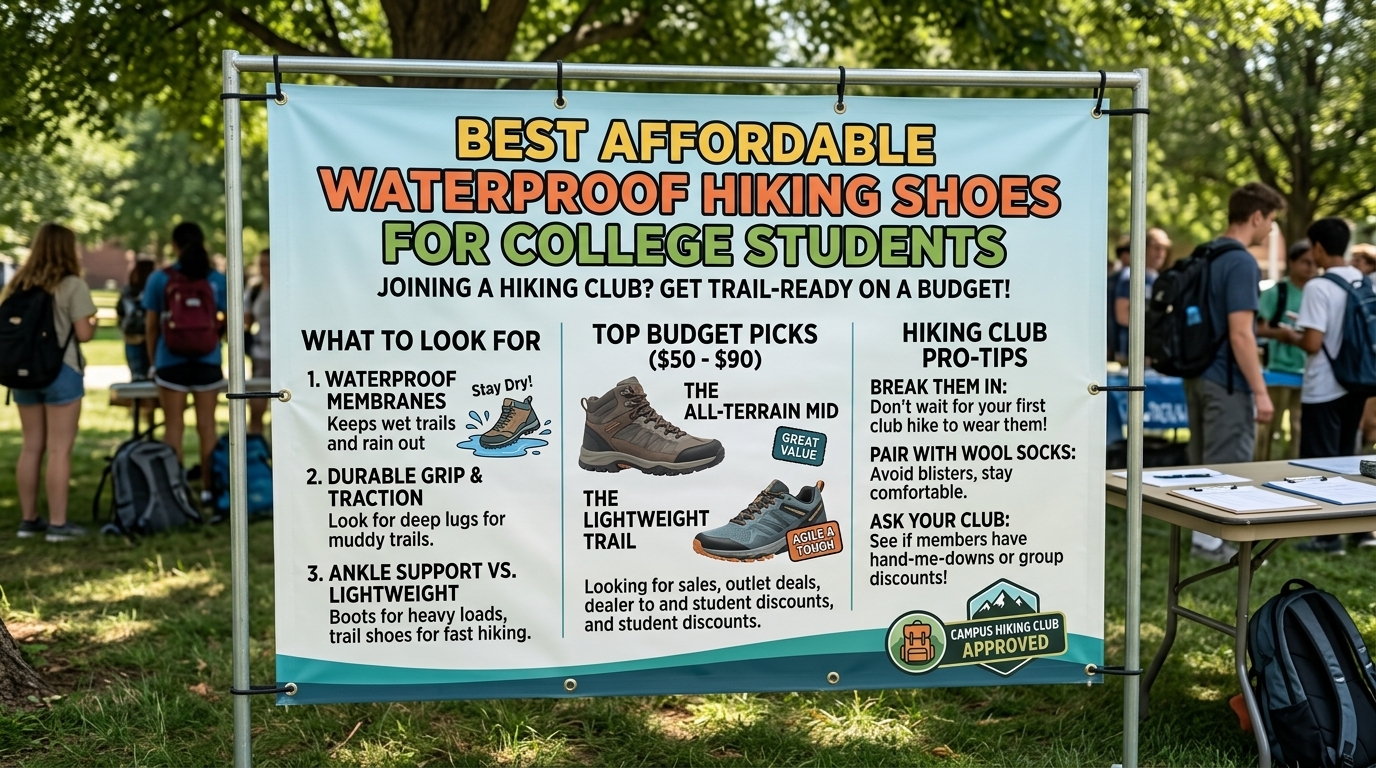
  • Best affordable waterproof hiking shoes for college students joining a hiking club

    Best affordable waterproof hiking shoes for college students joining a hiking club

    Starting college is an exciting chapter filled with new independence, academic challenges, and the chance to join exciting campus organizations. For many students attending universities across Washington, New York, California, San Francisco, and Texas, joining the campus hiking club is the ultimate way to escape the stress of lectures, explore breathtaking local landscapes, and make lifelong friends.

    However, student life comes with a strict reality: a tight budget.

    When you are juggling tuition, textbooks, and ramen noodles, dropping three hundred dollars on high-end alpine mountaineering boots is simply not an option. At the same time, campus hikes don’t wait for perfect weather. Whether you are trekking through sudden autumn downpours in upstate New York, navigating damp coastal marine layers in San Francisco, conquering muddy trails in Washington, or exploring unpredictable creek beds in Texas, you need reliable gear.

    What you need is a sweet spot: the best affordable, waterproof hiking shoes that deliver performance, durability, and waterproofing without breaking the bank.

    This comprehensive, highly optimized guide breaks down what college students should look for in budget footwear, reviews the top affordable models on the market, provides essential trail tips, and answers 10 frequently asked questions to help you conquer the trail on a student budget.

    Why College Students Need Purpose-Built Hiking Shoes

    When first joining a hiking club, many students make the mistake of wearing flat campus sneakers or old running shoes. On dry, paved park walks, sneakers might suffice. But the moment your club hits a rugged, unpaved trail, standard sneakers fail rapidly:

    • Zero Traction: Smooth sneaker soles turn into ice skates on wet rocks, slick mud, and loose dirt.
    • Wet Discomfort: A single morning dew-soaked meadow or shallow puddle will instantly soak through casual fabric sneakers, leaving your feet wet and freezing for the rest of the club hike.
    • Lack of Support: Carrying a backpack loaded with your water bottle, snacks, and extra layers without proper midfoot and ankle support leads to sore feet and exhausted legs before you even reach the summit.

    Investing in a dedicated pair of affordable waterproof hiking shoes or low-cut hikers protects your feet, ensures safety on group outings, and lasts through years of college adventures.

    Key Features to Look For on a Student Budget

    When shopping for affordable hiking shoes (ideally priced under $100 to $130), you don’t need to sacrifice performance. Keep an eye out for these essential specifications:

    1. Reliable Waterproofing: Look for integrated waterproof membranes or treated waterproof synthetic uppers that block out shallow puddles, mud, and rain.
    2. Lugged Rubber Outsoles: Ensure the shoe features deep, multi-directional rubber lugs for gripping dirt, gravel, and wet stone.
    3. Lightweight Agility: Low-top or light mid-cut hiking shoes offer the nimble feel of running shoes while providing much sturdier underfoot protection.
    4. Durability-to-Price Ratio: Look for reputable outdoor brands known for building entry-level footwear that survives hundreds of miles of trail use.

    Top Affordable Waterproof Hiking Shoes for Students

    To help you stretch your student budget, here are the top-rated, wallet-friendly waterproof hiking shoes and light boots on the market.

    1. Columbia Newton Ridge Plus Waterproof (Shale/Redondo or Dark Brown)

    • Estimated Price: $90 – $120 (frequently discounted)
    • Why It Works: Columbia is a student’s best friend when it comes to outdoor gear, offering reliable technical performance at a fraction of premium prices. The Newton Ridge Plus series features a seam-sealed waterproof leather and mesh upper, lightweight Techlite cushioning for all-day campus and trail comfort, and an Omni-Grip rubber outsole that bites securely into loose dirt and mud. They are comfortable right out of the box with virtually zero break-in period.

    2. Merrell Moab 3 Waterproof (or Moab Speed Waterproof)

    • Estimated Price: $130 (often found on sale for under $100 during seasonal clearances)
    • Why It Works: While standard retail prices sit right at the edge of budget territory, the Merrell Moab is frequently heavily discounted online and at sporting goods stores. Widely considered the king of entry-level hiking comfort, the Moab features a waterproof membrane, a supportive nylon arch shank, and a durable Vibram or high-traction rubber outsole. They are legendary for longevity, meaning a single pair can easily last your entire undergraduate career.

    3. KEEN Targhee Vent / Waterproof (Older Generations or Sales)

    • Estimated Price: $110 – $140
    • Why It Works: If you have wide feet or deal with painful bunions, KEEN is unmatched. Their footwear features an iconic, wide-splay toe box that gives your forefoot room to breathe. Look for sales on previous-generation Targhee models to score high-end waterproof leather hiking shoes at an accessible student price point.

    4. Timberland White Ledge Mid Waterproof Hiking Boot

    • Estimated Price: $100 – $120
    • Why It Works: A classic budget staple, the Timberland White Ledge is built with full-grain waterproof leather and rustproof speed lacing hardware. While it requires a slightly longer break-in period than mesh shoes, it offers full ankle protection and rugged waterproof reliability for club trips through mud and rain.

    Regional Hiking Tips for Student Club Members

    Different university regions present unique weather challenges. Here is how to adapt your budget footwear to your local climate:

    • Washington & San Francisco: Coastal drizzle, wet marine layers, and slick forest mud require a reliable waterproof membrane and a deep-lugged outsole to prevent slipping on wet roots.
    • New York: Crisp autumns and unpredictable spring storms mean wet leaf litter and sudden mud. Waterproof shoes keep your feet dry when navigating damp eastern woodlands.
    • Texas & California: While many trails are dry and dusty, sudden flash downpours or creek crossings happen. If you are hiking in scorching desert heat, prioritize lightweight breathability over heavy waterproofing during summer months.

    Essential Budget Gear Tips for Student Hikers

    • Watch for End-of-Season Sales: Outdoor gear goes on massive clearance during late winter and late summer. Shop off-season sales to score $160 boots for under $90.
    • Don’t Skimp on Socks: Even the best budget waterproof shoes will cause blisters if paired with thin 100% cotton socks. Invest in two or three pairs of moisture-wicking merino wool socks to keep your feet dry and friction-free.
    • Check Student Discounts: Many outdoor retailers (like Backcountry, REI, or Moosejaw) offer student discount programs via UNiDAYS or Student Beans. Always check for a 10% to 15% discount before checking out.

    Frequently Asked Questions (FAQs)

    1. Can I wear regular sneakers on college hiking club trips?

    For casual, flat, dry walking paths, sneakers work fine. However, for rocky terrain, steep hills, or muddy club hikes, regular sneakers lack traction, arch support, and waterproofing, putting you at risk for slips and painful blisters.

    2. Are cheap hiking shoes safe for long hikes?

    Yes, reputable budget brands like Columbia and Merrell offer safe, durable footwear. The main difference between a $100 budget shoe and a $250 premium boot is often minor weight savings and leather thickness, not basic safety or traction.

    3. Do I really need waterproof shoes for college hiking?

    If your club hikes frequently in damp regions like Washington, New York, or San Francisco, waterproof shoes are essential. However, if you exclusively hike in hot, dry climates like Texas or southern California, breathable non-waterproof mesh shoes might actually keep your feet cooler.

    4. How long should budget hiking shoes last?

    With regular use (weekend club hikes and occasional backpacking trips), a quality pair of budget hiking shoes should comfortably last between 300 to 500 miles, or roughly 1 to 2 years of active student hiking.

    5. Where can college students find the best discounts on hiking gear?

    Check out online clearance outlets (like REI Outlet, Sierra, and Backcountry), look for seasonal holiday sales (Black Friday, Memorial Day), and take advantage of student verification discounts.

    6. Do I need high-top boots or low-top hiking shoes?

    Low-top hiking shoes or trail runners are lighter and more agile, making them great for fast day hikes. Mid-top boots provide extra ankle stability, which is helpful if you are carrying a heavy backpack or navigating rocky trails.

    7. How do I break in new hiking shoes before a club trip?

    Wear your new shoes around your dorm or campus for a few days, then take them on short 1-to-2-mile walks around your neighborhood wearing your hiking socks. This softens the materials and prevents blisters on your first big club hike.

    8. Will my waterproof shoes stay waterproof forever?

    Over time, dirt and UV exposure degrade the outer water-repellent (DWR) coating on your shoes. You can easily restore water-beading performance by washing your shoes and spraying them with an affordable DWR spray.

    9. Should I buy hiking shoes a half-size larger?

    Yes! Always buy your hiking shoes a half-size larger than your casual sneakers. This leaves room for foot swelling and thick wool socks, preventing your toes from slamming into the front of the shoe on downhills.

    10. Can I use running socks with hiking shoes?

    You can, but synthetic or merino wool hiking socks are vastly superior. Cotton running socks absorb sweat, bunch up, and cause painful blisters, whereas wool and technical synthetics keep your feet dry and cushioned.

    Conclusion

    Joining a university hiking club is one of the best ways to enrich your college experience, explore incredible landscapes across the country, and build lasting friendships. You don’t need a massive bank account to get started. By choosing affordable, reliable waterproof hiking shoes—such as the Columbia Newton Ridge or a sale-priced Merrell Moab—you protect your feet, conquer wet trails with confidence, and stay well within your student budget. Lace up, join your club’s next adventure, and hit the trail!

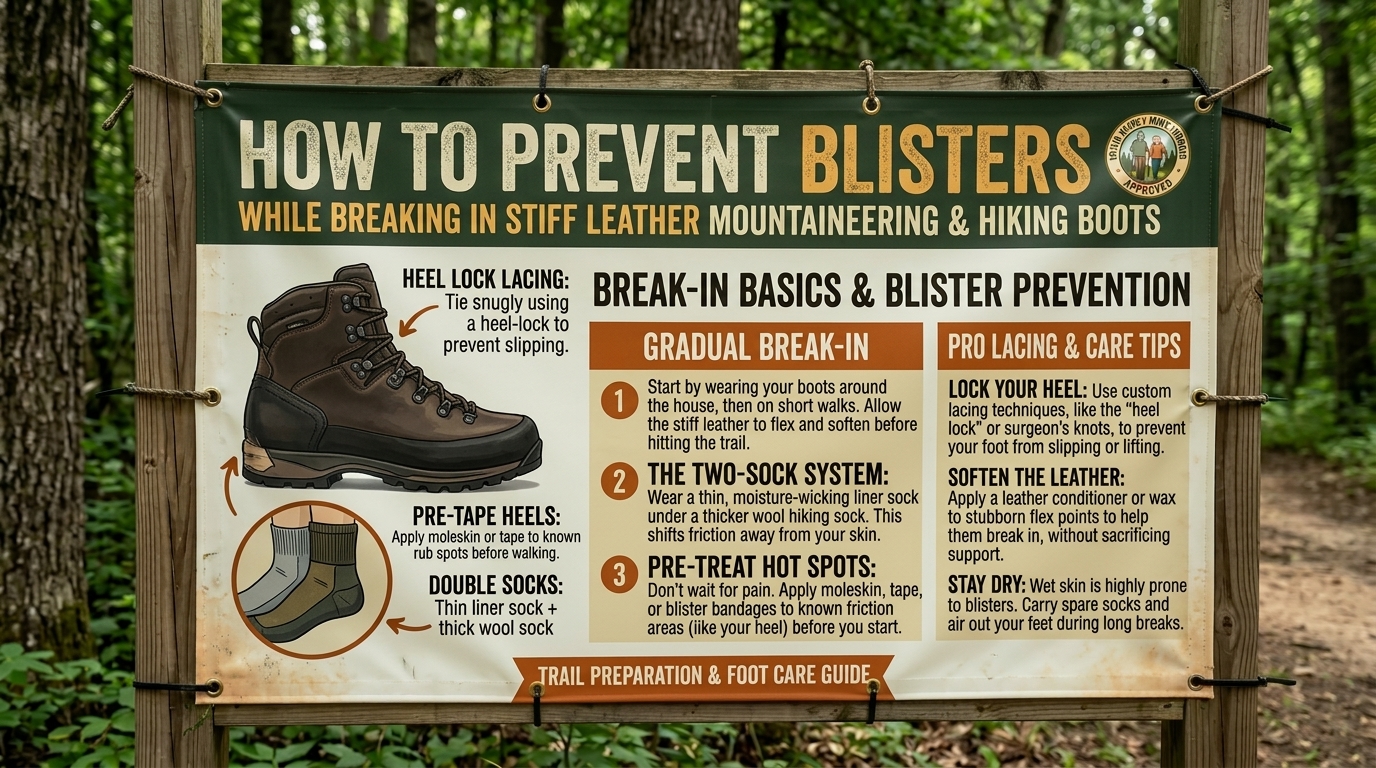
  • How to prevent blisters while breaking in stiff leather mountaineering and hiking boots

    How to prevent blisters while breaking in stiff leather mountaineering and hiking boots

    There is a unique kind of excitement that comes with unboxing a brand-new pair of heavy-duty, full-grain leather hiking or mountaineering boots. They smell like rich leather, look ruggedly indestructible, and promise countless miles of high-alpine adventures across the jagged granite of California, the damp wooded trails of Washington and New York, the sun-baked expanses of Texas, or the steep coastal ridges around San Francisco.

    However, that excitement often turns to dread within the first mile. Unlike soft synthetic mesh trail runners that feel broken in straight out of the box, traditional stiff leather boots are built like medieval armor. Their thick hides, rigid heel counters, internal shanks, and unyielding leather uppers require a grueling break-in period. During this phase, friction, pressure points, and stiff seams wage war against your skin, turning minor hot spots into agonizing, fluid-filled blisters that can derail a trip instantly.

    Can you enjoy stiff leather boots without sacrificing your feet? Absolutely. This comprehensive, highly optimized guide explores the exact anatomy of boot-induced friction, proactive skin-prep strategies, professional break-in methods, and step-by-step techniques to break in your leather boots completely pain-free.

    The Anatomy of a Blister: Why Stiff Leather Causes Trouble

    Before looking at prevention, it is crucial to understand why blisters form. A friction blister is your body’s emergency response to mechanical stress.

    When your skin rubs repeatedly against the rigid interior wall of a stiff leather boot or an internal seam, the friction creates shear stress between the outer layers of your skin (the epidermis) and the deeper layers (the dermis). Your body responds by pumping blood plasma into the separation, creating a fluid-filled cushion to protect the damaged tissue below.

    Why Full-Grain Leather is Unforgiving

    • Zero Initial Flexibility: Full-grain leather is dense, thick, and stiff. Until it stretches, softens, and molds to the exact bony contours of your feet, it acts like a rigid clamp.
    • Moisture Amplification: Sweaty feet soften skin tissue (maceration), making it far more vulnerable to friction tear. Stiff leather boots, even waterproof ones, can trap heat during early wear sessions, accelerating sweat accumulation.
    • Aggressive Heel Counters: The internal plastic or fiber heel counter designed to lock your foot in place is notoriously abrasive during the first few dozen miles.

    Phase 1: Pre-Hike Preparation and Proper Sizing

    Prevention begins long before you step foot on a trail. Many “break-in blisters” are actually the direct result of wearing boots that do not fit correctly.

    1. The Sizing Rule for Stiff Leather

    As established in boot-fitting fundamentals, stiff leather boots require careful sizing. Because leather has minimal give lengthwise, you must buy your leather boots a half-size to a full size larger than your casual sneakers. This extra space prevents your toes from jamming into the front box on descents and accommodates the thick, high-density socks required for leather footwear.

    2. Choose the Right Sock Architecture

    Never wear thin cotton athletic socks or single-layer synthetic socks with stiff leather mountaineering boots. Cotton absorbs sweat, loses its shape, and bunches up, creating friction points.

    • The Two-Sock System: Many mountaineers swear by wearing a thin, synthetic, moisture-wicking liner sock underneath a thick, high-density merino wool outer sock. The two socks rub against each other instead of your skin, neutralizing friction completely.

    Phase 2: Accelerated Softening (How to Break in Leather Without Pain)

    You should never take brand-new, stiff leather boots straight out of the box and embark on an 8-mile mountain hike. You must condition and soften the leather to help it mold to your feet safely.

    1. The House-Slipper Method (Week 1)

    Wear your new leather boots around the house while doing chores, watching television, or working from home for 1 to 2 hours a day. This low-stress environment allows your body heat and slight foot movements to begin softening the leather without generating sweat or sustained friction.

    2. Short Neighborhood Walks (Week 2)

    Progress to wearing your boots on short, flat walks around your neighborhood (1 to 2 miles max) wearing your proper hiking socks. If you feel even a slight rubbing sensation on your heel or pinky toe, stop immediately before a blister forms.

    3. Use Specialized Leather Conditioners and Softeners

    Stiff leather can be gently relaxed using specialized leather care products.

    • Apply a quality leather conditioner (like Mink Oil, Huberd’s Shoe Grease, or Nikwax Conditioning Wax) to the flex points across the forefoot and ankle collar.
    • Warning: Avoid over-softening the heel counter, as you still want the rear of the boot to provide structural stability and lock your heel in place.

    Phase 3: Advanced Friction-Fighting Armor (Taping and Barriers)

    Even with proper conditioning, certain pressure points (like the Achilles tendon, heel, and outer ankle bones) will experience friction during the break-in phase. Use these professional-grade barrier techniques to protect your skin.

    1. Leukotape P (The Ultimate Preventative Shield)

    Leukotape P is a rigid, rayon-backed sports tape with an exceptionally strong zinc oxide adhesive that stays stuck to skin even through sweat and water.

    • Cut a strip of Leukotape and place it over your heel, big toe joint, or any known hot spot before you put your socks on.
    • It acts as an artificial outer skin, taking the brunt of the friction while your skin remains completely unharmed.

    2. Moleskin and Gel Blister Pads

    If you feel a warm “hot spot” developing on the trail, stop immediately. Wipe the skin dry, and apply a piece of moleskin or a hydrocolloid blister bandage (like Compeed) over the area. Hydrocolloid bandages cushion the pressure point and accelerate healing if a blister has already begun to form.

    Phase 4: Mastering Lacing Zones to Prevent Heel Rub

    Heel slippage is the number one cause of blistering on the back of the heel during the break-in phase. As leather flexes, if your heel lifts up and down inside the boot, it rubs raw against the heel counter.

    • Utilize the Surgeon’s Knot: As covered in advanced lacing techniques, loop your laces twice around each other at the ankle eyelets before tying your bow. This creates a friction lock that holds your heel firmly back in the boot pocket, stopping vertical slip dead in its tracks.
    • Vary Tension Across the Instep: Keep the forefoot snug to prevent sliding, but don’t over-tighten the very top ankle collar until the leather softens, as excessive rigid pressure can bruise the tendon.

    Frequently Asked Questions (FAQs)

    1. How long does it typically take to break in stiff leather mountaineering boots?

    Depending on the thickness of the leather (e.g., 2.8mm full-grain leather vs. lighter nubuck), it typically takes between 15 to 30 miles of gradual walking and hiking to fully soften the leather and mold it to the unique contours of your feet.

    2. Should I soak my leather boots in water to break them in faster?

    No! The old myth of soaking leather boots in warm water and wearing them dry will ruin the leather, cause premature rotting of stitching threads, warp the internal shanks, and almost guarantee severe, infected blisters. Always break them in dry with gradual wear.

    3. What is the difference between a “hot spot” and a blister?

    A hot spot is an early warning sign—a localized area of warmth, itching, or minor stinging caused by friction. If caught immediately and covered with Leukotape or moleskin, you can prevent a fluid-filled blister from forming.

    4. Can I use alcohol or heat guns to stretch tight leather spots?

    Never use chemical rubbing alcohol, as it strips natural oils, dries out the leather, and causes it to crack. While a professional cobbler can use a specialized mechanical stretcher for tight spots, avoid using home hair dryers or heat guns, which melt glues and ruin the hide.

    5. Why do my heels always blister during the first few hikes?

    Heel blisters happen because the stiff leather heel counter hasn’t flexed yet, causing your heel to lift out of the pocket with every step. Using the Surgeon’s Knot lacing technique and wearing dual-layer socks resolves this immediately.

    6. Are synthetic boots easier to break in than leather boots?

    Yes. Synthetic mesh and nylon hiking boots feature flexible, soft upper textiles that require virtually zero break-in period, which is why many modern hikers prefer them over heavy leather.

    7. Should I pop a blister if one forms on the trail?

    Medical professionals generally advise against popping blisters because the unbroken skin roof acts as a sterile, natural barrier against bacteria. If a blister is massive and unbearable, sterilize a needle, puncture the edge carefully to drain fluid, leave the skin flap intact, and cover it with a hydrocolloid bandage.

    8. What kind of socks stop leather boot blisters best?

    High-density merino wool socks paired with thin synthetic liner socks provide the ultimate friction-management system. Avoid 100% cotton socks completely, as they trap moisture and cause skin tearing.

    9. How do I know if my leather boots are broken in or simply too small?

    If a boot is simply stiff, the pain will be concentrated on the surface skin where friction occurs. However, if your toes are jammed against the front hard wall or your entire foot is cramped laterally with zero wiggle room, the boots are simply too small and cannot be broken in to fit.

    10. Can I wear blister prevention tape directly over broken skin?

    You should never place aggressive adhesive tapes (like Leukotape) directly onto an open, popped blister, as tearing the tape off will rip the delicate new skin away. Use a non-stick sterile pad or a hydrocolloid bandage first, then secure the edges with tape.

    Conclusion

    Breaking in stiff leather mountaineering and hiking boots is a rite of passage for serious outdoor enthusiasts. While the initial break-in phase can feel intimidating, approaching the process with patience and strategy makes all the difference. By sizing your boots correctly, conditioning the leather gradually, utilizing a two-sock system, and deploying preventative barrier tapes like Leukotape, you can bypass the agony of blisters entirely. Take your time softening those rugged hides, and you will be rewarded with lifelong, custom-molded leather boots ready to conquer any trail across Washington, New York, California, San Francisco, Texas, and beyond.

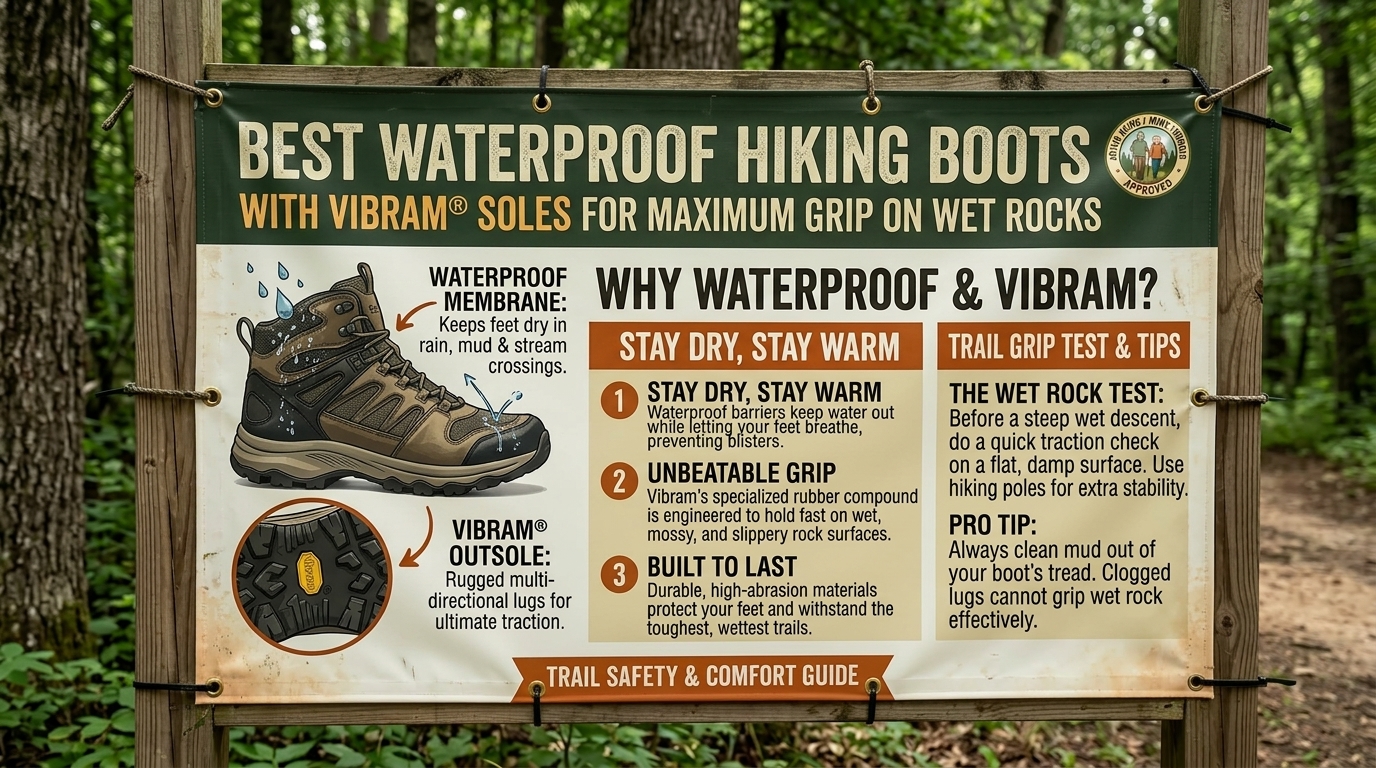
  • Best waterproof hiking boots with Vibram soles for maximum grip on wet rocks

    Best waterproof hiking boots with Vibram soles for maximum grip on wet rocks

    When you are deep in the backcountry, negotiating a slick granite stream crossing in Washington, navigating wet, root-strewn paths in New York, scrambling over damp coastal boulders in San Francisco and California, or tracking through slick riverbeds in Texas, there is one feature your life quite literally depends on: grip.

    Nothing halts a hike faster—or carries a higher risk of injury—than slipping on a wet rock. When water mixes with moss, algae, and smooth stone, standard rubber outsoles turn into ice skates.

    To achieve maximum traction and complete waterproof protection, savvy backpackers and outdoor professionals look for the gold standard combination: waterproof hiking boots equipped with Vibram soles.

    This comprehensive, highly optimized guide breaks down why Vibram rules the trail, reviews the top-rated waterproof boots featuring Vibram technology, provides essential traction tips, and answers your most pressing questions to help you dominate wet terrain safely.

    The Science of Grip: Why Vibram Soles Reign Supreme

    Founded in Italy in 1937 following a tragic mountaineering accident caused by inadequate footwear traction, Vibram revolutionized outdoor safety. Vitale Bramani invented the first rubber lugged soles, setting a benchmark that remains unmatched today.

    1. Advanced Rubber Compounds

    Vibram does not use a single generic rubber formula. Instead, they engineer specialized compounds tailored for specific environments:

    • Vibram Megagrip: The undisputed champion for wet-rock traction. Megagrip offers a unique balance of high friction (stickiness) and rugged durability, conforming to micro-irregularities in stone surfaces like rubber glue.
    • Vibram XS Trek EVO: A balanced compound providing flexibility, wet-surface grip, and high durability for multi-terrain backpacking.
    • Vibram Idrogrip: Specifically formulated for slippery water environments, canyoning, and wet riverbeds, offering maximum adherence on slick, submerged rocks.

    2. Strategic Lug Geometry

    Beyond the rubber compound, Vibram outsoles feature multi-directional, self-cleaning lugs. Lugs at the heel provide braking power during steep descents, while forefoot lugs maximize propulsion on ascents. Channels between the lugs allow mud and water to squirt out instantly, preventing your boots from becoming slick mud-cakes.

    Essential Companion: The Waterproof Membrane

    A high-grip Vibram sole keeps you stuck to the rock, but an integrated waterproof membrane keeps your feet dry from standing water, puddles, and driving rain.

    Look for boots utilizing industry-leading waterproof-breathable technologies like GORE-TEX or proprietary multi-layer waterproof booties. A gusseted tongue (where the tongue is attached to the upper sides of the boot) is crucial to prevent water from splashing in over the laces when you step through shallow creeks.

    Top-Rated Waterproof Hiking Boots with Vibram Soles

    To help you conquer wet, slippery trails, here are the top-rated waterproof hiking boots featuring high-performance Vibram outsoles.

    1. La Sportiva Ultra Raptor II Mid GTX

    • Sole Compound: Vibram FriXion White with Impact Brake System
    • Waterproof Tech: GORE-TEX Extended Comfort Membrane
    • Why It Works: A favorite among thru-hikers and technical mountaineers, the Ultra Raptor II Mid GTX delivers incredible grip on slick stone. The aggressive lug pattern combined with La Sportiva’s specialized rubber compound bites into wet granite and moss with supreme confidence. The lightweight mid-cut synthetic upper offers ankle security without feeling heavy.

    2. Merrell Moab 3 Mid Waterproof (Vibram TC5+)

    • Sole Compound: Vibram TC5+ rubber outsole
    • Waterproof Tech: Waterproof membrane with closed-cell foam tongue
    • Why It Works: Known worldwide for legendary out-of-the-box comfort, the Moab 3 integrates a high-traction Vibram TC5+ sole that delivers reliable all-around grip on wet and dry surfaces. Available in dedicated Wide widths, it accommodates broad forefeet and bunions while keeping your feet dry through sloppy weather.

    3. Danner Mountain Light / Danner Mountain 600 Leaf GTX

    • Sole Compound: Vibram SPE midsole paired with Vibram Fuga outsoles featuring Megagrip
    • Waterproof Tech: GORE-TEX waterproof lining
    • Why It Works: If you want a blend of classic heritage aesthetics and modern high-tech grip, Danner’s integration of Vibram Megagrip in models like the Mountain 600 Leaf is exceptional. The Megagrip compound clings to slick wet river stones like a gecko, providing unmatched security.

    4. Hoka Anacapa 2 Mid GTX

    • Sole Compound: Vibram Megagrip with Litebase construction
    • Waterproof Tech: GORE-TEX Invisible Fit with recycled materials
    • Why It Works: Combining Hoka’s signature maximalist shock-absorbing cushion with the supreme adhesive power of Vibram Megagrip, the Anacapa 2 Mid GTX is a powerhouse for hikers with joint pain who refuse to compromise on wet-rock traction. The Litebase technology reduces outsole weight without sacrificing rubber thickness or grip.

    Proactive Tips for Hiking on Wet, Slippery Rocks

    Even with the stickiest Vibram Megagrip soles on your boots, slick rock requires careful biomechanical technique:

    • Step Flat and Centered: Avoid landing on your heels or toes when stepping onto wet rock. Plant your entire foot flat to maximize the surface area contact between the Vibram rubber lugs and the stone.
    • Avoid Wet Moss and Algae: No rubber compound on earth can grip wet green slime or submerged algae. Steer clear of mossy patches; step on bare rock, wet sand, or dry wood instead.
    • Keep Your Center of Gravity Low: Bend your knees slightly and keep your torso centered directly over your feet. Leaning backward or forward shifts your weight unevenly, causing your boots to skid.
    • Use Trekking Poles: When navigating wet boulder fields, trekking poles act as extra legs, giving you a vital three- or four-point stance that prevents slips during dynamic movements.

    Frequently Asked Questions (FAQs)

    1. What makes Vibram soles better than standard rubber soles?

    Vibram uses proprietary rubber compounds (like Megagrip) that maintain their high-friction coefficient and flexibility even in cold, wet environments. Standard cheap rubber soles harden up when wet or cold, turning smooth and slick.

    2. Which Vibram compound is best for wet rocks?

    Vibram Megagrip is widely considered the absolute best compound on the market for wet rock, slick granite, and coastal boulder fields because it provides superior adhesive friction.

    3. Do waterproof boots with Vibram soles take a long time to break in?

    It depends on the upper construction. Synthetic vegan models (like La Sportiva or Hoka) offer instant out-of-the-box flexibility, while full-grain leather boots with Vibram soles (like traditional Danners) require a short break-in period to soften the leather upper.

    4. Why do my Vibram boots still slip on some wet rocks?

    No sole can grip 100% of wet surfaces. If you step on wet green moss, slick clay mud, flat wet algae-covered river stones, or icy surfaces, even Vibram Megagrip will slide. Technique and line-picking are always crucial.

    5. How do I maintain the grip on my Vibram soles?

    Keep your outsoles clean. Mud, dirt, and microscopic debris pack into the lugs and reduce surface contact. Use a stiff brush and warm water to scrub out caked-on mud after every muddy hike.

    6. Are Vibram soles resoleable?

    Some premium, stitched construction boots (like traditional full-grain leather Danner or Vibram-soled mountaineering boots) can be resoleable by professional cobblers once the lugs wear down. Cemented modern trail boots generally cannot be resoled.

    7. Do waterproof membranes reduce the breathability of Vibram-soled boots?

    The waterproof membrane (like GORE-TEX) is inside the boot upper, while the Vibram sole is on the bottom. While waterproof membranes do trap some heat compared to open mesh shoes, modern high-end boots balance this with breathable upper textiles.

    8. Are Vibram soles heavier than standard rubber soles?

    Vibram offers various weights, including advanced technologies like Vibram Litebase which reduces sole weight by up to 30% without sacrificing durability or traction depth.

    9. Can I wear Vibram hiking boots in winter snow and ice?

    Yes, many Vibram-soled boots handle snow brilliantly, but for hard-packed ice, look for specialized winter compounds (like Vibram Arctic Grip) which are engineered specifically to grip wet ice.

    10. How many miles do Vibram outsoles typically last?

    High-quality Vibram rubber outsoles typically last between 500 to 800 miles of active trail use, depending on how abrasive the terrain is (e.g., sharp desert sandstone vs. soft forest dirt).

    Conclusion

    Slick, wet rocks are one of the most unpredictable hazards on the trail, capable of turning a relaxing hike into a dangerous slip-and-fall scenario. By investing in waterproof hiking boots equipped with high-performance Vibram soles—such as the La Sportiva Ultra Raptor II Mid GTX, Hoka Anacapa 2, or Danner Mountain series—you secure elite traction, advanced moisture protection, and total peace of mind. Combine your footwear with smart foot placement and trekking poles, and you will navigate wet boulder fields, coastal mist, and rainy mountain passes across Washington, New York, California, San Francisco, and Texas with absolute confidence.

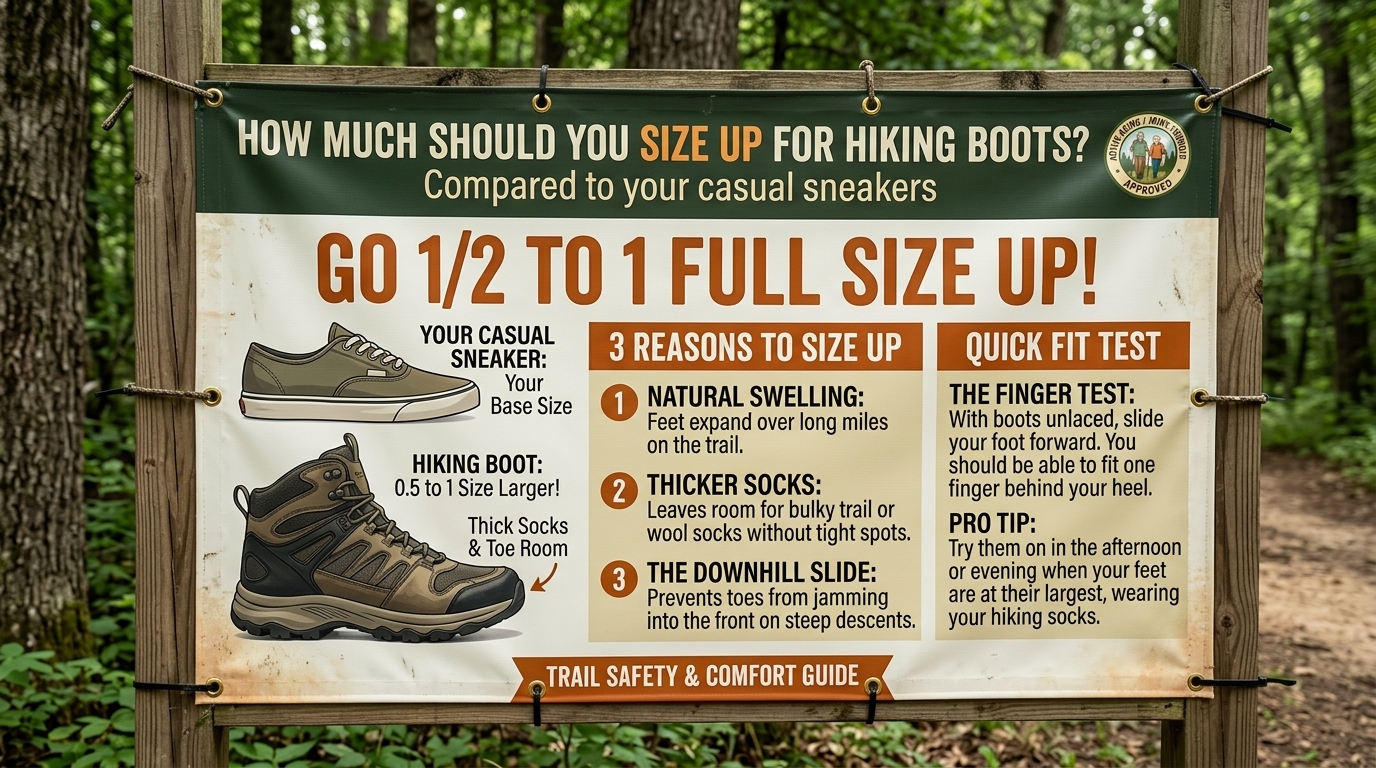
  • What size up should you buy for hiking boots compared to casual sneakers

    What size up should you buy for hiking boots compared to casual sneakers

    One of the most common and painful mistakes outdoor enthusiasts make is buying hiking boots in the exact same size as their everyday casual sneakers. You lace up a brand-new pair of boots, take them out on a scenic trail in New York, California, Washington, San Francisco, or Texas, and by mile three, your toes are throbbing, your toenails are turning black, and excruciating blisters are forming on your heels.

    Why does this happen? Casual sneakers are designed for fashion, comfort during short walks, and sedentary daily activities where your feet remain static. Hiking boots, on the other hand, are engineered for rugged terrain, heavy loads, steep inclines, and long-distance endurance.

    To prevent foot trauma, you almost always need to size up your hiking boots compared to your standard casual sneakers. But by how much? Should you go up a half-size, a full size, or adjust for width?

    This comprehensive, highly optimized guide explores the biomechanical reasons you need extra room, exact sizing rules, expert fitting tips, and answers to your most pressing questions to help you buy the right size the first time.

    Why You Can’t Wear the Same Size in Sneakers and Hiking Boots

    To understand why sizing up is mandatory for hiking boots, you must look at how your feet behave under the physical stress of backpacking and trail hiking.

    1. Foot Expansion and Volume Changes

    Throughout a day of hiking, your feet swell significantly. As your heart rate increases and blood pumps vigorously to your extremities, your feet expand both in length and in width. Furthermore, the constant impact of walking compresses the fat pads under your heels and balls of your feet, causing your foot to spread wider. A shoe that feels perfectly snug in a quiet living room will feel like a vice grip after five miles on a dusty trail.

    2. The Gravity Penalty: Downhill Descents

    Going downhill is the ultimate test for boot sizing. When you walk down a steep mountain grade or a rocky incline, your body weight and momentum drive your entire foot forward inside the shoe.

    • If your casual sneakers fit with just a thumbnail’s width of space at the front, your toes will slam repeatedly against the interior hard shell of the boot on every downward step.
    • This continuous micro-trauma results in bruised, black toenails (runner’s toe) and severe forefoot blisters.

    3. Sock Thickness Differences

    You probably wear thin cotton, low-cut athletic, or no-show socks with your casual sneakers. Hiking boots require high-density, cushion-heavy merino wool or technical synthetic socks to absorb friction and wick moisture. These hiking socks take up significantly more volume inside the boot, meaning your footwear needs extra interior space to accommodate them without crushing your feet.

    The Golden Rule: How Much Larger Should Hiking Boots Be?

    As a general industry standard, you should buy your hiking boots a full half-size to a full size larger than your standard casual sneaker size (or street shoe size).

    Footwear TypeTypical Sizing RuleSock Type Usually Worn
    Casual SneakersTrue to size (Snug, minimal toe room)Thin cotton or low-cut athletic socks
    Hiking Shoes / BootsHalf-size to 1 full size upThick, cushioned merino wool socks
    Mountaineering / Alpine Boots1 to 1.5 sizes up (Extra volume for thick socks/swelling)Double socks or heavy mountaineering socks

    The “Thumbnail Test” for Sizing

    When trying on hiking boots:

    1. Put on the exact socks you plan to wear on the trail.
    2. Lace the boots up snugly.
    3. Slide your foot all the way forward so your toes touch the front interior wall.
    4. Reach behind your heel. You should be able to comfortably slip one index finger (roughly a thumbnail’s width or about half an inch to a full inch) down into the space between your heel and the back of the boot.
    5. Stand up and rock forward onto your toes. Your toes should not press hard against the front wall.

    Brand-Specific Sizing Variations to Watch Out For

    Not all shoe brands adhere to standard sizing scales. Knowing how specific manufacturers cut their footwear can save you from an expensive sizing mistake:

    • European Sizing (EU): Many premium outdoor brands (like La Sportiva, Lowa, and Salomon) use European sizing. EU sizes do not map linearly to US half-sizes. Always consult the brand’s specific centimeter (CM) or Mondopoint chart rather than guessing your US conversion.
    • Italian and European Brands: Brands originating in Europe often feature narrower toe boxes and lower overall volume. If you have wide feet or bunions, you may need to size up a full size and look for a dedicated “Wide” (EE) width version.
    • American Heritage Brands: Brands like KEEN and Altra are famous for generous, foot-shaped toe boxes. In these brands, your true street shoe size or just a half-size up is often sufficient because the toe box naturally accommodates splay and swelling.

    Essential Tips for Getting the Perfect Fit

    Getting the right numerical size is only half the battle. Use these professional fitting tips when shopping for your next pair of hiking boots:

    • Shop Later in the Day: Never buy hiking boots first thing in the morning when your feet are at their smallest. Go shopping in the late afternoon or evening when your feet are naturally swollen from a full day of standing and walking.
    • Wear Your Actual Hiking Socks: Bring the thickest merino wool hiking socks you own to the store when trying on boots. Testing them with thin dress socks will give you a false sense of roominess.
    • Test on the Incline Ramp: Any reputable outdoor specialty store will have an incline board. Walk down a steep ramp wearing the boots laced up. If your big toes touch the front wall of the boot while descending, the boots are too small; you need to size up.
    • Lock Down Your Heel: While you want extra room in the toe box, your heel should remain securely locked in the rear heel pocket. If your heel lifts up and down while walking, it will cause friction blisters. Use specialized lacing techniques (like the Surgeon’s Knot) to anchor your ankle back.

    Frequently Asked Questions (FAQs)

    1. Should I buy hiking boots a full size up if I have wide feet?

    Sizing up in length to compensate for wide feet is a mistake because it shifts the flex point of the shoe away from your arch, causing blisters and instability. Instead, buy your proper length (or a half-size up) in a dedicated Wide (EE or EEE) width model.

    2. What happens if my hiking boots are too big?

    If hiking boots are overly large, your feet will slide back and forth uncontrollably. On ascents, your heel will slip out of the pocket, creating friction blisters. On descents, your foot will still shift forward if the instep isn’t locked down. Always aim for a snug midfoot and heel with generous toe room.

    3. Can I use thick insoles to fix hiking boots that are a half-size too big?

    Yes! If your boots feel slightly too roomy or loose, inserting a supportive aftermarket insole (like Superfeet or custom orthotics) takes up excess vertical volume inside the boot, locking your foot more securely in place.

    4. Do women’s and men’s hiking boots fit differently besides size?

    Yes. Men’s boots are built on a wider last (the mold of the foot) with a higher volume instep, while women’s boots feature a narrower heel cup, a slightly narrower midfoot, and a lower volume overall to match typical female biomechanics.

    5. Why do my toes hit the front of my boots even though I sized up?

    Toe slamming on downhills is usually a lacing issue, not a sizing issue. If your instep isn’t laced tightly enough, your foot slides forward inside a correctly sized boot. Retie your boots before descents by kicking your heel back and using a locking ankle knot.

    6. Do trail running shoes require the same sizing up as leather boots?

    Yes. Just like traditional hiking boots, trail running shoes used for backpacking or long day hikes expand your feet and require a half-size to a full-size buffer to prevent toe jam on downhills.

    7. How do I convert US shoe sizes to European (EU) sizes for boots?

    EU sizing is typically more precise. For example, a US Men’s 10 is usually a European 43 or 44. Always check the brand’s specific millimeter (MM) or centimeter (CM) foot length chart, as conversions vary slightly between manufacturers.

    8. Will my leather hiking boots stretch out over time?

    Full-grain leather and suede boots will stretch and mold slightly to the contours of your feet over time, but they will not stretch lengthwise to fix a boot that is too small. Never buy a boot hoping it will stretch out in length.

    9. Should waterproof boots be sized differently than non-waterproof boots?

    No. Both waterproof and non-waterproof boots should be sized a half-size to a full size up. Waterproof membranes do not alter the internal volumetric length requirements of your foot.

    10. Can I wear two pairs of socks to fill out boots that are too big?

    Wearing two pairs of socks is strongly discouraged. The friction between the two sock layers creates a breeding ground for severe blisters. It is always better to wear one properly fitted pair of high-density merino wool socks inside a correctly sized boot.

    Conclusion

    Sizing your hiking boots correctly is the single most important step in ensuring a pain-free, enjoyable outdoor experience. Leaving behind your casual sneaker sizing habits and sizing up by a half-size to a full size gives your feet the room they need to swell, protects your toes from bruising on steep mountain descents, and accommodates technical merino wool socks. Whether you are prepping for rugged trails in Washington, New York, California, San Francisco, or Texas, take your time, test your boots on an incline, and step out onto the trail with absolute comfort and confidence.

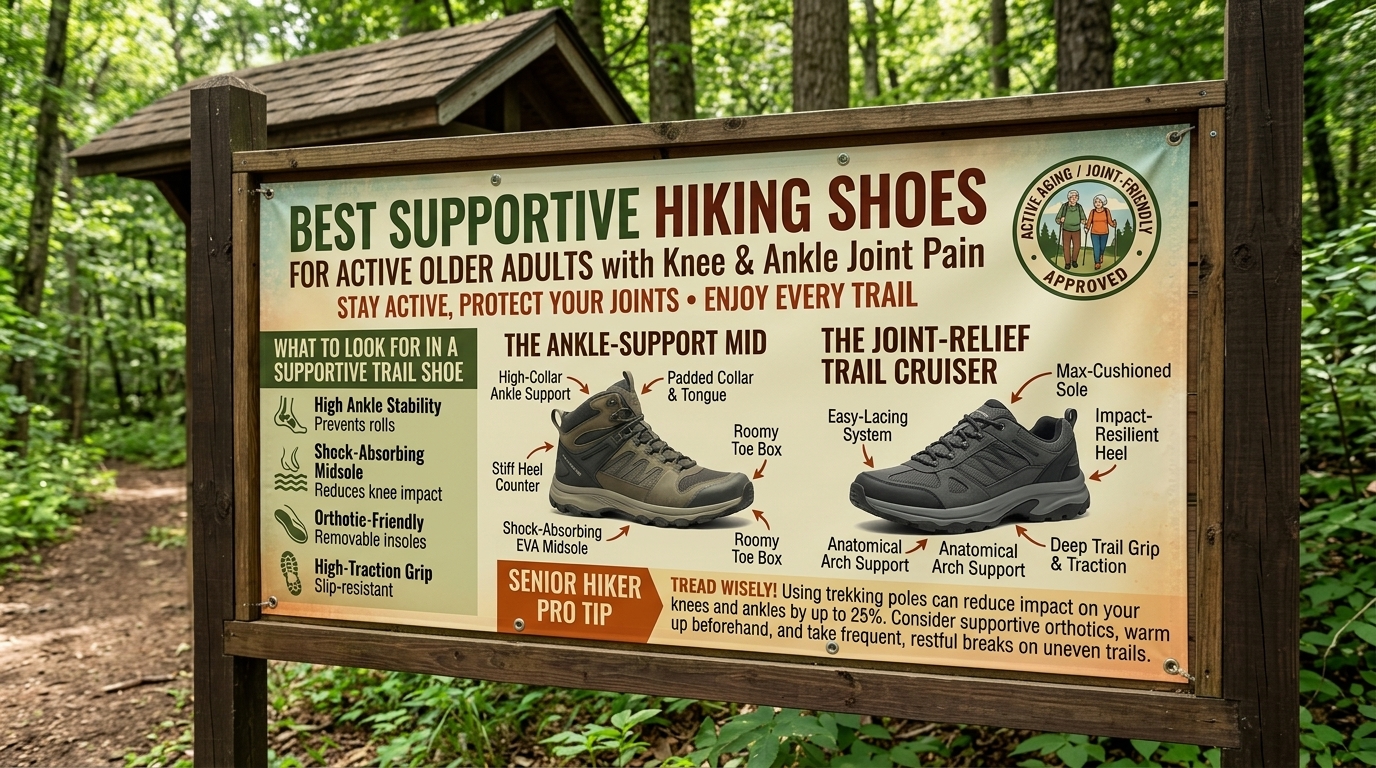
  • Best supportive hiking shoes for older adults with knee and ankle joint pain

    Best supportive hiking shoes for older adults with knee and ankle joint pain

    Age is just a number, and the call of the outdoors only grows sweeter with time. Whether you are taking leisurely weekend nature walks in Texas, exploring the lush coastal forests of Washington, tackling rolling hills in New York, or enjoying scenic vistas across California and San Francisco, hiking remains one of the best ways to stay physically and mentally vibrant.

    However, as we age, our bodies change. Years of walking, running, and living take a toll on our joints. If you experience aching knees, stiff ankles, or general joint discomfort, standard minimalist footwear or worn-out sneakers will no longer suffice. Every downward step sends a shockwave up through your ankles, knees, and lower back.

    Finding the best supportive hiking shoes for older adults with knee and ankle joint pain is essential to keeping you safe, stable, and pain-free on the trail. This comprehensive guide explores how proper footwear protects aging joints, features to look for, top-rated shoe recommendations, and expert-backed tips to preserve your mobility.

    Understanding Joint Pain: Why Footwear Matters for Knees and Ankles

    When hiking, your lower extremities absorb forces equal to two to three times your body weight with every single step. When you hit uneven dirt, rocks, or roots, your ankles must stabilize your body, while your knees absorb the vertical impact—especially during descents.

    1. The Shock Absorption Equation (Protecting the Knees)

    As we age, the cartilage cushioning our knee joints naturally thins. When you walk in shoes with rigid, unyielding soles or thin, worn-out foam, the ground impact transfers directly into your knees. Supportive hiking shoes with high-grade, cushioned midsoles (like EVA or supercritical foams) act as shock absorbers, dramatically reducing the percussive load transmitted to your knee joints.

    2. Stability and Proprioception (Protecting the Ankles)

    Ankle joint pain often stems from instability, arthritis, or previous sprains. If your foot rolls inward (overpronation) or outward inside a loose shoe, your ankle muscles must overcompensate, leading to fatigue and sharp joint aches. Supportive footwear features rigid heel counters, wide structural platforms, and supportive midsoles that keep your foot tracking in a straight, stable line.

    Critical Features to Look For in Joint-Supportive Hiking Shoes

    When shopping for hiking footwear designed to alleviate knee and ankle pain, do not compromise on these four architectural pillars:

    • Plush Midsole Cushioning (Max or Moderate Stack): Look for shoes with generous, shock-absorbing midsoles that cushion impact without feeling unstable. Avoid ultra-minimalist or zero-drop shoes if you suffer from severe knee arthritis, as they place higher demands on your lower leg joints.
    • Mid-Height Ankle Support (Optional vs. Low Top): While some hikers prefer low-top trail runners for weight savings, older adults with chronic ankle instability often benefit immensely from a lightweight mid-cut boot that provides gentle collar support around the ankle bones.
    • Firm Arch Support and Orthopedic Compatibility: Proper arch support prevents the foot from collapsing inward, which naturally forces the knee inward (valgus stress) and exacerbates patellar knee pain. Ensure the shoe has a robust arch or allows you to insert custom orthopedic insoles.
    • Rocker Sole Geometry: Many modern joint-friendly hiking shoes feature a curved “rocker” shape in the outsole. This design rolls your foot smoothly from heel strike to toe-off, reducing the bending strain on your ankle joint and minimizing knee fatigue.

    Top-Rated Hiking Shoes and Boots for Joint Relief

    To help you choose the right footwear for your next outdoor excursion, here are the top-rated models praised by older adults and outdoor enthusiasts for superior knee and ankle support.

    1. Hoka Anacapa 2 Mid GTX (or Hoka Kaha 2 GTX)

    • Why It Works: Hoka is universally renowned for its maximalist cushioning. The Anacapa 2 Mid GTX features a chunky, highly shock-absorbing foam midsole that acts like a pillow for your joints, absorbing harsh impacts on rocky descents. Despite its cushion, it includes a lightweight mid-cut ankle collar and a Vibram Megagrip outsole for secure traction, making it an elite choice for hikers with severe knee arthritis.

    2. Brooks Cascadia (17 or Latest Edition) / Cascadia Mid GTX

    • Why It Works: If you prefer a lighter, agile shoe with supreme stability, the Brooks Cascadia line features a specialized Pivot All-Terrain Stability System. This acts like a suspension system for your feet, keeping your foot level on uneven ground and preventing the lateral rolling that triggers ankle pain. The balanced cushioning protects knees without feeling overly bulky.

    3. Merrell Moab 3 Mid Waterproof (with Custom Insoles)

    • Why It Works: The Merrell Moab is a classic staple known for its out-of-the-box comfort and available Wide widths. For older adults with bunions, wide feet, or joint pain, the Moab offers a stable, supportive nylon arch shank and a sturdy heel counter that locks the foot in place. Pair it with a supportive aftermarket insole (like Superfeet), and you have a powerhouse of joint protection.

    4. KEEN Targhee IV Mid Waterproof

    • Why It Works: KEEN is famous for its anatomical, wide-splay toe boxes and robust structural integrity. The Targhee series features an internal ESS shank that provides torsional stability, meaning the shoe resists twisting when you step on sharp rocks. This torsional rigidity prevents your ankle from torquing sideways, safeguarding weak joints.

    Essential Tips for Joint-Friendly Hiking

    Proper footwear is your primary defense, but combining your shoes with these smart hiking practices will ensure a pain-free trek:

    • Use Trekking Poles: Trekking poles are an absolute game-changer for older adults. By converting your hike into a “four-wheel-drive” experience, poles transfer up to 25% of your body weight away from your lower body, reducing load on aching knees by thousands of pounds per mile.
    • Take Shorter, Quicker Strides: When going downhill—the most treacherous part for knee pain—resist the urge to take long, lunging steps. Take short, controlled steps with your knees slightly bent to allow your muscle quadriceps to absorb the load rather than your joint cartilage.
    • Replace Your Shoes Regularly: The shock-absorbing foam inside hiking shoes packs out and loses its elasticity after 350 to 500 miles. If your shoes look fine on the outside but your knees hurt after every hike, your midsoles are likely dead and need replacing.
    • Warm Up Before Hitting the Trail: Spend 5 to 10 minutes doing gentle leg swings, ankle rolls, and knee bends before starting your hike to lubricate the joint synovial fluid.

    Frequently Asked Questions (FAQs)

    1. Are hiking boots better than hiking shoes for knee and ankle pain?

    It depends on your specific pain profile. If you have chronic ankle instability, a lightweight mid-height boot provides gentle external guidance. However, if your main issue is knee pain, a lightweight cushioned hiking shoe or trail runner with excellent shock absorption is often preferred to reduce overall leg lifting weight.

    2. Can custom orthotics be used in hiking shoes?

    Yes! In fact, many older adults with joint pain benefit greatly from removing factory insoles and inserting podiatrist-prescribed custom orthotics or supportive over-the-counter insoles (like Superfeet) into hiking shoes with removable footbeds.

    3. Why do my knees hurt more going downhill than uphill?

    Going downhill involves eccentric muscle contractions, where your quadriceps and knees work overtime to brake your forward momentum against gravity. This creates massive impact spikes across the patellofemoral joint, which is why cushioned shoes and trekking poles are crucial for descents.

    4. Do zero-drop shoes help or hurt joint pain?

    For most older adults with knee and ankle joint pain, zero-drop shoes (where the heel and toe are level) can exacerbate discomfort because they place extra stretching tension on the Achilles tendon and calf muscles, which can indirectly increase joint strain. A shoe with a slight heel-to-toe drop (8mm to 12mm) is generally much more forgiving on aging joints.

    5. How do I know if my hiking shoes have enough cushion for joint protection?

    If you can easily feel sharp rocks poking through the bottom of your shoe when walking on gravel, the midsole foam is too thin. Look for shoes with a medium-to-high stack height that isolate your joints from harsh stone impacts.

    6. Are heavier leather boots bad for joint pain?

    Traditional full-grain leather boots are extremely durable, but they are also very heavy. Extra weight on your feet multiplies leg fatigue over long distances, which can weaken your form and stress sore joints near the end of a hike. Modern lightweight synthetic boots with high cushioning are often easier on joints.

    7. How can I strengthen my ankles and knees at home?

    Simple physical therapy exercises—such as single-leg balance stands, seated leg extensions with light resistance, calf raises, and step-downs—strengthen the supporting muscles around your joints, providing natural biological support on the trail.

    8. Should I buy wide-width hiking shoes even if I don’t have wide feet?

    Many older adults experience foot spreading or foot swelling over long hikes. Choosing a shoe with a roomy toe box or a dedicated wide width prevents your feet from being constricted, which improves your natural balance and reduces tension radiating up into your ankles.

    9. How often should I rest during a hike to protect my joints?

    A good rule of thumb is to take a short 3-to-5-minute rest break every 30 to 45 minutes. Sit down, take your pack off, let your joints decompress, and hydrate to keep your cartilage and muscles functioning smoothly.

    10. Can trekking poles really replace ankle braces?

    While trekking poles do not immobilize an ankle like a medical brace, they provide two extra points of contact that drastically improve your overall balance, preventing the missteps and wobbles that cause ankle rolls in the first place.

    Conclusion

    Joint pain should never be a barrier that keeps you locked indoors. By investing in the right footwear—such as maximalist cushioned boots from Hoka, stable trail shoes from Brooks, or spacious, supportive models from KEEN and Merrell—you can drastically reduce the percussive shock hitting your knees and stabilize vulnerable ankles. Combine your new shoes with trekking poles, mindful pacing, and proper warm-ups, and you will be ready to explore scenic trails across Texas, New York, California, Washington, and San Francisco with comfort, confidence, and joy for years to come.

  • How to keep your feet dry while hiking through deep swampy mud and streams

    How to keep your feet dry while hiking through deep swampy mud and streams

    Few trail obstacles test a hiker’s resolve quite like a vast expanse of knee-deep, sucking swamp mud or a roaring, ice-cold stream crossing. Whether you are navigating boggy rainforest trails in Washington, dealing with coastal marine layers and damp lowlands in San Francisco and California, exploring saturated woodlands in New York, or trekking through unpredictable flood zones and creeks in Texas, wet feet are an occupational hazard for outdoor enthusiasts.

    When moisture breaches your defenses, it brings more than just discomfort. Constant wetness leads to severe skin maceration, painful friction hotspots, debilitating blisters, and, in cold conditions, the looming threat of hypothermia.

    The eternal debate among backpackers splits into two camps: Is it actually possible to keep your feet dry, or should you embrace the wetness and focus on management?

    This comprehensive, highly detailed guide explores expert-backed techniques, gear setups, and field strategies to keep your feet completely dry through deep mud and streams—along with what to do when the water inevitably wins.

    Philosophy 101: The “Keep Dry” Setup vs. The “Accept the Wet” Strategy

    Before hitting a notoriously soggy trail, you must choose your tactical approach based on the environment:

    1. The Fortress Approach (Keeping Dry): Ideal for cold climates, early spring “mud seasons,” or short-day excursions where stepping into water is occasional. This relies on high-shaft waterproof boots, specialized gaiters, and sometimes waterproof socks.
    2. The Hydrophilic Approach (Embracing Wetness): Popular among long-distance backpackers in warm weather. This method utilizes lightweight, non-waterproof mesh trail runners that let water in just as easily as they let it out, paired with fast-drying socks.

    If your objective is to maintain completely dry feet through deep swamps and rushing streams, you must build a robust, multi-layered defensive system.

    Essential Gear Arsenal to Block Deep Water and Mud

    If you choose the fortress approach, standard low-cut shoes and casual socks will fail instantly. You need a specialized gear lineup engineered to repel mud and standing water.

    • High-Shaft Waterproof Boots: Look for full-grain leather or heavy-duty synthetic boots featuring integrated waterproof membranes (like GORE-TEX or OutDry) with an ankle height of 6 to 8 inches.
    • Taller Mountaineering or Expedition Gaiters: Low trail gaiters keep dust out, but deep swamp mud requires knee-high waterproof gaiters (such as Outdoor Research Crocodiles). These seal the gap between your pants and your boots, preventing slop from spilling over the collar.
    • Waterproof Socks (Socks with Membranes): Brands like SealSkinz or Rocky GORE-TEX Socks feature an internal waterproof barrier. Worn between your inner sock and outer shoe, they act as a secondary defense line if external water breaches your boots.
    • Sturdy Trekking Poles: Essential for probing the depth of murky swamp water or testing slippery stream beds before placing your weight down.

    Step-by-Step Techniques for Conquering Deep Mud

    Swamp mud is deceptive. Step into the wrong spot, and you can sink knee-deep, creating a vacuum lock that pulls your boots right off your feet.

    Step 1: Probe Before You Tread

    Never blindly step into a massive mud pit. Use your trekking poles to test the consistency and depth of the mire. If the pole sinks rapidly without hitting a solid bottom, look for a bypass or step on embedded roots, rocks, or elevated tussocks.

    Step 2: Secure Your Laces and Gaiters

    Ensure your high-top gaiters are cinched tightly around your calves and securely hooked to your boot laces. Loose gaiters allow thick mud to funnel down into the top of your footwear, breaking the seal.

    Step 3: The “Penguin Glide” Technique

    When traversing deep, sticky mud, avoid lifting your feet vertically—the vacuum suction will pull your boots right off your feet, leaving you stepping into muck in your socks. Instead, glide your feet forward horizontally or pull your foot up by flexing your ankle and pointing your toes downward to break the suction seal.

    Step-by-Step Techniques for Safe Stream Crossings

    Streams present a dynamic hazard where a single misstep means total immersion.

    Step 1: Unclip Your Pack’s Hip Belt

    Before stepping into a rushing stream, always unbuckle the hip belt and sternum strap of your backpack. If you lose your footing and fall into the current, a heavy backpack will act like a turtle shell, pinning you underwater. Unbuckling allows you to ditch the pack instantly if you drift.

    Step 2: Face Upstream and Use a Tripod Stance

    Cross rivers diagonally facing slightly upstream. Use your trekking poles to establish a stable three-point contact stance at all times, moving one limb (either a pole or a foot) at a time.

    Step 3: Keep Your Boots On (or Switch to Dedicated Wading Shoes)

    While walking barefoot across a rocky stream feels natural, it invites severe cuts, deep bruises, and slips. If you are committed to keeping your hiking boots completely dry, pack lightweight camp sandals (like Crocs or water shoes) to wear during stream crossings, then thoroughly dry your feet before putting your dry hiking socks and boots back on.

    Proactive Foot Care: What to Do When Water Gets In

    Despite your best efforts, a rogue wave or a knee-deep bog might submerge your boots. Once water breaches your waterproof barrier, the game changes entirely: trapped water cannot escape easily, turning your boots into a miniature foot bath.

    • Drain and Dry Immediately: At your next break, strip off your boots and socks. Wipe your feet completely dry with a small microfiber towel.
    • Apply Anti-Friction Balm: Wet skin softens rapidly (maceration) and blisters within minutes. Slather your feet with anti-chafe balm or Glide stick to create a moisture-repellent barrier.
    • Put on Fresh, Dry Socks: Never put wet socks back onto dry feet. Always keep a dedicated pair of dry merino wool socks stored inside a ziplock bag in your pack exclusively for emergencies or evening camp use.

    Frequently Asked Questions (FAQs)

    1. Are waterproof boots actually effective in deep swamps?

    Waterproof boots work brilliantly for shallow puddles, morning dew, and light rain. However, if the water or mud level rises above the collar of your boot (typically 6 inches), it will pour directly inside over the top, trapping the water inside the membrane.

    2. Should I wear waterproof socks for hiking?

    Yes, waterproof socks (like Gore-Tex or membrane socks) are fantastic insurance policies. Even if your boots get completely soaked crossing a stream, a quality waterproof sock worn over a thin wool liner will keep your actual skin dry.

    3. How do I prevent my boots from getting sucked off my feet in deep mud?

    Thick, suction-heavy swamp mud creates a vacuum. Ensure your boots are laced snugly around the instep and ankle, and wear tall, securely buckled gaiters that prevent mud from sliding down into the throat of the shoe.

    4. Is it better to walk through the center of a muddy trail or around the edges?

    Always walk directly through the center of the trail. Walking around the edges to avoid mud widens the trail, destroys fragile vegetation, accelerates erosion, and turns a narrow path into an environmental scar.

    5. What is the fastest way to dry wet hiking boots overnight?

    Remove the insoles, pull the tongue forward, and stuff the interior tightly with dry newspaper, paper towels, or spare clothing to absorb internal moisture. If camping, you can fill Nalgene bottles with warm water and place them inside the boots to accelerate drying.

    6. Can I use plastic grocery bags over my socks to keep my feet dry?

    While classic “plastic bag booties” (putting grocery bags over your socks inside your shoes) keep water out temporarily, they trap 100% of your foot sweat. Within an hour, your feet will be swimming in your own perspiration, leading to severe skin blistering.

    7. How do I safely cross a fast-flowing mountain stream?

    Always unbuckle your pack’s hip belt, use trekking poles for balance, cross at a wide, shallow riffle rather than a deep pool, and face diagonally upstream against the current. If the water is above your knees and moving rapidly, turn back.

    8. What socks are best for wet-weather hiking?

    Always wear high-density merino wool socks. Unlike cotton—which retains moisture, loses its shape, and causes painful blisters—merino wool naturally wicks moisture and retains its thermal insulating properties even when damp.

    9. Should I grease or wax my leather boots for swamp hiking?

    Yes. Regularly treating full-grain leather hiking boots with natural waxes, nikwax, or leather conditioners saturates the pores of the hide, providing an exceptional barrier against prolonged moisture and mud absorption.

    10. What should I do if my skin starts turning white and wrinkly from moisture?

    That is trench foot or severe skin maceration. Stop immediately, dry your feet completely in the air and sun, apply dry powder or anti-friction balm, and put on a fresh, bone-dry pair of wool socks.

    Conclusion

    Hiking through deep swampy mud and rushing streams is an inevitable adventure for outdoor enthusiasts exploring diverse landscapes from Washington and San Francisco to New York and Texas. While keeping your feet 100% dry requires a meticulous combination of high-shaft waterproof boots, knee-high gaiters, and careful line-picking, mastering trail resilience ensures that a little water won’t dampen your spirit. Equip yourself with the right gear, respect the power of deep water, practice proactive foot care, and enjoy every muddy mile of the journey.

  • Top rated vegan friendly hiking boots made from synthetic and recycled materials

    Top rated vegan friendly hiking boots made from synthetic and recycled materials

    The modern outdoor industry is undergoing a massive ethical and ecological transformation. For decades, traditional hiking boots relied heavily on full-grain leather, suede, and animal-derived glues. Today, conscious outdoor enthusiasts no longer have to choose between high-performance trail footwear and their ethical values.

    The rise of advanced synthetic textiles, plant-based innovations, and closed-loop recycled plastics has made it possible to engineer hiking boots that outperform old-school leather models. These vegan-friendly boots offer superior breathability, lighter weights, rapid drying times, and zero animal cruelty—all while helping clean up our oceans and landfills.

    Whether you are navigating coastal fog in San Francisco and Washington, tackling rocky multi-day ascents in New York and California, or training on rugged trails in Texas, this comprehensive guide covers the top-rated vegan hiking boots built from synthetic and recycled materials, alongside essential buying tips and regional care strategies.

    What Makes a Hiking Boot “Vegan-Friendly”?

    At first glance, a pair of hiking boots might look like simple fabric and rubber, but animal products hide in surprising places throughout traditional outdoor gear. To be certified or genuinely considered vegan, a hiking boot must completely omit:

    • Full-Grain Leather, Suede, and Nubuck: Hides sourced from cows, pigs, or goats.
    • Animal-Based Glues: Traditional shoemaking adhesives frequently use collagen derived from horse or cow connective tissues. True vegan brands explicitly use synthetic, plant-based, or resin glues.
    • Wool Linings or Shearling: Often found in winter models as insulation or comfort footbeds.

    Instead, top-tier vegan boots utilize high-performance synthetics like Cordura nylon, recycled polyester mesh, Kevlar reinforcements, and technical waterproof membranes (like GORE-TEX or proprietary waterproof liners) paired with cruelty-free binding agents.

    Key Benefits of Synthetic and Recycled Hiking Boots

    Choosing synthetic and recycled vegan footwear offers distinct functional advantages on the trail over traditional leather options:

    1. Featherweight Construction: Synthetic meshes and recycled plastics weigh significantly less than heavy leather. This reduces foot and ankle fatigue over high-mileage days.
    2. Zero Break-In Period: While stiff full-grain leather can take weeks of painful blistering to soften, synthetic vegan boots are supple right out of the box.
    3. Eco-Friendly Circular Economy: Many leading brands utilize ocean plastics, recycled polyester (rPET) laces and linings, and post-consumer rubber outsoles, actively diverting waste from landfills.
    4. Faster Drying Times: Synthetic materials absorb minimal water compared to leather. If your boots get saturated during a stream crossing or a sudden downpour, they dry out remarkably fast.

    Top-Rated Vegan Hiking Boots for the Trail

    To help you find the perfect pair for your next trek, here are the highest-rated vegan hiking boots on the market, combining eco-friendly recycled components with uncompromising trail performance.

    1. La Sportiva Ultra Raptor II Mid GTX

    • Materials: AirMesh synthetic upper, microfiber reinforcements, and GORE-TEX waterproof membrane with recycled components; 100% vegan-certified construction.
    • Why It Works: Regarded by many thru-hikers as the gold standard for synthetic technical footwear, the Ultra Raptor II Mid GTX delivers the rugged protection of a heavy leather boot at a fraction of the weight. Featuring an aggressive FriXion rubber outsole and a supportive stability chassis, it handles steep, rocky terrain in California, New York, and Washington with absolute confidence.

    2. Merrell Moab Speed 2 Mid GTX (or Moab Speed Mid)

    • Materials: 100% recycled mesh upper, recycled laces, webbing, and mesh lining, paired with a GORE-TEX waterproof membrane and FloatPro Foam midsole.
    • Why It Works: Merrell has made sustainability a core priority in their lineup. The Moab Speed 2 Mid takes the legendary, wide-friendly comfort of the original Moab and infuses it with eco-conscious recycled plastics. It features a Vibram TC5+ or XS Trek EVO outsole that delivers exceptional grip across wet and dry terrain while keeping your footprint light on the planet.

    3. Adidas Terrex Free Hiker 2.0 (Low or Mid)

    • Materials: Primeknit textile upper made with at least 50% Parley Ocean Plastic and 50% recycled polyester, boosted by Continental Rubber outsoles.
    • Why It Works: For hikers who prioritize supreme cushioning and a sock-like fit, the Adidas Terrex Free Hiker line is unmatched. The upper hugs your foot dynamically while actively utilizing upcycled marine plastic debris. The responsive Boost midsole cushions every step, making it an ideal choice for fast-paced day hikes and long-distance paths.

    4. Altra Lone Peak All-Weather Mid (Altra All-Wthr Mid)

    • Materials: Synthetic weather-resistant upper, balanced zero-drop platform, and MaxTrac sticky rubber outsole.
    • Why It Works: If you suffer from bunions or wide forefeet, the Altra Lone Peak All-Weather Mid is a game-changer. It features Altra’s signature foot-shaped toe box, allowing your toes to splay naturally without painful friction. While built with lightweight synthetic materials rather than heavy leather, it provides exceptional comfort for long-distance backpacking.

    Regional Performance: How Vegan Boots Handle Diverse Terrains

    Different environments test synthetic and recycled materials in unique ways:

    • Texas & California: Arid conditions, fine dust, and jagged granite require breathable mesh uppers and durable rock plates. Synthetic vegan shoes excel here because they vent heat rapidly and prevent overheating.
    • Washington & San Francisco: Coastal moisture, slick marine layers, and muddy forest floors demand robust waterproof membranes (like GORE-TEX) paired with deep, multi-directional rubber lugs to prevent slipping on wet tree roots.
    • New York: Rapidly changing weather—from humid summer heatwaves to slick autumn mud—highlights the versatility of lightweight synthetic boots that dry quickly after unexpected downpours.

    Essential Tips for Maintaining Vegan Hiking Boots

    To maximize the lifespan of your synthetic and recycled hiking boots, incorporate these simple maintenance habits:

    • Brush Away Dirt Regularly: Fine dust and dirt act like sandpaper on synthetic mesh fibers. Use a soft brush and lukewarm water to clean off mud after every hike.
    • Avoid High Heat: Never place synthetic shoes near a campfire, heater, or in direct hot sunlight to dry. Excessive heat can warp synthetic foams and melt eco-friendly adhesives.
    • Reapply DWR Treatments: Over time, the outer water-repellent coating on synthetic uppers wears off. Spray them periodically with a eco-friendly, water-based DWR spray to maintain moisture shedding.

    Frequently Asked Questions (FAQs)

    1. Are vegan hiking boots as durable as leather boots?

    High-end synthetic vegan boots (like those built with Cordura mesh or ballistic textiles) match or even exceed the durability of traditional leather while shedding weight. However, ultra-lightweight mesh models may wear out slightly faster than thick, full-grain leather.

    2. How can I verify if a hiking boot is 100% vegan?

    Check the manufacturer’s specifications for explicit mentions of “synthetic,” “man-made,” or “vegan-certified.” Look closely at the glue used, as some brands use synthetic adhesives even if the upper is fabric. Brands like La Sportiva, Merrell, and Adidas clearly label their vegan-friendly lines.

    3. Do recycled plastic hiking boots feel different on feet?

    Not at all. Recycled polyester and upcycled ocean plastics are engineered into high-performance technical threads that feel identical to virgin synthetic fibers, offering the same breathability and strength.

    4. Are waterproof vegan boots hot in the summer?

    Waterproof membranes (like GORE-TEX) can trap some heat in scorching summer temperatures. For hot, dry climates like Texas, many vegan hikers prefer non-waterproof, highly breathable mesh trail shoes.

    5. Do synthetic vegan boots require a break-in period?

    Generally, no. Synthetic and textile uppers are flexible right out of the box, meaning you can take them on a long day hike immediately without worrying about painful blisters.

    6. Can I wash my synthetic hiking boots in a washing machine?

    No. Machine washing subjects your boots to violent agitation and extreme tumbling that can break down structural glues, ruin waterproof membranes, and warp the sole out of shape. Always hand wash them.

    7. Do vegan hiking boots offer good ankle support?

    Yes, mid-height synthetic vegan boots (such as the La Sportiva Ultra Raptor II Mid) offer robust ankle stability and protective collars similar to traditional leather hiking boots.

    8. What is the best way to dry wet synthetic boots?

    Remove the insoles, loosen the laces, pull the tongue forward, and let them air dry in a well-ventilated room at normal room temperature. Stuffing them with clean newspaper accelerates the process.

    9. Are vegan boots more expensive than regular leather boots?

    Not necessarily. Vegan hiking boots span the exact same price spectrum as leather boots, ranging from budget-friendly options around $100 to high-performance technical models costing $180 to $220+.

    10. Do recycled materials compromise the waterproof integrity of the boot?

    No. Waterproofing is handled by an internal membrane (such as an inner bootie). The outer recycled fabric serves as a protective, eco-friendly shell, meaning waterproofing performance remains uncompromised.

    Conclusion

    Stepping onto the trail in a pair of top-rated, vegan-friendly hiking boots made from synthetic and recycled materials allows you to explore the great outdoors while aligning your footwear choices with your ethical and environmental values. From the rugged peaks of Washington and New York to the sun-baked trails of California and Texas, modern eco-conscious boots deliver elite performance, featherweight agility, and cruelty-free comfort. Choose your ideal pair, lace up, and tread lightly on your next wilderness adventure.