Blog

  • Best supportive hiking shoes for older adults with knee and ankle joint pain

    Best supportive hiking shoes for older adults with knee and ankle joint pain

    Age is just a number, and the call of the outdoors only grows sweeter with time. Whether you are taking leisurely weekend nature walks in Texas, exploring the lush coastal forests of Washington, tackling rolling hills in New York, or enjoying scenic vistas across California and San Francisco, hiking remains one of the best ways to stay physically and mentally vibrant.

    However, as we age, our bodies change. Years of walking, running, and living take a toll on our joints. If you experience aching knees, stiff ankles, or general joint discomfort, standard minimalist footwear or worn-out sneakers will no longer suffice. Every downward step sends a shockwave up through your ankles, knees, and lower back.

    Finding the best supportive hiking shoes for older adults with knee and ankle joint pain is essential to keeping you safe, stable, and pain-free on the trail. This comprehensive guide explores how proper footwear protects aging joints, features to look for, top-rated shoe recommendations, and expert-backed tips to preserve your mobility.

    Understanding Joint Pain: Why Footwear Matters for Knees and Ankles

    When hiking, your lower extremities absorb forces equal to two to three times your body weight with every single step. When you hit uneven dirt, rocks, or roots, your ankles must stabilize your body, while your knees absorb the vertical impact—especially during descents.

    1. The Shock Absorption Equation (Protecting the Knees)

    As we age, the cartilage cushioning our knee joints naturally thins. When you walk in shoes with rigid, unyielding soles or thin, worn-out foam, the ground impact transfers directly into your knees. Supportive hiking shoes with high-grade, cushioned midsoles (like EVA or supercritical foams) act as shock absorbers, dramatically reducing the percussive load transmitted to your knee joints.

    2. Stability and Proprioception (Protecting the Ankles)

    Ankle joint pain often stems from instability, arthritis, or previous sprains. If your foot rolls inward (overpronation) or outward inside a loose shoe, your ankle muscles must overcompensate, leading to fatigue and sharp joint aches. Supportive footwear features rigid heel counters, wide structural platforms, and supportive midsoles that keep your foot tracking in a straight, stable line.

    Critical Features to Look For in Joint-Supportive Hiking Shoes

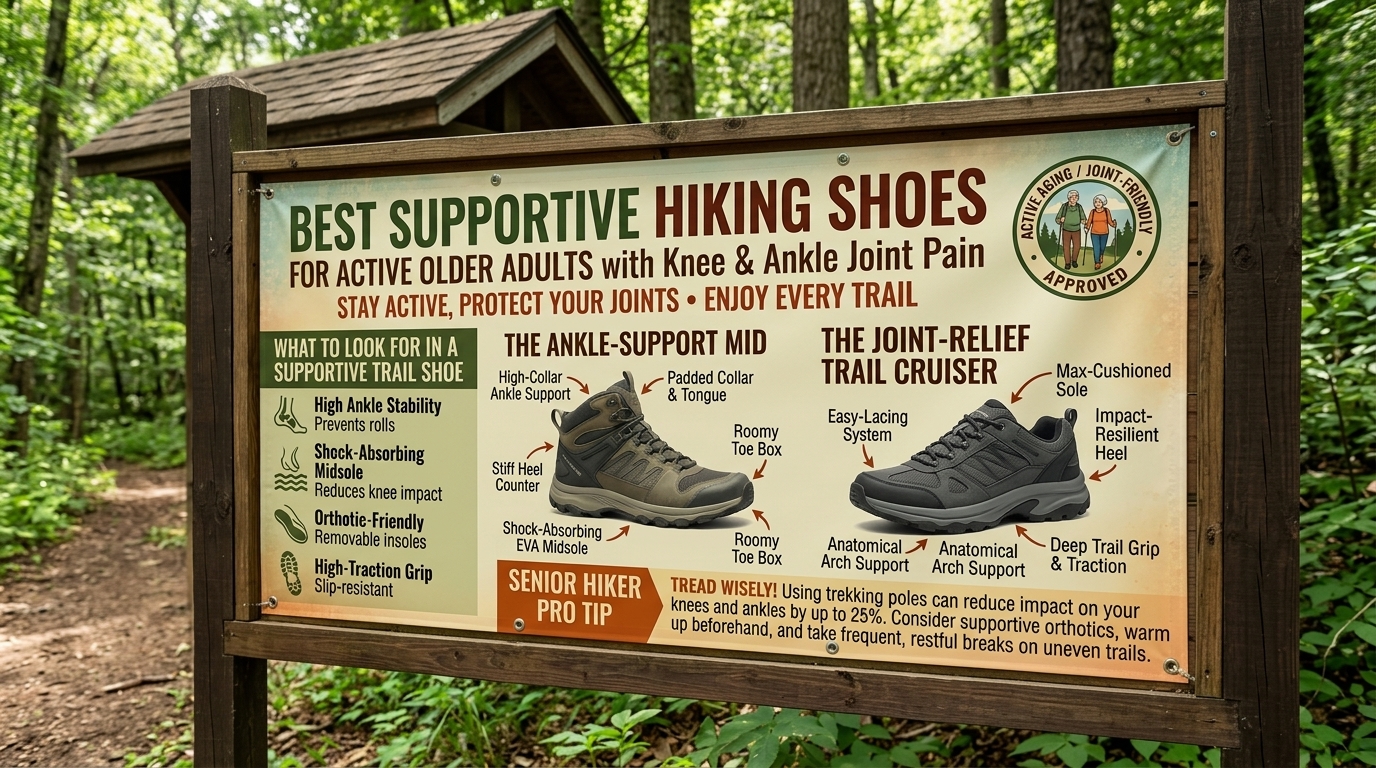
    When shopping for hiking footwear designed to alleviate knee and ankle pain, do not compromise on these four architectural pillars:

    • Plush Midsole Cushioning (Max or Moderate Stack): Look for shoes with generous, shock-absorbing midsoles that cushion impact without feeling unstable. Avoid ultra-minimalist or zero-drop shoes if you suffer from severe knee arthritis, as they place higher demands on your lower leg joints.
    • Mid-Height Ankle Support (Optional vs. Low Top): While some hikers prefer low-top trail runners for weight savings, older adults with chronic ankle instability often benefit immensely from a lightweight mid-cut boot that provides gentle collar support around the ankle bones.
    • Firm Arch Support and Orthopedic Compatibility: Proper arch support prevents the foot from collapsing inward, which naturally forces the knee inward (valgus stress) and exacerbates patellar knee pain. Ensure the shoe has a robust arch or allows you to insert custom orthopedic insoles.
    • Rocker Sole Geometry: Many modern joint-friendly hiking shoes feature a curved “rocker” shape in the outsole. This design rolls your foot smoothly from heel strike to toe-off, reducing the bending strain on your ankle joint and minimizing knee fatigue.

    Top-Rated Hiking Shoes and Boots for Joint Relief

    To help you choose the right footwear for your next outdoor excursion, here are the top-rated models praised by older adults and outdoor enthusiasts for superior knee and ankle support.

    1. Hoka Anacapa 2 Mid GTX (or Hoka Kaha 2 GTX)

    • Why It Works: Hoka is universally renowned for its maximalist cushioning. The Anacapa 2 Mid GTX features a chunky, highly shock-absorbing foam midsole that acts like a pillow for your joints, absorbing harsh impacts on rocky descents. Despite its cushion, it includes a lightweight mid-cut ankle collar and a Vibram Megagrip outsole for secure traction, making it an elite choice for hikers with severe knee arthritis.

    2. Brooks Cascadia (17 or Latest Edition) / Cascadia Mid GTX

    • Why It Works: If you prefer a lighter, agile shoe with supreme stability, the Brooks Cascadia line features a specialized Pivot All-Terrain Stability System. This acts like a suspension system for your feet, keeping your foot level on uneven ground and preventing the lateral rolling that triggers ankle pain. The balanced cushioning protects knees without feeling overly bulky.

    3. Merrell Moab 3 Mid Waterproof (with Custom Insoles)

    • Why It Works: The Merrell Moab is a classic staple known for its out-of-the-box comfort and available Wide widths. For older adults with bunions, wide feet, or joint pain, the Moab offers a stable, supportive nylon arch shank and a sturdy heel counter that locks the foot in place. Pair it with a supportive aftermarket insole (like Superfeet), and you have a powerhouse of joint protection.

    4. KEEN Targhee IV Mid Waterproof

    • Why It Works: KEEN is famous for its anatomical, wide-splay toe boxes and robust structural integrity. The Targhee series features an internal ESS shank that provides torsional stability, meaning the shoe resists twisting when you step on sharp rocks. This torsional rigidity prevents your ankle from torquing sideways, safeguarding weak joints.

    Essential Tips for Joint-Friendly Hiking

    Proper footwear is your primary defense, but combining your shoes with these smart hiking practices will ensure a pain-free trek:

    • Use Trekking Poles: Trekking poles are an absolute game-changer for older adults. By converting your hike into a “four-wheel-drive” experience, poles transfer up to 25% of your body weight away from your lower body, reducing load on aching knees by thousands of pounds per mile.
    • Take Shorter, Quicker Strides: When going downhill—the most treacherous part for knee pain—resist the urge to take long, lunging steps. Take short, controlled steps with your knees slightly bent to allow your muscle quadriceps to absorb the load rather than your joint cartilage.
    • Replace Your Shoes Regularly: The shock-absorbing foam inside hiking shoes packs out and loses its elasticity after 350 to 500 miles. If your shoes look fine on the outside but your knees hurt after every hike, your midsoles are likely dead and need replacing.
    • Warm Up Before Hitting the Trail: Spend 5 to 10 minutes doing gentle leg swings, ankle rolls, and knee bends before starting your hike to lubricate the joint synovial fluid.

    Frequently Asked Questions (FAQs)

    1. Are hiking boots better than hiking shoes for knee and ankle pain?

    It depends on your specific pain profile. If you have chronic ankle instability, a lightweight mid-height boot provides gentle external guidance. However, if your main issue is knee pain, a lightweight cushioned hiking shoe or trail runner with excellent shock absorption is often preferred to reduce overall leg lifting weight.

    2. Can custom orthotics be used in hiking shoes?

    Yes! In fact, many older adults with joint pain benefit greatly from removing factory insoles and inserting podiatrist-prescribed custom orthotics or supportive over-the-counter insoles (like Superfeet) into hiking shoes with removable footbeds.

    3. Why do my knees hurt more going downhill than uphill?

    Going downhill involves eccentric muscle contractions, where your quadriceps and knees work overtime to brake your forward momentum against gravity. This creates massive impact spikes across the patellofemoral joint, which is why cushioned shoes and trekking poles are crucial for descents.

    4. Do zero-drop shoes help or hurt joint pain?

    For most older adults with knee and ankle joint pain, zero-drop shoes (where the heel and toe are level) can exacerbate discomfort because they place extra stretching tension on the Achilles tendon and calf muscles, which can indirectly increase joint strain. A shoe with a slight heel-to-toe drop (8mm to 12mm) is generally much more forgiving on aging joints.

    5. How do I know if my hiking shoes have enough cushion for joint protection?

    If you can easily feel sharp rocks poking through the bottom of your shoe when walking on gravel, the midsole foam is too thin. Look for shoes with a medium-to-high stack height that isolate your joints from harsh stone impacts.

    6. Are heavier leather boots bad for joint pain?

    Traditional full-grain leather boots are extremely durable, but they are also very heavy. Extra weight on your feet multiplies leg fatigue over long distances, which can weaken your form and stress sore joints near the end of a hike. Modern lightweight synthetic boots with high cushioning are often easier on joints.

    7. How can I strengthen my ankles and knees at home?

    Simple physical therapy exercises—such as single-leg balance stands, seated leg extensions with light resistance, calf raises, and step-downs—strengthen the supporting muscles around your joints, providing natural biological support on the trail.

    8. Should I buy wide-width hiking shoes even if I don’t have wide feet?

    Many older adults experience foot spreading or foot swelling over long hikes. Choosing a shoe with a roomy toe box or a dedicated wide width prevents your feet from being constricted, which improves your natural balance and reduces tension radiating up into your ankles.

    9. How often should I rest during a hike to protect my joints?

    A good rule of thumb is to take a short 3-to-5-minute rest break every 30 to 45 minutes. Sit down, take your pack off, let your joints decompress, and hydrate to keep your cartilage and muscles functioning smoothly.

    10. Can trekking poles really replace ankle braces?

    While trekking poles do not immobilize an ankle like a medical brace, they provide two extra points of contact that drastically improve your overall balance, preventing the missteps and wobbles that cause ankle rolls in the first place.

    Conclusion

    Joint pain should never be a barrier that keeps you locked indoors. By investing in the right footwear—such as maximalist cushioned boots from Hoka, stable trail shoes from Brooks, or spacious, supportive models from KEEN and Merrell—you can drastically reduce the percussive shock hitting your knees and stabilize vulnerable ankles. Combine your new shoes with trekking poles, mindful pacing, and proper warm-ups, and you will be ready to explore scenic trails across Texas, New York, California, Washington, and San Francisco with comfort, confidence, and joy for years to come.
  • How to keep your feet dry while hiking through deep swampy mud and streams

    How to keep your feet dry while hiking through deep swampy mud and streams

    Few trail obstacles test a hiker’s resolve quite like a vast expanse of knee-deep, sucking swamp mud or a roaring, ice-cold stream crossing. Whether you are navigating boggy rainforest trails in Washington, dealing with coastal marine layers and damp lowlands in San Francisco and California, exploring saturated woodlands in New York, or trekking through unpredictable flood zones and creeks in Texas, wet feet are an occupational hazard for outdoor enthusiasts.

    When moisture breaches your defenses, it brings more than just discomfort. Constant wetness leads to severe skin maceration, painful friction hotspots, debilitating blisters, and, in cold conditions, the looming threat of hypothermia.

    The eternal debate among backpackers splits into two camps: Is it actually possible to keep your feet dry, or should you embrace the wetness and focus on management?

    This comprehensive, highly detailed guide explores expert-backed techniques, gear setups, and field strategies to keep your feet completely dry through deep mud and streams—along with what to do when the water inevitably wins.

    Philosophy 101: The “Keep Dry” Setup vs. The “Accept the Wet” Strategy

    Before hitting a notoriously soggy trail, you must choose your tactical approach based on the environment:

    1. The Fortress Approach (Keeping Dry): Ideal for cold climates, early spring “mud seasons,” or short-day excursions where stepping into water is occasional. This relies on high-shaft waterproof boots, specialized gaiters, and sometimes waterproof socks.
    2. The Hydrophilic Approach (Embracing Wetness): Popular among long-distance backpackers in warm weather. This method utilizes lightweight, non-waterproof mesh trail runners that let water in just as easily as they let it out, paired with fast-drying socks.

    If your objective is to maintain completely dry feet through deep swamps and rushing streams, you must build a robust, multi-layered defensive system.

    Essential Gear Arsenal to Block Deep Water and Mud

    If you choose the fortress approach, standard low-cut shoes and casual socks will fail instantly. You need a specialized gear lineup engineered to repel mud and standing water.

    • High-Shaft Waterproof Boots: Look for full-grain leather or heavy-duty synthetic boots featuring integrated waterproof membranes (like GORE-TEX or OutDry) with an ankle height of 6 to 8 inches.
    • Taller Mountaineering or Expedition Gaiters: Low trail gaiters keep dust out, but deep swamp mud requires knee-high waterproof gaiters (such as Outdoor Research Crocodiles). These seal the gap between your pants and your boots, preventing slop from spilling over the collar.
    • Waterproof Socks (Socks with Membranes): Brands like SealSkinz or Rocky GORE-TEX Socks feature an internal waterproof barrier. Worn between your inner sock and outer shoe, they act as a secondary defense line if external water breaches your boots.
    • Sturdy Trekking Poles: Essential for probing the depth of murky swamp water or testing slippery stream beds before placing your weight down.

    Step-by-Step Techniques for Conquering Deep Mud

    Swamp mud is deceptive. Step into the wrong spot, and you can sink knee-deep, creating a vacuum lock that pulls your boots right off your feet.

    Step 1: Probe Before You Tread

    Never blindly step into a massive mud pit. Use your trekking poles to test the consistency and depth of the mire. If the pole sinks rapidly without hitting a solid bottom, look for a bypass or step on embedded roots, rocks, or elevated tussocks.

    Step 2: Secure Your Laces and Gaiters

    Ensure your high-top gaiters are cinched tightly around your calves and securely hooked to your boot laces. Loose gaiters allow thick mud to funnel down into the top of your footwear, breaking the seal.

    Step 3: The “Penguin Glide” Technique

    When traversing deep, sticky mud, avoid lifting your feet vertically—the vacuum suction will pull your boots right off your feet, leaving you stepping into muck in your socks. Instead, glide your feet forward horizontally or pull your foot up by flexing your ankle and pointing your toes downward to break the suction seal.

    Step-by-Step Techniques for Safe Stream Crossings

    Streams present a dynamic hazard where a single misstep means total immersion.

    Step 1: Unclip Your Pack’s Hip Belt

    Before stepping into a rushing stream, always unbuckle the hip belt and sternum strap of your backpack. If you lose your footing and fall into the current, a heavy backpack will act like a turtle shell, pinning you underwater. Unbuckling allows you to ditch the pack instantly if you drift.

    Step 2: Face Upstream and Use a Tripod Stance

    Cross rivers diagonally facing slightly upstream. Use your trekking poles to establish a stable three-point contact stance at all times, moving one limb (either a pole or a foot) at a time.

    Step 3: Keep Your Boots On (or Switch to Dedicated Wading Shoes)

    While walking barefoot across a rocky stream feels natural, it invites severe cuts, deep bruises, and slips. If you are committed to keeping your hiking boots completely dry, pack lightweight camp sandals (like Crocs or water shoes) to wear during stream crossings, then thoroughly dry your feet before putting your dry hiking socks and boots back on.

    Proactive Foot Care: What to Do When Water Gets In

    Despite your best efforts, a rogue wave or a knee-deep bog might submerge your boots. Once water breaches your waterproof barrier, the game changes entirely: trapped water cannot escape easily, turning your boots into a miniature foot bath.

    • Drain and Dry Immediately: At your next break, strip off your boots and socks. Wipe your feet completely dry with a small microfiber towel.
    • Apply Anti-Friction Balm: Wet skin softens rapidly (maceration) and blisters within minutes. Slather your feet with anti-chafe balm or Glide stick to create a moisture-repellent barrier.
    • Put on Fresh, Dry Socks: Never put wet socks back onto dry feet. Always keep a dedicated pair of dry merino wool socks stored inside a ziplock bag in your pack exclusively for emergencies or evening camp use.

    Frequently Asked Questions (FAQs)

    1. Are waterproof boots actually effective in deep swamps?

    Waterproof boots work brilliantly for shallow puddles, morning dew, and light rain. However, if the water or mud level rises above the collar of your boot (typically 6 inches), it will pour directly inside over the top, trapping the water inside the membrane.

    2. Should I wear waterproof socks for hiking?

    Yes, waterproof socks (like Gore-Tex or membrane socks) are fantastic insurance policies. Even if your boots get completely soaked crossing a stream, a quality waterproof sock worn over a thin wool liner will keep your actual skin dry.

    3. How do I prevent my boots from getting sucked off my feet in deep mud?

    Thick, suction-heavy swamp mud creates a vacuum. Ensure your boots are laced snugly around the instep and ankle, and wear tall, securely buckled gaiters that prevent mud from sliding down into the throat of the shoe.

    4. Is it better to walk through the center of a muddy trail or around the edges?

    Always walk directly through the center of the trail. Walking around the edges to avoid mud widens the trail, destroys fragile vegetation, accelerates erosion, and turns a narrow path into an environmental scar.

    5. What is the fastest way to dry wet hiking boots overnight?

    Remove the insoles, pull the tongue forward, and stuff the interior tightly with dry newspaper, paper towels, or spare clothing to absorb internal moisture. If camping, you can fill Nalgene bottles with warm water and place them inside the boots to accelerate drying.

    6. Can I use plastic grocery bags over my socks to keep my feet dry?

    While classic “plastic bag booties” (putting grocery bags over your socks inside your shoes) keep water out temporarily, they trap 100% of your foot sweat. Within an hour, your feet will be swimming in your own perspiration, leading to severe skin blistering.

    7. How do I safely cross a fast-flowing mountain stream?

    Always unbuckle your pack’s hip belt, use trekking poles for balance, cross at a wide, shallow riffle rather than a deep pool, and face diagonally upstream against the current. If the water is above your knees and moving rapidly, turn back.

    8. What socks are best for wet-weather hiking?

    Always wear high-density merino wool socks. Unlike cotton—which retains moisture, loses its shape, and causes painful blisters—merino wool naturally wicks moisture and retains its thermal insulating properties even when damp.

    9. Should I grease or wax my leather boots for swamp hiking?

    Yes. Regularly treating full-grain leather hiking boots with natural waxes, nikwax, or leather conditioners saturates the pores of the hide, providing an exceptional barrier against prolonged moisture and mud absorption.

    10. What should I do if my skin starts turning white and wrinkly from moisture?

    That is trench foot or severe skin maceration. Stop immediately, dry your feet completely in the air and sun, apply dry powder or anti-friction balm, and put on a fresh, bone-dry pair of wool socks.

    Conclusion

    Hiking through deep swampy mud and rushing streams is an inevitable adventure for outdoor enthusiasts exploring diverse landscapes from Washington and San Francisco to New York and Texas. While keeping your feet 100% dry requires a meticulous combination of high-shaft waterproof boots, knee-high gaiters, and careful line-picking, mastering trail resilience ensures that a little water won’t dampen your spirit. Equip yourself with the right gear, respect the power of deep water, practice proactive foot care, and enjoy every muddy mile of the journey.

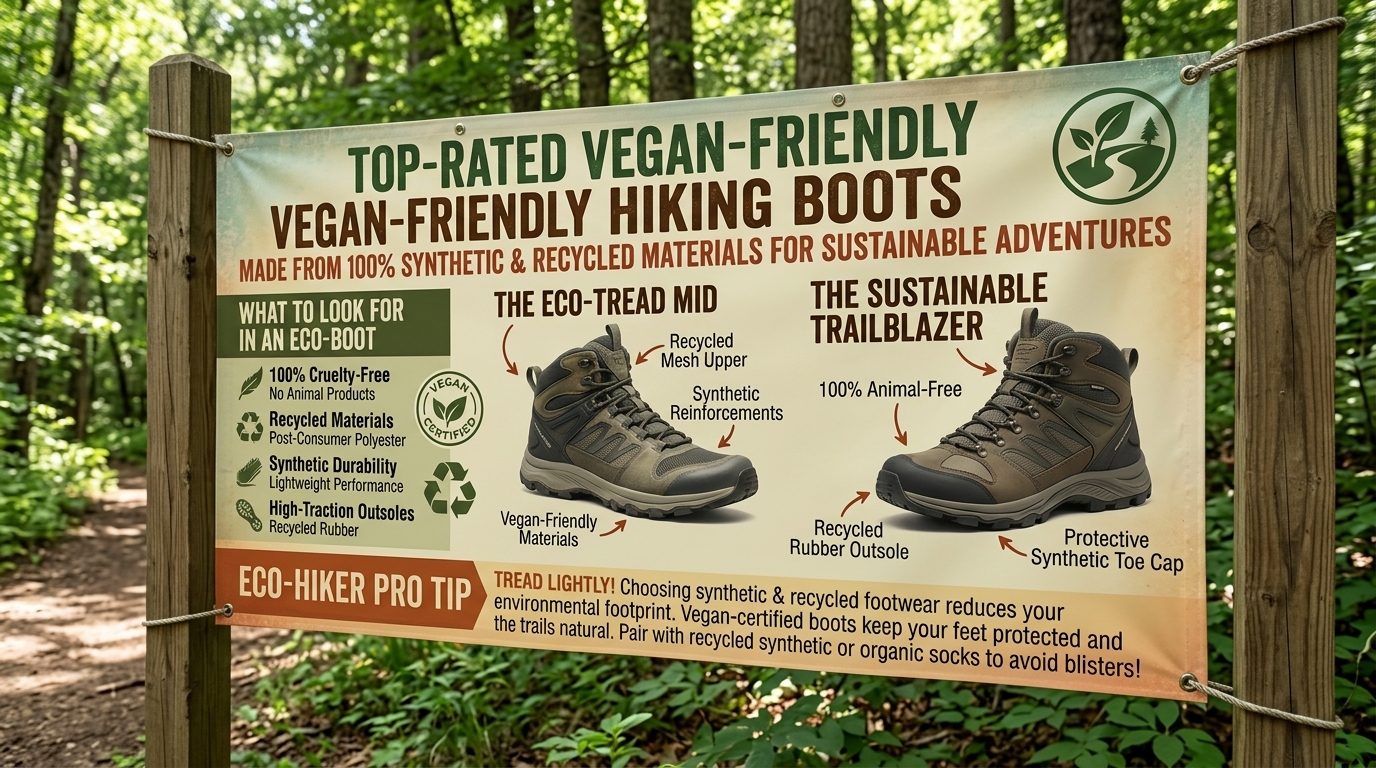
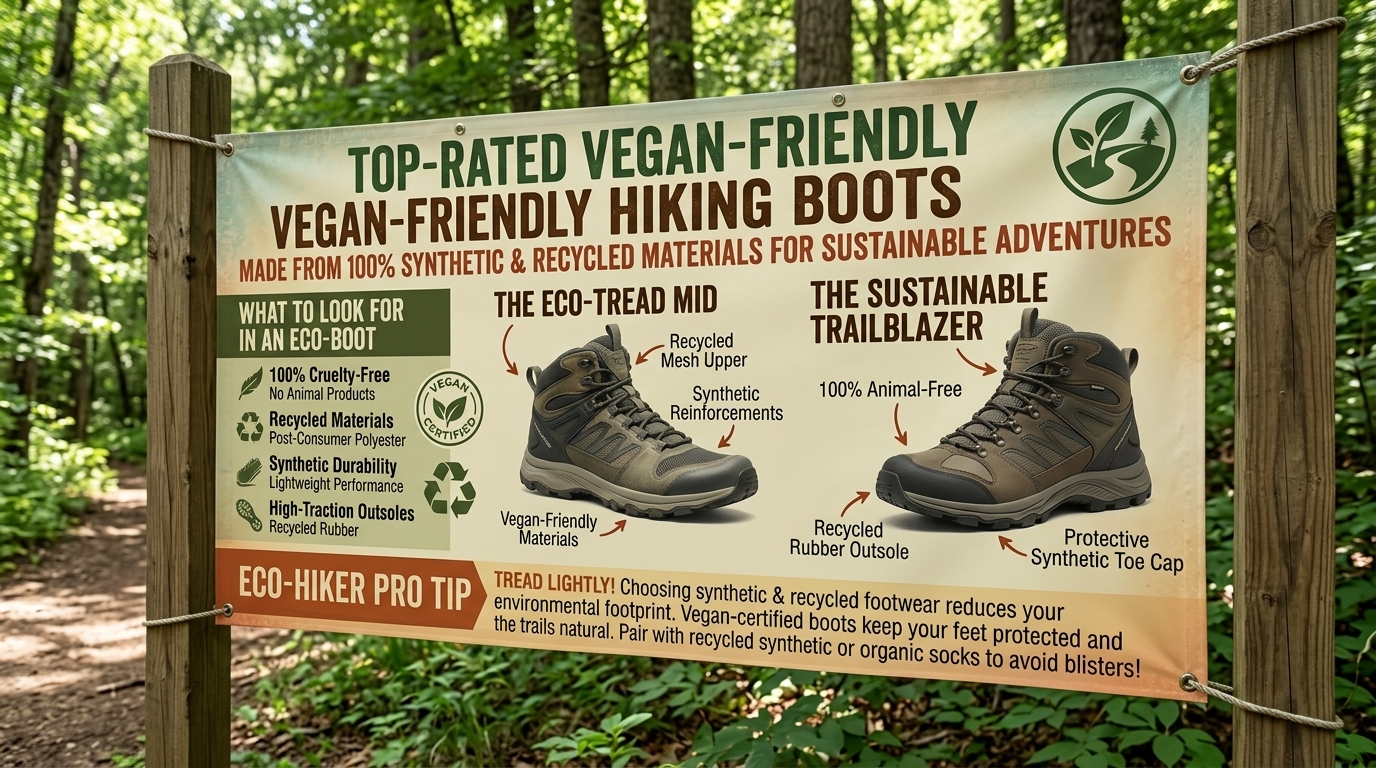
  • Top rated vegan friendly hiking boots made from synthetic and recycled materials

    Top rated vegan friendly hiking boots made from synthetic and recycled materials

    The modern outdoor industry is undergoing a massive ethical and ecological transformation. For decades, traditional hiking boots relied heavily on full-grain leather, suede, and animal-derived glues. Today, conscious outdoor enthusiasts no longer have to choose between high-performance trail footwear and their ethical values.

    The rise of advanced synthetic textiles, plant-based innovations, and closed-loop recycled plastics has made it possible to engineer hiking boots that outperform old-school leather models. These vegan-friendly boots offer superior breathability, lighter weights, rapid drying times, and zero animal cruelty—all while helping clean up our oceans and landfills.

    Whether you are navigating coastal fog in San Francisco and Washington, tackling rocky multi-day ascents in New York and California, or training on rugged trails in Texas, this comprehensive guide covers the top-rated vegan hiking boots built from synthetic and recycled materials, alongside essential buying tips and regional care strategies.

    What Makes a Hiking Boot “Vegan-Friendly”?

    At first glance, a pair of hiking boots might look like simple fabric and rubber, but animal products hide in surprising places throughout traditional outdoor gear. To be certified or genuinely considered vegan, a hiking boot must completely omit:

    • Full-Grain Leather, Suede, and Nubuck: Hides sourced from cows, pigs, or goats.
    • Animal-Based Glues: Traditional shoemaking adhesives frequently use collagen derived from horse or cow connective tissues. True vegan brands explicitly use synthetic, plant-based, or resin glues.
    • Wool Linings or Shearling: Often found in winter models as insulation or comfort footbeds.

    Instead, top-tier vegan boots utilize high-performance synthetics like Cordura nylon, recycled polyester mesh, Kevlar reinforcements, and technical waterproof membranes (like GORE-TEX or proprietary waterproof liners) paired with cruelty-free binding agents.

    Key Benefits of Synthetic and Recycled Hiking Boots

    Choosing synthetic and recycled vegan footwear offers distinct functional advantages on the trail over traditional leather options:

    1. Featherweight Construction: Synthetic meshes and recycled plastics weigh significantly less than heavy leather. This reduces foot and ankle fatigue over high-mileage days.
    2. Zero Break-In Period: While stiff full-grain leather can take weeks of painful blistering to soften, synthetic vegan boots are supple right out of the box.
    3. Eco-Friendly Circular Economy: Many leading brands utilize ocean plastics, recycled polyester (rPET) laces and linings, and post-consumer rubber outsoles, actively diverting waste from landfills.
    4. Faster Drying Times: Synthetic materials absorb minimal water compared to leather. If your boots get saturated during a stream crossing or a sudden downpour, they dry out remarkably fast.

    Top-Rated Vegan Hiking Boots for the Trail

    To help you find the perfect pair for your next trek, here are the highest-rated vegan hiking boots on the market, combining eco-friendly recycled components with uncompromising trail performance.

    1. La Sportiva Ultra Raptor II Mid GTX

    • Materials: AirMesh synthetic upper, microfiber reinforcements, and GORE-TEX waterproof membrane with recycled components; 100% vegan-certified construction.
    • Why It Works: Regarded by many thru-hikers as the gold standard for synthetic technical footwear, the Ultra Raptor II Mid GTX delivers the rugged protection of a heavy leather boot at a fraction of the weight. Featuring an aggressive FriXion rubber outsole and a supportive stability chassis, it handles steep, rocky terrain in California, New York, and Washington with absolute confidence.

    2. Merrell Moab Speed 2 Mid GTX (or Moab Speed Mid)

    • Materials: 100% recycled mesh upper, recycled laces, webbing, and mesh lining, paired with a GORE-TEX waterproof membrane and FloatPro Foam midsole.
    • Why It Works: Merrell has made sustainability a core priority in their lineup. The Moab Speed 2 Mid takes the legendary, wide-friendly comfort of the original Moab and infuses it with eco-conscious recycled plastics. It features a Vibram TC5+ or XS Trek EVO outsole that delivers exceptional grip across wet and dry terrain while keeping your footprint light on the planet.

    3. Adidas Terrex Free Hiker 2.0 (Low or Mid)

    • Materials: Primeknit textile upper made with at least 50% Parley Ocean Plastic and 50% recycled polyester, boosted by Continental Rubber outsoles.
    • Why It Works: For hikers who prioritize supreme cushioning and a sock-like fit, the Adidas Terrex Free Hiker line is unmatched. The upper hugs your foot dynamically while actively utilizing upcycled marine plastic debris. The responsive Boost midsole cushions every step, making it an ideal choice for fast-paced day hikes and long-distance paths.

    4. Altra Lone Peak All-Weather Mid (Altra All-Wthr Mid)

    • Materials: Synthetic weather-resistant upper, balanced zero-drop platform, and MaxTrac sticky rubber outsole.
    • Why It Works: If you suffer from bunions or wide forefeet, the Altra Lone Peak All-Weather Mid is a game-changer. It features Altra’s signature foot-shaped toe box, allowing your toes to splay naturally without painful friction. While built with lightweight synthetic materials rather than heavy leather, it provides exceptional comfort for long-distance backpacking.

    Regional Performance: How Vegan Boots Handle Diverse Terrains

    Different environments test synthetic and recycled materials in unique ways:

    • Texas & California: Arid conditions, fine dust, and jagged granite require breathable mesh uppers and durable rock plates. Synthetic vegan shoes excel here because they vent heat rapidly and prevent overheating.
    • Washington & San Francisco: Coastal moisture, slick marine layers, and muddy forest floors demand robust waterproof membranes (like GORE-TEX) paired with deep, multi-directional rubber lugs to prevent slipping on wet tree roots.
    • New York: Rapidly changing weather—from humid summer heatwaves to slick autumn mud—highlights the versatility of lightweight synthetic boots that dry quickly after unexpected downpours.

    Essential Tips for Maintaining Vegan Hiking Boots

    To maximize the lifespan of your synthetic and recycled hiking boots, incorporate these simple maintenance habits:

    • Brush Away Dirt Regularly: Fine dust and dirt act like sandpaper on synthetic mesh fibers. Use a soft brush and lukewarm water to clean off mud after every hike.
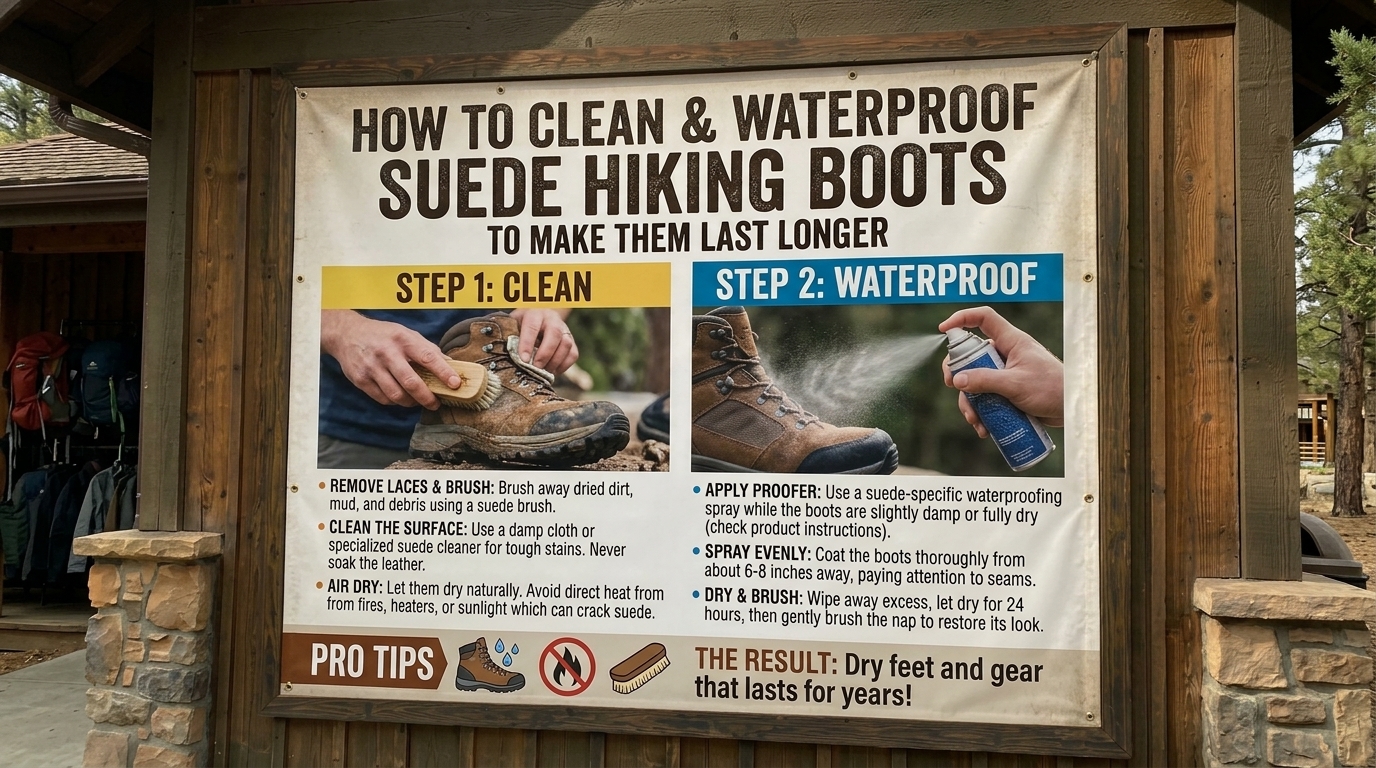
    • Avoid High Heat: Never place synthetic shoes near a campfire, heater, or in direct hot sunlight to dry. Excessive heat can warp synthetic foams and melt eco-friendly adhesives.
    • Reapply DWR Treatments: Over time, the outer water-repellent coating on synthetic uppers wears off. Spray them periodically with a eco-friendly, water-based DWR spray to maintain moisture shedding.

    Frequently Asked Questions (FAQs)

    1. Are vegan hiking boots as durable as leather boots?

    High-end synthetic vegan boots (like those built with Cordura mesh or ballistic textiles) match or even exceed the durability of traditional leather while shedding weight. However, ultra-lightweight mesh models may wear out slightly faster than thick, full-grain leather.

    2. How can I verify if a hiking boot is 100% vegan?

    Check the manufacturer’s specifications for explicit mentions of “synthetic,” “man-made,” or “vegan-certified.” Look closely at the glue used, as some brands use synthetic adhesives even if the upper is fabric. Brands like La Sportiva, Merrell, and Adidas clearly label their vegan-friendly lines.

    3. Do recycled plastic hiking boots feel different on feet?

    Not at all. Recycled polyester and upcycled ocean plastics are engineered into high-performance technical threads that feel identical to virgin synthetic fibers, offering the same breathability and strength.

    4. Are waterproof vegan boots hot in the summer?

    Waterproof membranes (like GORE-TEX) can trap some heat in scorching summer temperatures. For hot, dry climates like Texas, many vegan hikers prefer non-waterproof, highly breathable mesh trail shoes.

    5. Do synthetic vegan boots require a break-in period?

    Generally, no. Synthetic and textile uppers are flexible right out of the box, meaning you can take them on a long day hike immediately without worrying about painful blisters.

    6. Can I wash my synthetic hiking boots in a washing machine?

    No. Machine washing subjects your boots to violent agitation and extreme tumbling that can break down structural glues, ruin waterproof membranes, and warp the sole out of shape. Always hand wash them.

    7. Do vegan hiking boots offer good ankle support?

    Yes, mid-height synthetic vegan boots (such as the La Sportiva Ultra Raptor II Mid) offer robust ankle stability and protective collars similar to traditional leather hiking boots.

    8. What is the best way to dry wet synthetic boots?

    Remove the insoles, loosen the laces, pull the tongue forward, and let them air dry in a well-ventilated room at normal room temperature. Stuffing them with clean newspaper accelerates the process.

    9. Are vegan boots more expensive than regular leather boots?

    Not necessarily. Vegan hiking boots span the exact same price spectrum as leather boots, ranging from budget-friendly options around $100 to high-performance technical models costing $180 to $220+.

    10. Do recycled materials compromise the waterproof integrity of the boot?

    No. Waterproofing is handled by an internal membrane (such as an inner bootie). The outer recycled fabric serves as a protective, eco-friendly shell, meaning waterproofing performance remains uncompromised.

    Conclusion

    Stepping onto the trail in a pair of top-rated, vegan-friendly hiking boots made from synthetic and recycled materials allows you to explore the great outdoors while aligning your footwear choices with your ethical and environmental values. From the rugged peaks of Washington and New York to the sun-baked trails of California and Texas, modern eco-conscious boots deliver elite performance, featherweight agility, and cruelty-free comfort. Choose your ideal pair, lace up, and tread lightly on your next wilderness adventure.

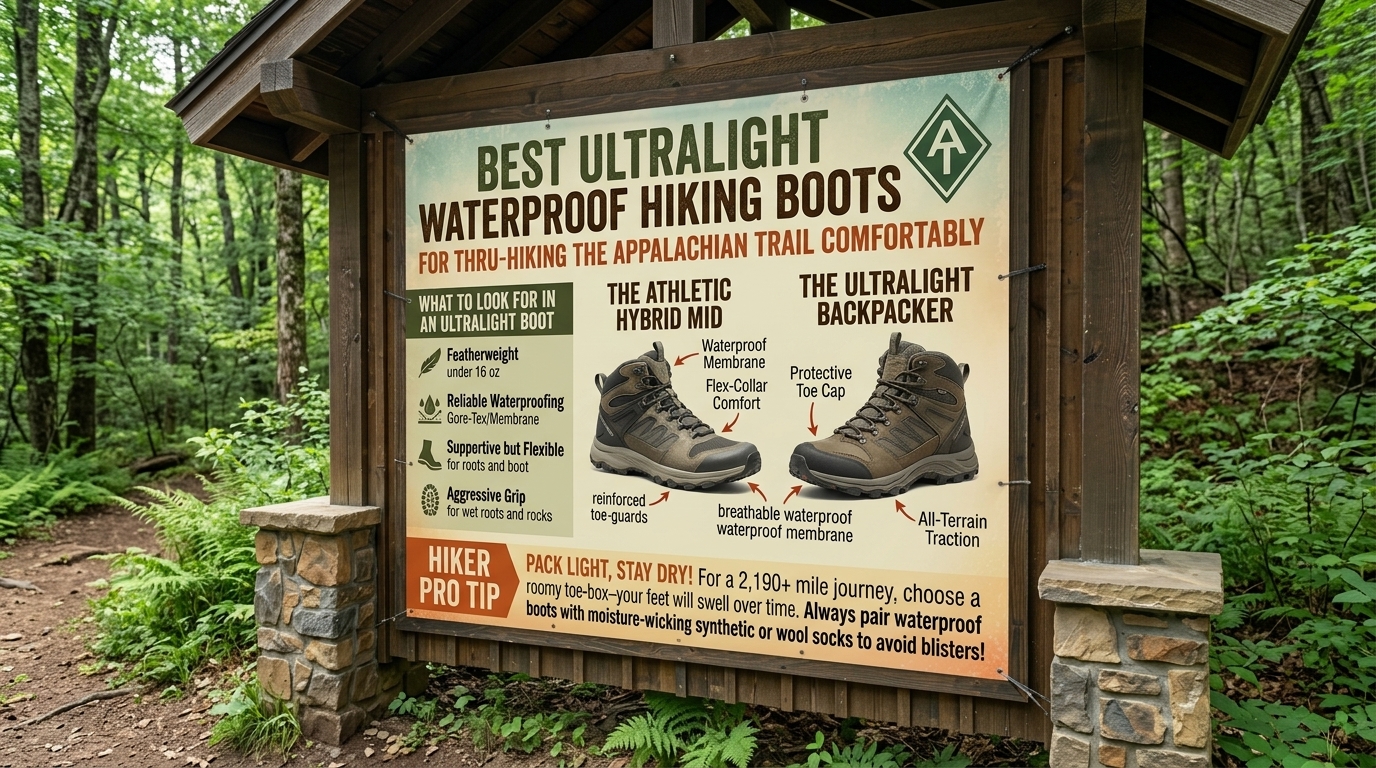
  • Best ultralight waterproof hiking boots for thru hiking the appalachian trail comfortably

    Best ultralight waterproof hiking boots for thru hiking the appalachian trail comfortably

    Embarking on a thru-hike of the legendary Appalachian Trail (AT) is a life-changing endeavor. Stretching over 2,190 miles from Springer Mountain in Georgia to Mount Katahdin in Maine, the AT presents every imaginable terrain and weather hazard: slick granite slabs in New York and New Jersey, relentless rocky ascents in Pennsylvania, deep mud and roots in Washington and New England, and unpredictable downpours across the eastern seaboard.

    For decades, the standard wisdom for thru-hikers was to wear heavy, stiff, full-grain leather boots. However, modern footwear technology has revolutionized long-distance trekking. Today’s thru-hikers demand gear that combines the speed and agility of trail runners with the essential protection and moisture defense of a dedicated boot.

    Enter the ultralight waterproof hiking boot.

    If you want to keep your feet dry through relentless mountain downpours, protect your ankles from hidden roots, and avoid the crushing leg fatigue caused by heavy footwear, choosing the right pair of ultralight waterproof boots is paramount. This comprehensive, highly optimized guide explores the best ultralight waterproof hiking boots for thru-hiking the Appalachian Trail, complete with expert tips, regional insights, and answers to your most pressing questions.

    The Appalachian Trail Footwear Dilemma: Waterproof vs. Ultralight

    When prepping for a 2,000+ mile journey, every single ounce on your feet multiplies exponentially. Biomechanical studies show that a single pound on your feet requires the same energy expenditure as carrying five pounds on your back.

    Historically, ultralight backpackers strictly opted for non-waterproof trail running shoes, arguing that once water gets into a waterproof shoe (either from deep puddles or heavy sweat), it takes too long to dry. However, the AT presents a unique challenge: it is notoriously damp, rainy, and muddy for months on end.

    Why Ultralight Waterproof Boots Hit the Sweet Spot on the AT

    1. Reduced Leg Fatigue: Weighing significantly less than traditional leather boots (typically under 25 to 30 ounces per pair), ultralight boots save your calf muscles and Achilles tendons over high-mileage days.
    2. Protection Against Puddles and Slop: In damp sections of the trail, an ultralight waterproof membrane keeps your feet dry from intermittent puddles, morning dew, and light drizzle.
    3. Ankle Support with Zero Bulk: While trail runners work well for many, thru-hikers carrying a fully loaded pack over the jagged rocks of Pennsylvania or the muddy roots of New England often appreciate the structural ankle stability of a lightweight mid-height boot.

    Key Features to Look For in AT Thru-Hiking Boots

    When evaluating boots for an Appalachian Trail thru-hike, standard comfort isn’t enough; you need durability that can withstand thousands of miles of intense abuse.

    • Weight: Look for boots that weigh under 30 ounces per pair. Every ounce saved keeps you moving efficiently over long distances.
    • Waterproof-Breathable Membranes: High-end membranes like GORE-TEX or proprietary waterproof liners keep external water out. Ensure the boot features a gusseted tongue to prevent water from spilling in over the laces.
    • Durable Outsoles (Vibram Megagrip or Equivalent): The AT is famous for wet tree roots and slick rocks. Sticky rubber outsoles with multi-directional lugs are mandatory to prevent sliding.
    • Toe Cap Protection: Bumping your toes against hidden rocks under forest leaves is an everyday occurrence on the AT. A robust rubber toe cap protects your nail beds from trauma.

    Top Ultralight Waterproof Hiking Boots for the Appalachian Trail

    To help you conquer the green tunnel in comfort, here are the top-performing ultralight waterproof boots engineered for long-distance thru-hiking.

    1. Salomon X Ultra 4 Mid GORE-TEX

    • Average Weight: Approx. 22 oz – 24 oz per pair
    • Why It Works: The Salomon X Ultra series is practically royalty among long-distance hikers. It bridges the gap between a technical trail runner and a supportive mid-height boot. Featuring a GORE-TEX waterproof membrane, an Advanced Chassis for lateral stability on rocky terrain, and a sticky Contagrip outsole, it offers incredible agility without sacrificing ankle support or moisture protection.

    2. Altra Lone Peak All-Weather Mid (Altra All-Wthr Mid)

    • Average Weight: Approx. 20 oz – 22 oz per pair
    • Why It Works: If you love the famous foot-shaped toe box of the Altra Lone Peak but need wet-weather protection, this is your boot. It features Altra’s signature zero-drop platform and a wide forefoot that allows your toes to splay naturally (preventing blisters and bunions over high mileage), coupled with a lightweight eVent or proprietary waterproof upper.

    3. Merrell Moab Speed Mid GORE-TEX

    • Average Weight: Approx. 25 oz per pair
    • Why It Works: Merrell took the legendary comfort of the Moab platform and redesigned it into a modern, weight-conscious speed hiker. Utilizing GORE-TEX waterproofing, float-pro foam midsoles, and a durable rock plate, it handles the punishing terrain of the AT while keeping your feet light, cushioned, and dry.

    4. Hoka Anacapa 2 Mid GTX

    • Average Weight: Approx. 27 oz per pair
    • Why It Works: For hikers who want maximalist cushioning to absorb the endless pounding of rocky trails, the Hoka Anacapa 2 Mid GTX delivers. Despite its chunky appearance, it is remarkably lightweight, utilizing a waterproof nubuck leather upper, GORE-TEX Invisible Fit technology, and a Vibram Megagrip outsole for supreme traction on wet AT granite.

    Essential Thru-Hiking Tips for Foot Care on the Appalachian Trail

    No matter how high-tech your boots are, a 2,000-mile footpath will test your feet to their absolute limits. Implement these proven strategies to prevent common trail injuries:

    • Sizing Up is Mandatory: Your feet will swell significantly over long days of walking, especially in warmer weather. Always buy your thru-hiking boots a full half-size to a full size larger than your normal street shoes to prevent toe jam and black toenails on descents.
    • Pack Multiple Pairs of Merino Wool Socks: Pair your waterproof boots with high-density merino wool socks. Merino wool naturally regulates temperature, resists odor, and keeps your feet warm even if they happen to get damp from sweat.
    • Air Out Your Feet at Camp: As soon as you roll into camp at the end of the day, take off your hiking boots and wet socks immediately. Let your feet breathe and dry out overnight, and switch to camp shoes or sandals.
    • Treat Hot Spots Instantly: Never ignore a hot spot or minor friction point. Stop immediately, apply a piece of Leukotape, moleskin, or anti-blister balm before a blister forms.

    Frequently Asked Questions (FAQs)

    1. Are waterproof boots too hot for summer thru-hiking on the Appalachian Trail?

    During the height of summer (July and August), waterproof boots can trap heat and sweat, especially in humid southern states like Georgia, North Carolina, and Virginia. Many thru-hikers choose waterproof boots for the damp spring starts and rainy northern sections (New York, Vermont, New Hampshire, Maine), while some switch to non-waterproof mesh shoes for mid-summer.

    2. How many pairs of boots will I go through on an AT thru-hike?

    Because ultralight boots use lightweight materials and soft rubber outsoles to save weight, most hikers go through 2 to 3 pairs of shoes or boots over the course of a 2,190-mile thru-hike.

    3. Do waterproof boots dry out if water gets inside?

    If water splashes over the collar of a waterproof boot or if your feet sweat heavily, moisture can get trapped inside the waterproof membrane. Drying them out takes longer than breathable mesh shoes, requiring you to remove the insoles and stuff them with dry socks or newspaper overnight.

    4. Is ankle support necessary for the Appalachian Trail?

    It depends on personal preference and ankle strength. While many modern thru-hikers use low-top trail runners, lightweight mid boots provide extra reassurance against ankle rolls when navigating the notoriously rocky, root-strewn paths of Pennsylvania and New England.

    5. Should I buy wide-width hiking boots for a thru-hike?

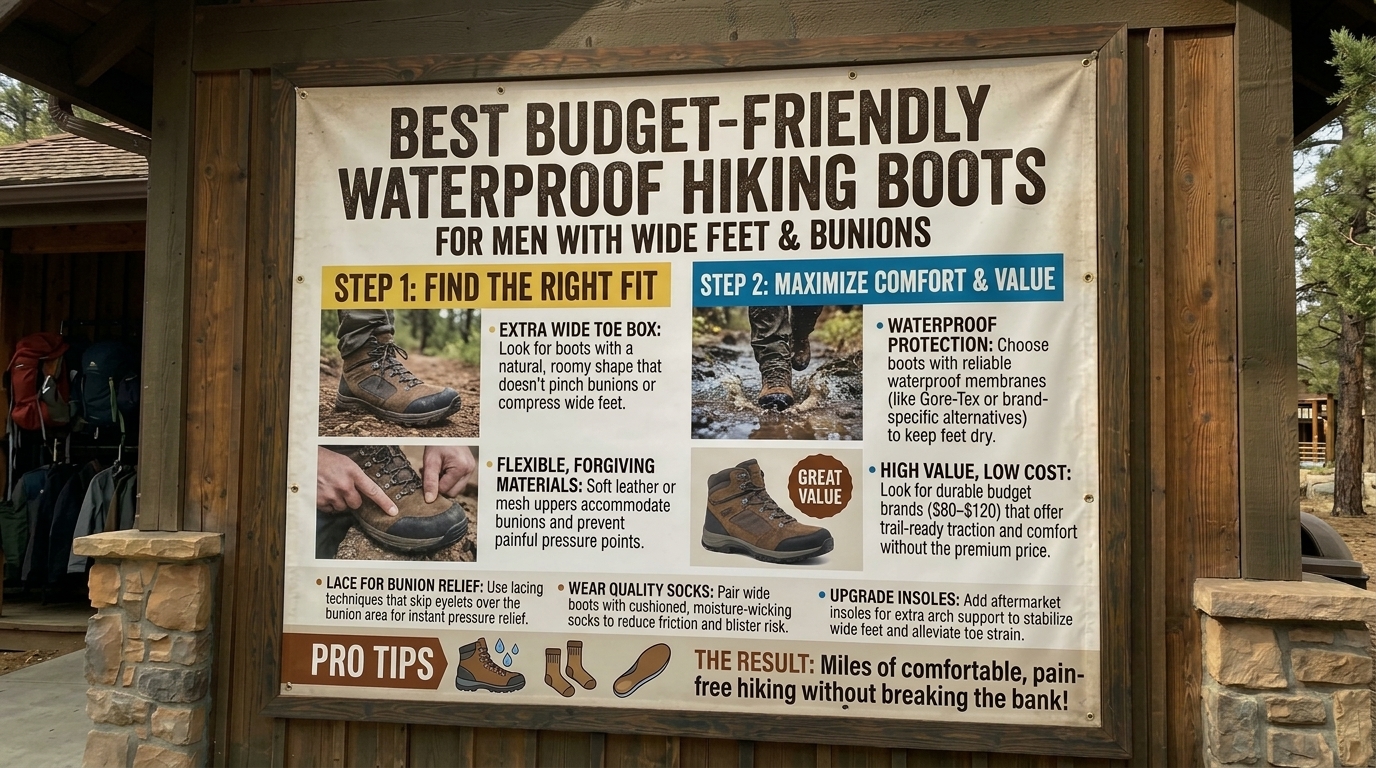
    If your feet tend to swell or if you have wide forefeet/bunions, buying dedicated wide-width (EE) boots or a brand with a naturally spacious toe box (like Altra) is crucial to prevent agonizing pressure and blisters.

    6. How do I prevent blisters when breaking in new boots on the trail?

    Wear your boots on short training hikes for a few weeks before your thru-hike. On the trail, wear moisture-wicking merino wool socks, keep your feet clean of dirt, and use athletic tape or blister pads at the first sign of friction.

    7. Are zero-drop boots good for the Appalachian Trail?

    Yes, many hikers successfully use zero-drop shoes like the Altra All-Wthr Mid. However, if you are not accustomed to zero-drop footwear, transition to them gradually months before your hike to avoid straining your Achilles tendons.

    8. What is the best way to clean my boots during an AT thru-hike?

    When you stop at trail towns or hostels, rinse off caked-on mud with water and a soft brush. Keeping mud off your boots prevents it from clogging the breathable pores of your waterproof membrane.

    9. Do I need gaiters with lightweight waterproof boots?

    Yes, wearing low-profile trail gaiters prevents small rocks, twigs, dirt, and sand from sliding over the collar of your boots as you hike through leaf litter on the AT.

    10. Can I get my boots repaired if they blow out mid-trail?

    Ultralight boots are built for performance and weight savings rather than lifetime durability. While minor sole separation can sometimes be fixed with gear glue (like Shoe Goo), most thru-hikers simply have a replacement pair shipped to an outfitter or post office along the trail when their boots wear out around the 500-to-800-mile mark.

    Conclusion

    Tackling an Appalachian Trail thru-hike requires careful gear curation, and your footwear choice is arguably the most important decision you will make. By selecting a pair of high-performance, ultralight waterproof hiking boots—such as the Salomon X Ultra 4 Mid GORE-TEX or Altra All-Wthr Mid—you secure the ideal balance of moisture protection, ankle security, and featherweight agility. Dial in your fit, take meticulous care of your feet, and step onto the trail ready to conquer every mile from Georgia to Maine.

  • How to properly lace hiking boots to prevent heel slippage and sore toes

    How to properly lace hiking boots to prevent heel slippage and sore toes

    Hitting the trail should be an absolute pleasure, but there are few discomforts on a hike quite as agonizing as heel slippage and bruised, sore toes. With every uphill step, your heel lifts out of the pocket, creating friction and developing into raw blisters. Then, when gravity pulls you down the mountain, your foot slides forward, smashing your toes repeatedly against the front of your boot. By the end of the day, you are left with agonizing pain, lost toenails, and ruined morale.

    The culprit isn’t always poor boot sizing; more often than not, it is improper lacing. Your feet change shape throughout the day, swell in the heat, and shift depending on the incline. Utilizing specialized lacing techniques allows you to customize the fit of your boot dynamically.

    Whether you are navigating steep switchbacks in California, traversing damp mountain passes in Washington, handling rocky trails in Texas, or escaping New York and San Francisco for weekend backpacking trips, mastering proper boot lacing will transform your comfort on the trail. This comprehensive guide details advanced lacing methods, professional tips, and troubleshooting strategies to keep your feet secure and pain-free.

    Why Heel Slippage and Sore Toes Happen

    Before looking at solutions, it helps to understand the mechanical forces at play inside your hiking boots.

    When you lace a boot uniformly tight from top to bottom, you treat your foot like a rigid block. However, human feet are dynamic structures. Your forefoot needs room to splay naturally, your midfoot needs a secure lockdown to prevent lateral sliding, and your ankle needs to be held firmly back into the heel pocket without cutting off circulation.

    • Causes of Heel Slippage: If the instep (the top of your foot) isn’t locked down securely, your entire foot slides forward and backward inside the boot. Every time your foot lifts, the heel separates from the counter, creating friction against your sock and skin.
    • Causes of Sore and Black Toes: Toe jam happens when your foot isn’t anchored at the ankle or midfoot. On descents, momentum drives your foot forward. If your laces aren’t holding your instep back, your toes crash violently against the interior toe box, bruising the nail beds and causing extreme pain.

    Step-by-Step Lacing Techniques to Fix Fit Issues

    Standard factory lacing (the classic criss-cross method) is a one-size-fits-all approach that rarely addresses specific anatomical quirks or terrain challenges. By implementing these specialized lacing techniques, you can completely alter how your boot fits.

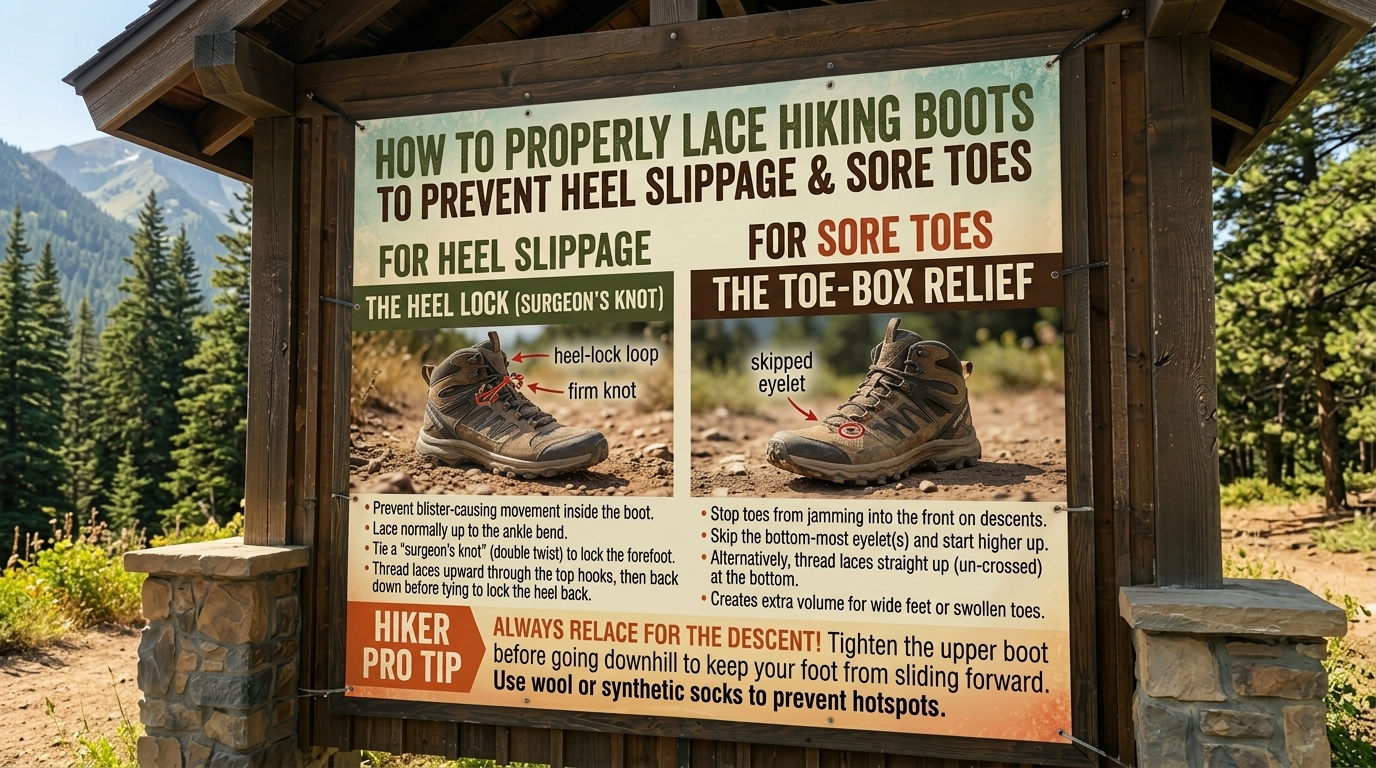
    1. The Surgeon’s Knot (The Ultimate Heel Lock)

    If your heels constantly slip up and down regardless of how hard you yank your laces, the surgeon’s knot is your best friend. This technique creates a specialized friction lock at the ankle eyelets, preventing upper lace tension from loosening.

    • How to Tie It:
      1. Lace your boots normally up to the eyelet just below where the ankle flexes.
      2. Take both lace ends and loop them around each other twice (like an overhand knot with an extra twist).
      3. Pull the laces outward to cinch the loop tight against the eyelet. The double twist creates internal friction that stops the lace from slipping backward.
      4. Continue lacing up through the remaining speed hooks or top eyelets normally and tie your final bow.

    2. Window Lacing / Box Lacing (Relieving Pressure on the Top of the Foot)

    If you have high arches or suffer from dorsal foot pain (where the tongue of the boot presses too hard against the top tendons), standard lacing can cause numbness and throbbing. Window lacing creates a “relief bridge” over the sensitive spot.

    • How to Tie It:
      1. Skip the standard criss-cross over the exact spot where you feel pressure.
      2. Instead of crossing the laces diagonally, run them straight up vertically to the next set of eyelets.
      3. Resume your normal criss-cross pattern above the pressure point. This distributes tension around the sensitive area while maintaining overall foot security.

    3. Toe-Relief Lacing (Creating Space for Wide Forefeet and Bunions)

    If your forefoot feels pinched or your toes are squished together, you need to reduce tension across the toe box before the laces even reach the midfoot.

    • How to Tie It:
      1. Start by threading your laces straight across the very bottom two eyelets (creating a horizontal bar rather than an X).
      2. Leave the next set of eyelets completely unlaced, or run the laces loosely.
      3. Begin your standard criss-cross lacing higher up on the midfoot where you actually need structural lockdown. This frees up the toe box to expand naturally.

    The Ultimate Pre-Hike Lacing Strategy: Uphill vs. Downhill Adjustments

    Your lacing shouldn’t be a “set-it-and-forget-it” task. Experienced hikers adjust their laces dynamically based on the topography of the trail.

    Adjusting for Steep Ascents (Going Up)

    When climbing steep hills, your ankles flex forward constantly.

    • The Strategy: Keep the ankle hooks slightly looser than normal to allow your ankle joint full range of motion without the collar digging into your Achilles tendon. However, keep the midfoot locked down so your foot doesn’t slide backward inside the boot.

    Adjusting for Steep Descents (Going Down)

    Going downhill is when toe trauma and heel slip peak.

    • The Strategy: Before you hit a long descent, pause and retie your boots. Tap your heel firmly on the ground to slide your foot all the way back into the heel pocket. Use the Surgeon’s Knot at the ankle to lock your heel firmly in place, and pull the midfoot laces snugger than usual to anchor your foot so it cannot slide forward into the toe box.

    Essential Tips for Preventing Boot Blisters and Foot Pain

    Beyond changing how you lace your boots, incorporating these proactive foot-care habits will completely eliminate trail-induced misery:

    • Upgrade Your Socks: Never wear 100% cotton socks on a hike. Cotton absorbs sweat, swells, loses its shape, and creates massive friction blisters. Always wear high-density, moisture-wicking merino wool or synthetic socks.
    • Consider Toe Socks or Liners: If your toes rub against each other, causing blisters between the digits, wearing thin toe socks (like Injinji) completely eliminates skin-on-skin friction.
    • Check Your Insoles: Factory insoles are often flimsy foam pads that offer zero arch support. Without proper arch support, your foot flattens out and spreads wider under a load, pushing your toes forward into the front of the boot. Upgrading to supportive aftermarket insoles locks the foot’s arch into place.
    • Keep Your Toenails Trimmed Short: Long toenails act like tiny hammers against the front of your boot on descents. Trim your toenails straight across a day or two before every major hike.

    Frequently Asked Questions (FAQs)

    1. Why does my heel keep slipping even when my boots are tied tightly?

    If your heel slips despite tight laces, your boots may be slightly too long, your heel pocket might not match your foot shape, or your instep isn’t being held down properly. Try using the Surgeon’s Knot to anchor your ankle back into the heel pocket.

    2. How can I stop my toes from hitting the front of my boots when going downhill?

    Toe jamming is caused by forward foot sliding. Retie your boots before descents by kicking your heel back, cinching the midfoot snugly, and using a locking ankle knot to keep your foot anchored in the rear of the boot.

    3. Should I lace my hiking boots differently for uphill vs. downhill hiking?

    Yes! Loosening the ankle slightly on long ascents gives your ankle better flexibility, while tightening the ankle and midfoot securely before descents prevents forward sliding and toe trauma.

    4. What is a Surgeon’s Knot and how does it work?

    A Surgeon’s Knot involves twisting the laces around each other twice before pulling them tight against an eyelet. The extra twist creates friction that prevents the lace from loosening under tension, acting as a mechanical lock.

    5. Can incorrect lacing cause numbness in my feet?

    Absolutely. Lacing your boots too tightly across the top of your foot (the instep) compresses the superficial nerves and blood vessels, leading to numbness, tingling, and cold toes. Use window lacing to relieve this pressure.

    6. Are my boots too small if my toes hurt on downhills?

    Not necessarily. While a boot that is a full size too small will cause toe pain, even a perfectly sized boot will cause your toes to slam into the front if your foot isn’t locked down properly at the instep and ankle.

    7. How do I know if my hiking boots are the right width?

    When laced up, your toes should be able to wiggle freely from side to side, and the sides of your feet should not bulge over the edges of the midsole platform. If your forefoot feels pinched, use toe-relief lacing.

    8. Does sock thickness affect heel slippage?

    Yes. Wearing socks that are too thin can leave extra volumetric space inside the boot, causing your heel to lift. Conversely, socks that are too thick can crowd your toes and cut off circulation. Match your sock thickness to the interior volume of your boot.

    9. What should I do if my boots are broken in but still slip at the heel?

    In addition to the Surgeon’s Knot, you can insert heel lock pads (adhesive foam strips placed inside the heel counter) or switch to a thicker volume sock to fill the excess space.

    10. How often should I check or adjust my laces during a hike?

    It is normal for leather and synthetic boots to stretch slightly and for your feet to shift during the first mile or two of a hike. It is standard practice to stop after 15–20 minutes of hiking to fine-tune your lace tension.

    Conclusion

    Sore toes and heel slippage are two of the most common trail complaints, yet they are entirely preventable. By moving away from factory lacing habits and mastering specialized techniques like the Surgeon’s Knot, window lacing, and dynamic terrain adjustments, you can completely customize the fit of your boots on the fly. Take control of your comfort, protect your feet from friction and trauma, and hit the trail with absolute confidence on your next outdoor adventure.

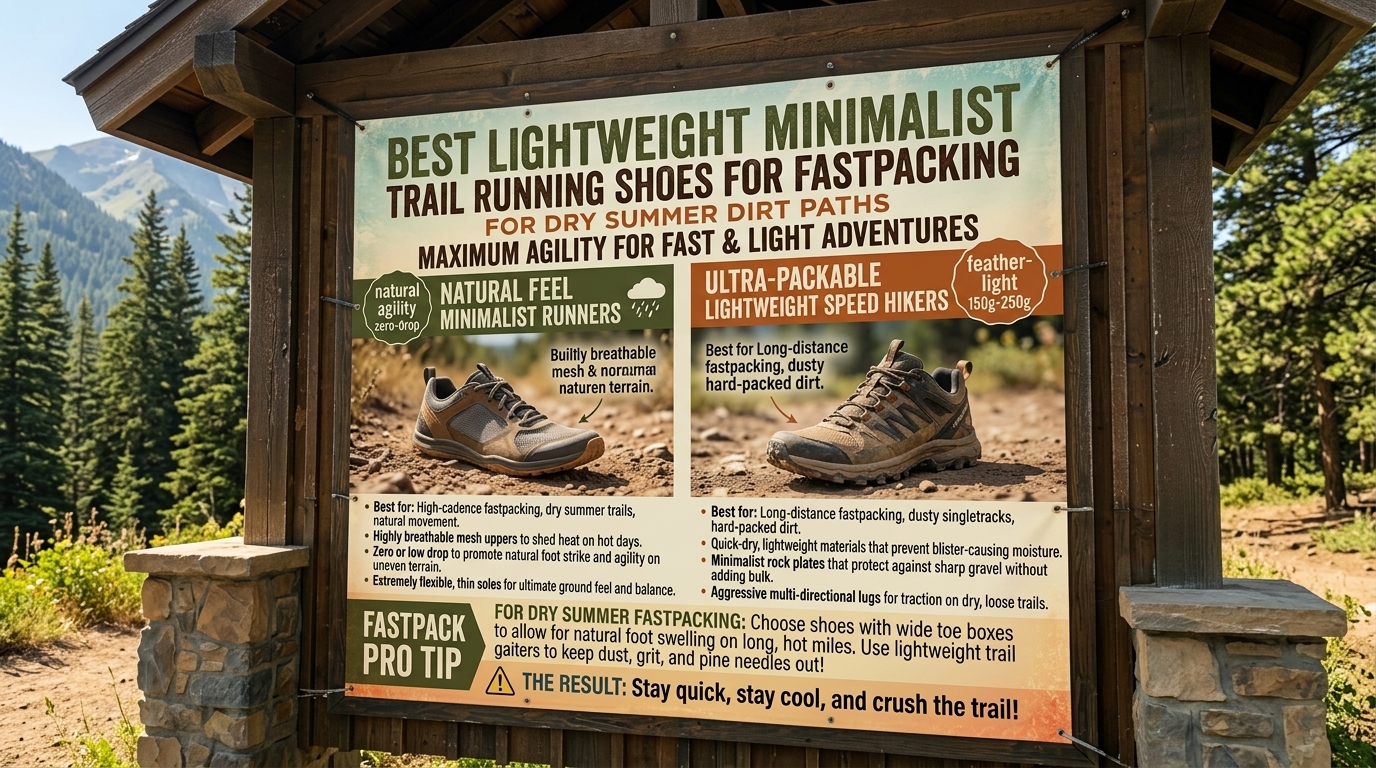
  • Lightweight minimalist trail running shoes for fastpacking on dry summer dirt paths

    Lightweight minimalist trail running shoes for fastpacking on dry summer dirt paths

    When the summer sun bakes the dirt tracks and the call of the backcountry grows irresistible, traditional heavy backpacking gear starts to feel like an anchor. Enter fastpacking—the exhilarating hybrid of ultra-lightweight backpacking and trail running. By shedding excess pounds and covering long distances at a swift, rhythmic pace, fastpackers can knock out multi-day itineraries in a fraction of the time.

    However, your choice of footwear can make or break your trip. When you are logging 20 to 30 miles a day over dry summer dirt paths with a loaded pack, heavy hiking boots will exhaust your legs and cook your feet. What you need are lightweight minimalist trail running shoes: footwear that offers agility, supreme breathability, exceptional ground feel, and zero unnecessary bulk.

    Whether you are tearing down dusty switchbacks in California, navigating arid trails in Texas, logging high-mileage dirt paths in Washington, or taking a weekend escape from San Francisco and New York, this comprehensive guide covers everything you need to know about choosing and utilizing minimalist trail runners for summer fastpacking.

    Why Minimalist Trail Running Shoes Excel for Fastpacking

    Fastpacking requires a delicate balance. You are carrying a multi-day pack (typically weighing between 15 to 25 pounds), yet you want the speed and freedom of a trail runner. Traditional hikers provide rigid structure, but minimalist and agile trail running shoes offer distinct advantages tailored for dry, hot summer conditions.

    1. Featherweight Agility and Reduced Fatigue

    In biomechanics, every ounce on your feet feels like five pounds on your back. Traditional hiking boots weigh anywhere from 2 to 4 pounds per pair. Lightweight minimalist trail runners often weigh under 20 ounces per pair. Reducing rotational weight at your ankles drastically cuts down leg fatigue over long summer days, allowing you to maintain a fluid stride from dawn until dusk.

    2. Unrivaled Breathability for Summer Heat

    Dry summer dirt paths kick up intense heat and fine dust. Minimalist trail shoes utilize open, ultra-permeable mono-mesh or engineered synthetic uppers. This high airflow allows sweat vapor to escape instantly, keeping your feet cool, dry, and free from the soggy skin maceration that causes blisters.

    3. Superior Ground Feel and Proprioception

    Minimalist shoes typically feature lower stack heights (the distance between your foot and the ground) and flexible midsoles. This encourages a natural midfoot or forefoot strike, enhancing your proprioception—your body’s ability to sense the terrain underfoot. You can feel rocks, roots, and loose dirt intuitively, allowing you to react quickly and avoid turned ankles.

    Key Features to Look For in Fastpacking Trail Shoes

    Not all trail running shoes are built to handle the structural demands of carrying a backpack. When shopping for minimalist fastpacking shoes, evaluate these critical performance metrics:

    • Outsole Traction (Lug Depth): For dry summer dirt paths, look for multi-directional rubber lugs ranging from 3mm to 5mm deep. Sticky rubber compounds (like Vibram Megagrip) provide phenomenal friction on loose scree, granite slabs, and dry hard-packed soil.
    • Midsole Cushioning: Minimalist doesn’t have to mean zero cushioning. Look for low-to-moderate stack heights with responsive foam (such as EVA or supercritical foams) that absorb sharp impacts from rocks without completely deadening ground feel.
    • Rock Plate Protection: Many minimalist shoes feature a thin, flexible rock plate embedded in the forefoot. This is vital for fastpacking; it protects the sensitive ball of your foot from bruising when you step hard onto sharp stones while wearing a heavy pack.
    • Non-Waterproof (Mesh) Uppers: For dry summer paths, avoid waterproof membranes (like Gore-Tex). Waterproof shoes trap sweat in hot weather. Instead, opt for pure mesh uppers that breathe freely and dry in minutes if you encounter water.

    Top Lightweight Minimalist Trail Running Shoes for Summer Fastpacking

    Here are the top-performing, highly breathable trail running shoes engineered for high-mileage fastpacking on dry summer dirt paths.

    1. Altra Lone Peak (8 or Latest Edition)

    • Weight (Per Pair): Approx. 20 oz – 21 oz
    • Why It Works: The Altra Lone Peak is practically the uniform of long-distance through-hikers and fastpackers. It features Altra’s signature FootShape toe box, which lets your toes splay out naturally, eliminating lateral pinch and bunion pain. With a balanced zero-drop platform, moderate cushioning, a flexible stone guard, and a sticky MaxTrac outsole, it provides unmatched comfort and foot freedom on dry dirt paths.

    2. Saucony Peregrine (13 or 14)

    • Weight (Per Pair): Approx. 20 oz
    • Why It Works: If you want a more secure, locked-in racing fit with a slightly lower profile, the Saucony Peregrine is an elite choice. It features PWRRUN cushioning that strikes a brilliant balance between ground feel and impact protection, paired with aggressive 5mm lugs for biting into loose dirt and dust. Its lightweight, durable upper breathes exceptionally well in summer heat.

    3. Brooks Cascadia (17 or Latest Lightweight Variant) / Catamount 3

    • Weight (Per Pair): Approx. 19 oz – 21 oz
    • Why It Works: The Brooks Catamount series is specifically designed for fast, technical trail running and lightweight fastpacking. Utilizing a lightweight nitrogen-infused foam midsole and a flexible ballistic rock plate protection system, it handles high speeds over rocky western trails and dusty California paths with remarkable stability.

    4. Hoka Torrent 3

    • Weight (Per Pair): Approx. 18 oz
    • Why It Works: While Hoka is famous for maximalist, thick-soled shoes, the Torrent line is their lightweight, streamlined racer. It strips away bulky foam to provide a nimble, minimalist ride with responsive cushioning. The open-engineered mesh upper breathes like a dream in scorching summer weather, and the multi-directional lugs grip dry dirt tracks securely.

    Essential Tips for Fastpacking in Minimalist Shoes

    Transitioning to lightweight minimalist trail runners for multi-day fastpacking trips requires a few strategic adjustments to protect your feet and body.

    • Build Up Your Mileage Gradually: Minimalist shoes feature lower drop heights and less artificial arch support. If you are used to stiff, heavy boots, your Achilles tendons and calves will need time to adapt. Do shorter day hikes before launching into a 50-mile fastpacking trip.
    • Manage Trail Dust and Debris: Because minimalist shoes have low collars and breathable mesh, fine summer dust and grit will inevitably get inside. Pair your shoes with lightweight, low-profile running gaiters (like Dirty Girl gaiters) to seal the gap between your shoe and your sock.
    • Embrace Wool or Synthetic Toe Socks: Friction between toes is a primary cause of blisters when moving fast. Pairing minimalist wide toe-box shoes with moisture-wicking toe socks (like Injinji) completely eliminates skin-on-skin toe friction.
    • Keep Your Pack Weight Low: Minimalist trail shoes sacrifice structural support for agility. To make them work comfortably, keep your base pack weight under 15–20 pounds.

    Frequently Asked Questions (FAQs)

    1. Can I use minimalist trail running shoes for multi-day backpacking with a heavy pack?

    Yes, thousands of long-distance backpackers use trail runners for multi-month through-hikes. However, because they lack rigid ankle support, your foot and ankle muscles must work harder, making a lightweight, ultra-light pack setup essential.

    2. Are waterproof trail running shoes better for summer fastpacking?

    No. In dry summer conditions, waterproof membranes trap body heat and sweat inside the shoe, causing your feet to overheat, swell, and blister. Breathable, non-waterproof mesh shoes are vastly superior for summer dirt paths.

    3. What is a “zero-drop” shoe, and is it good for fastpacking?

    A zero-drop shoe (like Altra models) means the heel and forefoot are at the exact same height from the ground, mimicking barefoot posture. Many fastpackers love zero-drop for its natural stride, but if you have tight calves, transition slowly to avoid strain.

    4. How many miles do minimalist trail running shoes last?

    Most lightweight trail running shoes last between 300 to 500 miles. Because they use lighter, minimalist foams and breathable meshes, they tend to pack out and lose cushioning slightly faster than heavy leather boots.

    5. Do I need a rock plate in my fastpacking shoes?

    If you are fastpacking on rocky, technical dirt paths while carrying a loaded pack, a flexible rock plate (or dense rock-protection layer) is highly recommended to prevent sharp stones from bruising the soles of your feet.

    6. How do I keep fine dust out of my mesh trail runners?

    Wearing lightweight trail gaiters that attach to the laces and heel of your shoe is the single most effective way to keep dirt, sand, and pebbles from entering your shoes on dry trails.

    7. Should I size up when buying trail running shoes for fastpacking?

    Yes. When fastpacking downhill for miles, your feet swell and slide forward. Buying your trail runners a half-size larger than your casual street shoes prevents your toes from smashing against the front of the toe box.

    8. Are minimalist shoes stable enough for uneven terrain?

    Yes. Because your foot sits closer to the ground (low stack height), your center of gravity is lower, which actually reduces the likelihood of rolling your ankle compared to standing on top of thick, high-platform soles.

    9. What socks work best with breathable minimalist shoes?

    Thin-to-medium cushion merino wool or synthetic moisture-wicking socks work best. Avoid cotton completely, as it retains sweat and causes friction blisters within minutes.

    10. How do I clean and dry my mesh trail shoes on a multi-day trip?

    At camp, take out the insoles and brush off any dried dust. If they get wet or sweaty, strap them to the outside of your pack during the afternoon hike or prop them up in a breezy, shaded spot to air dry overnight.

    Conclusion

    Fastpacking across dry summer dirt paths is one of the most rewarding ways to experience the backcountry, granting you the freedom to move swiftly, travel light, and cover massive ground. By swapping heavy boots for lightweight minimalist trail running shoes—such as the Altra Lone Peak or Saucony Peregrine—you will shed leg fatigue, keep your feet cool in soaring summer temperatures, and enjoy an agile, uninhibited stride. Dial in your pack weight, protect your feet from dust, and embrace the ultimate fastpacking experience on your next trail adventure.

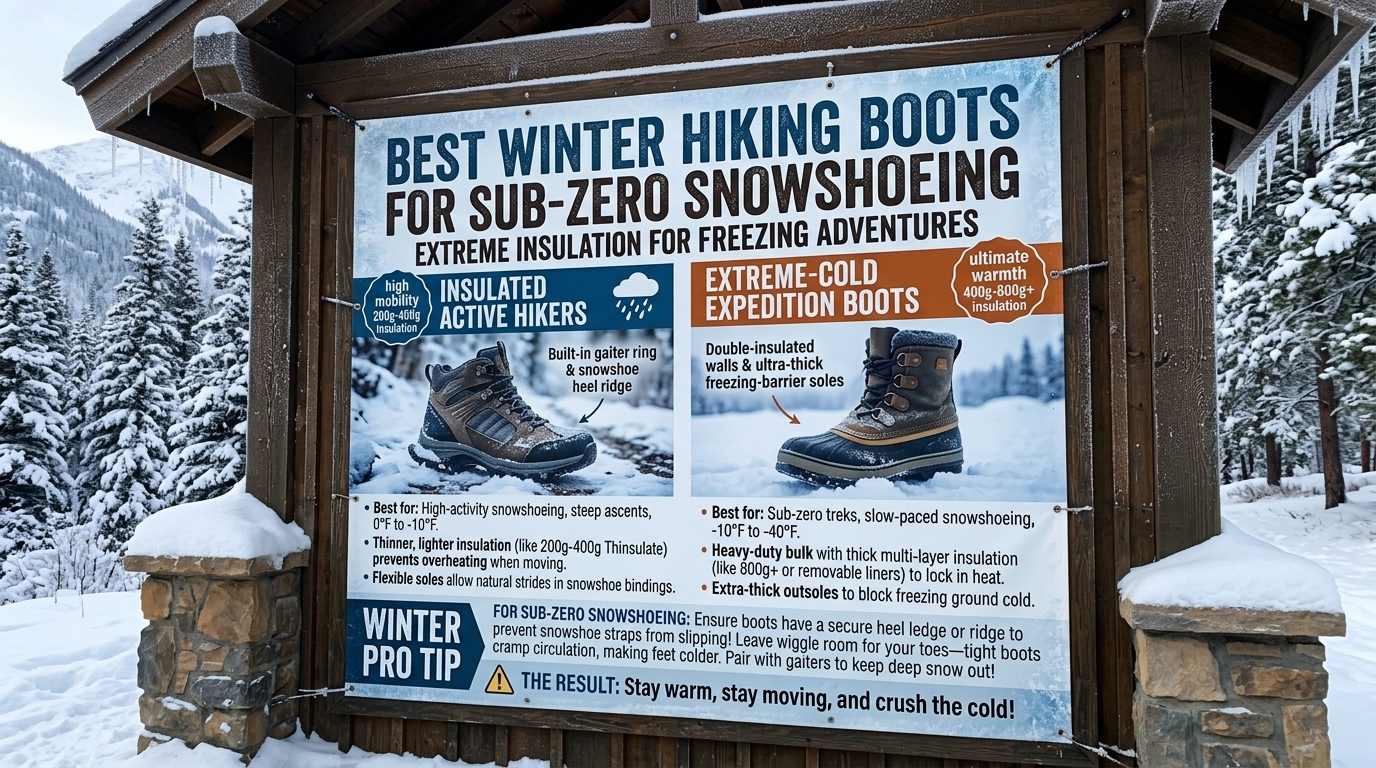
  • Best winter hiking boots with extreme insulation for sub-zero snowshoeing adventures

    Best winter hiking boots with extreme insulation for sub-zero snowshoeing adventures

    Best Winter Hiking Boots with Extreme Insulation for Sub-Zero Snowshoeing Adventures

    When the temperature plummets far below freezing and deep powder blankets the backcountry, standard hiking boots simply will not cut it. Sub-zero snowshoeing expeditions demand heavy-duty protection, specialized traction, and uncompromising thermal engineering. If your footwear fails when you are miles away from the trailhead in freezing alpine conditions, the risk of frostbite and hypothermia escalates rapidly.

    Whether you are carving tracks through heavy powder in Washington, braving bitter winter gales in New York, navigating high-altitude sub-zero passes, or preparing for winter camping trips, having the right extreme-insulation winter boot is paramount.

    This comprehensive guide explores the best winter hiking boots with extreme insulation designed specifically for sub-zero snowshoeing, complete with critical buying tips, regional insights, and answers to your most pressing questions.

    The Anatomy of an Extreme-Insulation Winter Snowshoeing Boot

    Not all winter boots are created equal. When temperatures drop below zero degrees Fahrenheit ($-18^\circ\text{C}$), standard leather hiking boots or casual winter pac boots will freeze solid. Extreme winter boots feature specialized architectural components designed for sub-zero survival and efficient snowshoe integration.

    1. High-Performance Insulation Ratings

    Look for boots that feature advanced synthetic insulation rather than basic foam linings.

    • Thinsulate Ultra / Platinum: High-density microfiber insulation (typically 400g to 1000g+ or specialized Aerogel blends) that traps body heat without adding excessive bulk.
    • Primaloft Eco / Gold Series: Highly compressible, water-resistant synthetic insulation that maintains its thermal efficiency even if moisture manages to sneak inside.
    • Removable Felt Liners: Traditional multi-layer felt or wool inner booties (common in extreme mountaineering and deep snow boots) that can be pulled out at night to dry in your sleeping bag.

    2. Comfort Temperature Ratings

    Unlike standard shoes, extreme cold-weather boots often come with manufacturer comfort ratings stretching down to $-40^\circ\text{F}$ or even $-60^\circ\text{F}$. Keep in mind that these ratings assume you are active; if you plan to stand still ice-fishing or belaying, your feet will get colder much faster.

    3. Snowshoe Compatibility (The Heel Welt)

    Snowshoeing puts unique strain on footwear bindings. Your boots need:

    • Stiff Soles: A rigid nylon or composite midsole prevents your foot from flexing repeatedly against the snowshoe binding, which cuts off blood circulation and causes cold toes.
    • Heel Welts / Ledges: A defined heel counter ensures that ratchet or strap bindings on modern mountaineering and snowshoe frames lock securely in place without slipping off during steep ascents.

    Top Extreme-Insulation Winter Boots for Sub-Zero Snowshoeing

    To help you conquer extreme winter landscapes, here are the top-performing, heavily insulated winter boots engineered for deep snow and sub-zero temperatures.

    1. Salomon Toundra Pro CSWP (CrimaShield Waterproof)

    • Temperature Rating: Comfort rated down to $-40^\circ\text{F}$ / $-40^\circ\text{C}$
    • Why It Works: Salomon integrated Aerogel—a material used by NASA to insulate space suits—into the boot’s construction. This creates an ultra-thin, incredibly lightweight thermal barrier that blocks out extreme sub-zero cold without feeling like a bulky brick on your feet. Combined with a waterproof membrane, aggressive Winter Contagrip rubber outsoles, and a secure fit for snowshoe bindings, it is a premier choice for active winter hikers.

    2. Kamik NationPlus / Goliath Extreme Winter Boots

    • Temperature Rating: Rated down to $-40^\circ\text{F}$
    • Why It Works: For hikers on a budget who still need heavy-duty sub-zero protection, Kamik delivers exceptional value. Featuring a waterproof leather and synthetic upper coupled with a moisture-wicking removable thermal liner, these boots handle deep snow drifts and heavy snowshoe mileage with ease. The rubber shell base ensures absolute waterproof integrity in slush and melting pack.

    3. Columbia Bugaboot Celsius / Titanium Omni-Heat

    • Temperature Rating: Rated down to $-25^\circ\text{F}$ to $-32^\circ\text{F}$
    • Why It Works: Columbia utilizes their signature Omni-Heat reflective lining, which bounces your body’s natural heat back toward your feet, paired with synthetic insulation. They offer a great balance of flexibility and rigidity, making them comfortable for long-distance snowshoeing treks across rolling winter terrain while keeping moisture entirely locked out.

    4. Sorel Glacier XT / Caribou Extreme

    • Temperature Rating: Rated down to $-100^\circ\text{F}$ (Extreme static rating)
    • Why It Works: If you are dealing with brutal arctic blasts, polar vortexes, or multi-day winter expeditions in places like northern New York or high-elevation Washington passes, the Sorel Glacier series is legendary. Featuring a massive 13mm ThermoPlus removable felt inner boot and a waterproof rubber shell, these boots are absolute fortresses against extreme cold, though they are bulkier for technical mountaineering.

    Essential Tips for Sub-Zero Snowshoeing Foot Comfort

    Even with the most expensive, heavily insulated boots on the market, sub-zero conditions require smart field strategies to prevent cold injuries.

    • Never Wear Tight Boots: Tight boots restrict blood circulation. In sub-zero weather, restricted blood flow means cold feet, regardless of how much insulation your boot has. Always size up slightly to accommodate thick mountaineering socks without compressing your toes.
    • The Layering Rule for Socks: Pair a thin, synthetic moisture-wicking liner sock with a thick, high-density merino wool winter sock. If your feet sweat on the approach hike, moisture will freeze when you stop; changing into dry socks at the summit is a game-changer.
    • Keep Moving: Insulation traps body heat; it does not generate it. If you stand still in sub-zero snow for too long, your feet will cool down. Keep your blood pumping.
    • Use Gaiters: Pair your boots with tall, waterproof gaiters. This prevents loose powder from spilling over the collar of your boots during deep snowshoeing ascents.

    Frequently Asked Questions (FAQs)

    1. What temperature rating do I need for sub-zero snowshoeing?

    For true sub-zero adventures (below $0^\circ\text{F}$ or $-18^\circ\text{C}$), look for boots with a comfort rating of at least $-25^\circ\text{F}$ to $-40^\circ\text{F}$. Keep in mind that static ratings (like $-100^\circ\text{F}$) are meant for standing still, while active ratings account for body movement.

    2. Are pac boots good for snowshoeing?

    Traditional pac boots (with removable felt liners and rubber bottoms) work well for casual winter walking, but many are too flexible and soft for technical snowshoeing. Look for winter boots with a stiffer midsole designed specifically to interface with snowshoe bindings.

    3. Why do my feet still get cold in insulated winter boots?

    The most common culprit is tight lacing or tight boots restricting blood circulation. Other causes include wearing cotton socks that trap sweat, or sitting still for too long in sub-zero winds without active movement.

    4. Can I use my standard three-season hiking boots with heavy socks for winter?

    No. Standard three-season boots lack thermal insulation, and forcing thick socks into a standard boot compresses your feet, cutting off circulation and accelerating frostbite risk in sub-zero weather.

    5. How do I dry my winter boot liners overnight in freezing weather?

    If you are winter camping or backpacking, remove the inner liners from your boots and place them inside your sleeping bag near your core. Your body heat will dry out accumulated sweat overnight. Never place boot liners directly over a high-heat campfire.

    6. Do I need crampons or microspikes instead of snowshoes in winter?

    It depends on snow depth. If the snow is packed hard or icy, microspikes or mountaineering crampons are ideal. If you are dealing with deep, uncompressed powder, snowshoes are mandatory to keep you from sinking waist-deep.

    7. How do I prevent snowshoe straps from chewing up my boots?

    Ensure your snowshoe bindings are centered properly and not rubbing against vulnerable fabric seams. Many extreme winter boots feature rubberized rand reinforcement around the lower perimeter specifically to resist abrasion from snowshoe straps.

    8. Should I buy waterproof winter boots for snow?

    Yes, absolutely. Snow melts when it contacts warm boot surfaces. Non-waterproof boots will quickly saturate with water, freeze into blocks of ice, and cause severe chilling.

    9. How tight should my extreme winter boots be laced?

    Lace them snugly enough to prevent heel lift and friction blisters, but keep the forefoot area loose enough that you can wiggle all your toes freely. Wiggling your toes is crucial for maintaining blood circulation in the cold.

    10. How many grams of insulation are best for extreme winter hiking?

    For sub-zero conditions, look for boots with 600g to 1000g+ of synthetic insulation, or advanced technologies like Aerogel and reflective thermal foils that provide high warmth-to-weight ratios.

    Conclusion

    Sub-zero snowshoeing adventures offer some of the most breathtaking, peaceful wilderness experiences of the year, but they demand absolute respect for the elements. Investing in a pair of high-performance, heavily insulated winter boots—such as the Salomon Toundra Pro or Kamik Extreme series—ensures your feet stay warm, dry, and secure against brutal winter conditions. Equip yourself with the right gear, prioritize proper fit and sock layering, and head out into the winter wonderland with total confidence.

  • What is the difference between waterproof and water-resistant hiking shoes for summer

    What is the difference between waterproof and water-resistant hiking shoes for summer

    What Is the Difference Between Waterproof and Water-Resistant Hiking Shoes for Summer?

    When summer arrives, hitting the trails becomes one of the ultimate outdoor pursuits. Whether you are scaling dry, dusty switchbacks in California, navigating coastal marine layers in San Francisco, traversing unpredictable microclimates in Washington, exploring rugged terrain in Texas, or escaping New York city life for weekend mountain getaways, choosing the right footwear can make or break your adventure.

    One of the most common dilemmas hikers face when shopping for summer gear is deciding between waterproof and water-resistant (or non-waterproof, highly breathable) hiking shoes. At first glance, the terms sound interchangeable, but on a hot summer trail, the difference dictates whether your feet stay comfortably cool or turn into a sweltering swamp.

    Defining the Terms: Waterproof vs. Water-Resistant

    To choose the correct footwear for warm-weather hiking, you first need to understand how these shoes are constructed and what level of protection they actually offer.

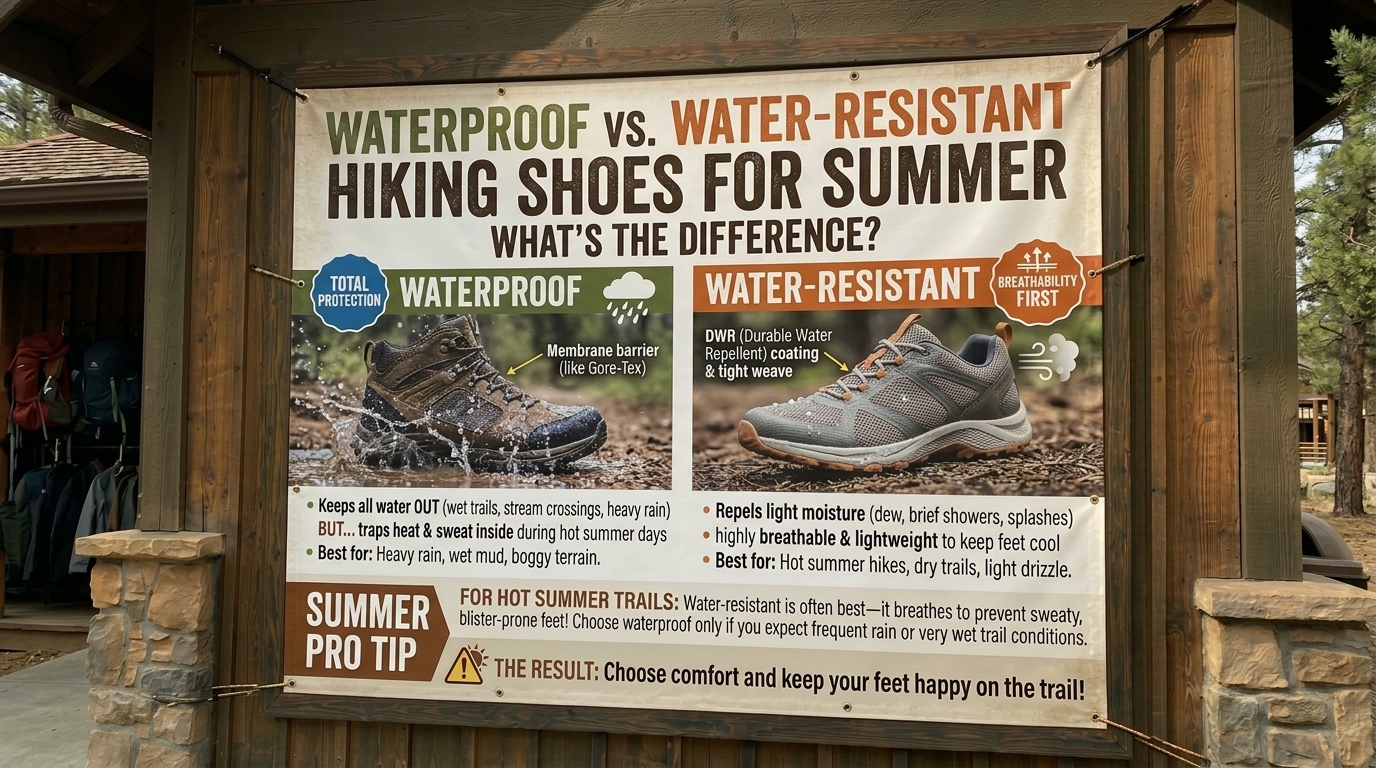
    1. Water-Resistant Hiking Shoes (The Breathable Choice)

    Water-resistant hiking shoes—often encompassing lightweight mesh hikers and trail runners—are designed to manage light moisture, such as a brief morning dew on grass or a passing drizzle, while prioritizing maximum airflow.

    • Construction: Built with open synthetic mesh uppers and treated with a Durable Water Repellent (DWR) coating on the outer surface. They do not contain an internal waterproof bootie or membrane.
    • How They Handle Water: They repel light splashes and very brief moisture, but heavy rain or stepping into a deep puddle will cause water to soak through. However, because they lack an internal barrier, they dry out remarkably fast once wet.

    2. Waterproof Hiking Shoes (The Shield)

    Waterproof hiking shoes are engineered to create an impenetrable barrier between your feet and external moisture.

    • Construction: Built with a specialized internal waterproof-breathable membrane (such as GORE-TEX, OutDry, or proprietary linings) coupled with gusseted tongues and sealed seams.
    • How They Handle Water: They block out standing water, deep mud, heavy downpours, and stream crossings completely, keeping your feet bone-dry from the outside elements.

    The Summer Dilemma: Why Waterproof Shoes Can Hurt in Hot Weather

    While waterproof shoes sound superior on paper, summer introduces a major physiological challenge: heat and foot sweat.

    Your feet contain more than 250,000 sweat glands and can produce up to half a pint of moisture per day during strenuous activity. In summer, temperature spikes compound this issue.

    • The Trap of Reduced Breathability: Even the highest-end waterproof membranes sacrifice a degree of breathability compared to open mesh. In hot weather, body heat and sweat vapor struggle to escape through the waterproof layer fast enough. The result? Your sweat gets trapped inside the shoe, effectively creating a miniature sauna.
    • The “Wet From the Inside” Paradox: Many hikers wearing waterproof boots in July heat discover their socks are soaking wet at the end of the day—not because rain leaked in, but because their own sweat couldn’t escape.
    • The Slow Drying Trap: If you do manage to submerge a waterproof shoe over the ankle (or if heavy sweat saturates the interior), water gets trapped inside the membrane barrier. Waterproof shoes can take an entire day or longer to dry out in the backcountry.

    Regional Summer Climates: Which Should You Wear?

    Geographic location and trail conditions should heavily influence your choice of summer hiking footwear:

    • Texas & Inland California: Characterized by dry, blistering heat, dusty trails, and intense sun. Water-resistant/breathable mesh shoes are the undisputed winner here. Waterproof boots will trap heat and cause excessive blistering from overheating.
    • San Francisco & Coastal Washington: Summers feature cool coastal breezes, heavy morning fog, damp shaded forests, and occasional mud. If you are hiking through wet coastal brush or cold mud, waterproof footwear provides welcome protection.
    • New York & Upstate Trails: Summer thunderstorms can trigger sudden downpours and muddy trails, but humidity is high. If trails are heavily wooded and wet, waterproof shoes work well, but for fast-paced dry day hikes, breathable water-resistant options keep feet cooler.

    Pros and Cons Breakdown

    FeatureWater-Resistant / Breathable ShoesWaterproof Hiking Shoes
    BreathabilityExtremely high; keeps feet cool in summer heat.Lower; tends to trap heat and sweat in warm weather.
    WeightTypically lighter and more agile on feet.Slightly heavier due to internal membranes and extra layers.
    Drying TimeDries rapidly if submerged or saturated with sweat.Slow to dry if water breaches the collar or sweat builds up.
    ProtectionRepels light dew and dust; lets water through in heavy saturation.Complete barrier against puddles, mud, streams, and heavy rain.
    Best Used ForHot, dry, dusty, or high-mileage summer trails.Cold, wet, muddy, or alpine summer conditions.

    Frequently Asked Questions (FAQs)

    1. Are waterproof hiking shoes too hot for summer hiking?

    In most warm, dry summer climates, yes. Waterproof membranes restrict airflow, causing heat and sweat to build up, which increases the risk of chafing and blisters. They are best reserved for cool, wet, or high-altitude summer routes.

    2. Can water-resistant shoes handle a sudden summer rainstorm?

    They can handle light sprinkles or brief showers, but sustained downpours will eventually saturate the fabric. However, because they dry quickly, many hikers prefer them over waterproof boots that trap moisture long after the rain stops.

    3. Do my feet get wet anyway in waterproof shoes during summer?

    Often, yes. If temperatures are high, your own sweat can accumulate inside the shoe faster than the membrane can vent it out, leaving your socks damp from the inside.

    4. Which option is better for preventing blisters in summer?

    Breathability is the key to blister prevention in hot weather. Water-resistant mesh shoes keep feet cooler and drier from sweat, reducing skin maceration (softening of the skin due to moisture) that leads to painful blisters.

    5. How do I maintain water-resistant shoes?

    Clean off mud and dirt regularly with a soft brush and mild soap, and reapply a Durable Water Repellent (DWR) spray every few months to maintain the outer moisture-shedding coating.

    6. Are waterproof shoes worth the extra money?

    If you frequently hike in wet, boggy, or rainy environments, absolutely. However, if your summer hiking consists of dry dirt paths and sunny skies, investing in waterproof footwear means paying more for a feature you won’t benefit from.

    7. Do waterproof membranes wear out over time?

    Yes. Over months of heavy hiking, dirt, body oils, and flex friction can clog or degrade the microscopic pores of a waterproof membrane, reducing both its breathability and waterproof integrity.

    8. What socks should I wear with summer hiking shoes?

    Always pair your summer hiking shoes—whether waterproof or water-resistant—with synthetic or merino wool moisture-wicking socks. Avoid 100% cotton socks, which hold moisture against your skin and cause blisters.

    9. Can I use waterproofing sprays to make mesh shoes waterproof?

    No. Spraying a water-resistant mesh shoe with a DWR spray will make it shed light splashes better, but it cannot turn a porous mesh shoe into a fully waterproof barrier because it lacks an internal sealed membrane.

    10. How do I dry out wet hiking shoes quickly on a summer trip?

    Remove the insoles, loosen the laces, pull the tongue forward, and place the shoes in a warm, well-ventilated spot out of direct sunlight. Never use campfires, hair dryers, or direct heaters, as extreme heat warp plastics and melts glues.

    Conclusion

    When choosing between waterproof and water-resistant hiking shoes for summer, let your environment and comfort dictate your choice. If your summer treks involve dry dirt trails, high temperatures, and high mileage, water-resistant, highly breathable mesh shoes will keep your feet cool, light, and blister-free. However, if your summer adventures take you through sloppy alpine mud, freezing stream crossings, or persistent rain, waterproof footwear remains your best defense against wet misery. Match your gear to the climate, and enjoy every mile of the trail.

  • Best budget friendly waterproof hiking boots for men with wide feet and bunions

    Best budget friendly waterproof hiking boots for men with wide feet and bunions

    Hitting the trail should be an escape into nature, not an exercise in foot torture. However, if you have wide feet or suffer from bunions—a painful bony bump that forms on the joint at the base of your big toe—finding the right footwear can feel like an impossible quest. Standard hiking boots are notoriously narrow, pinching the forefoot, crushing sensitive joints, and turning a pleasant weekend hike into a blistering nightmare.

    Add “waterproof” and “budget-friendly” to the checklist, and your options narrow down even further. Many entry-level boots sacrifice toe-box volume, while high-end orthopedic models can cost upwards of three hundred dollars.

    Whether you are navigating muddy trails in Washington, handling coastal moisture in San Francisco or New York, or trekking through dry, rugged terrain in Texas and California, you deserve comfort without breaking the bank. This comprehensive guide explores the best budget-friendly, waterproof hiking boots tailored specifically for men with wide feet and bunions, alongside expert-backed selection tips.

    Understanding the Challenge: Wide Feet, Bunions, and Waterproofing

    Before diving into specific boot models, it is essential to understand why standard hiking boots fail men with bunions and wide forefeet.

    A bunion (hallux valgus) alters the structural alignment of your foot, causing the big toe joint to push outward. When confined inside a narrow, tapered boot, this joint rubs constantly against the upper material. Friction creates inflammation, redness, corns, and excruciating pain.

    What to Look For:

    • Generous Toe Box: Unlike a pointed or tapered toe box, a wide or anatomically shaped (foot-shaped) toe box allows your toes to splay naturally, eliminating lateral pressure on bunions.
    • True Wide Sizing Options: Look for brands that offer dedicated “Wide” (EE) or “Extra Wide” (EEEE) sizing rather than just sizing up in length (which causes heel slippage).
    • Flexible Uppers: Supple leathers or high-grade synthetic mesh with minimal rigid overlays across the forefoot prevent painful rubbing.
    • Reliable Waterproof Membranes: Budget-friendly doesn’t have to mean leaky. Look for integrated waterproof-breathable membranes that keep streams and rain out while letting sweat escape.

    Top Budget-Friendly Waterproof Hiking Boots for Wide Feet & Bunions

    To help you find the right pair, here are the top-performing, wallet-friendly waterproof hiking boots on the market that excel in accommodating wide forefeet and sensitive bunions.

    1. Merrell Moab 3 Mid Waterproof

    • Price Range: $140 – $160 (frequently on sale)
    • Why It Works: Often called the “mother of all boots,” the Merrell Moab 3 is legendary for out-of-the-box comfort. Crucially, Merrell offers this boot in dedicated Wide widths. The Moab 3 features a contoured footbed, a supportive nylon arch shank, and a generous volume forefoot that accommodates mild-to-moderate bunions without pinching. The Gold-rated suede leather and mesh upper break in rapidly, while the waterproof membrane keeps your feet dry in sloppy conditions.

    2. KEEN Targhee III (or Targhee IV) Waterproof Mid

    • Price Range: $150 – $170
    • Why It Works: KEEN is famous for its signature generous, wide toe boxes, making them a holy grail brand for hikers with bunions and wide feet. The Targhee series provides ample room up front so your toes and big toe joints can rest without compression. Built with waterproof leather and a breathable membrane, these boots feature robust rubber toe caps that protect against rocks while maintaining a flexible, non-binding midfoot fit.

    3. Columbia Newton Ridge Plus Waterproof Amped

    • Price Range: $90 – $120
    • Why It Works: If you are shopping on a strict budget, Columbia offers one of the best value propositions in outdoor footwear. While standard widths can feel snug, the Wide versions of the Newton Ridge provide surprising volumetric space in the toe box. Featuring lightweight techlite midsoles and seam-sealed waterproof construction, these boots offer solid performance for day hikes across Texas and California without draining your wallet.

    4. Timberland White Ledge Mid Waterproof

    • Price Range: $100 – $130
    • Why It Works: A classic entry-level boot, the Timberland White Ledge is widely available in dedicated wide sizes. Crafted from full-grain waterproof leather, it features a gusseted tongue and a cushioned EVA footbed. While it requires a slightly longer break-in period than mesh-heavy boots, the all-leather upper molds to the shape of your foot over time, custom-fitting around troublesome bunions.

    Essential Tips for Buying and Fitting Wide Bunion Boots

    Finding the right boot model is only half the battle; how you fit and prep them dictates your comfort on the trail.

    • Shop Later in the Day: Always try on or buy hiking boots in the afternoon or evening when your feet are naturally swollen to their maximum size.
    • Wear Your Hiking Socks: Test potential boots wearing the exact cushioned, moisture-wicking socks you plan to use on the trail.
    • Consider Custom Insoles: If budget permits, pairing a budget boot with an orthotic insole or a metatarsal pad can drastically relieve pressure off the ball of the foot and bunion joint.
    • Use a Boot Stretcher: If a synthetic or leather boot fits great everywhere except a slight pinch over your bunion, a localized wooden boot stretcher with a bunion plug can stretch that exact spot by a few millimeters.

    Frequently Asked Questions (FAQs)

    1. Should I buy a size larger to accommodate my bunions?

    Sizing up in length is generally a bad idea because it shifts your heel out of the heel pocket, causing painful blisters and instability. Instead, buy your true length in a dedicated Wide (EE) width or choose a brand naturally known for a roomy toe box like KEEN.

    2. Are leather or synthetic hiking boots better for bunions?

    Both have merits. Soft synthetic mesh boots offer instant flexibility with zero break-in time, making them gentle on bunions immediately. However, quality full-grain or suede leathers stretch and mold to the exact contours of your foot over time, providing a personalized pain-free fit.

    3. How do I know if a hiking boot is truly wide enough?

    When laced up, your toes should be able to wiggle freely side-to-side, and the sides of your feet (especially the big toe joint) should not press heavily against the inner walls of the boot. If the upper material bulges past the midsole outsole platform, the boot is too narrow.

    4. Can waterproofing sprays help loosen tight boots?

    No. Waterproofing sprays create a protective barrier against moisture; they do not alter or stretch the structural material of the boot. Use a dedicated leather or synthetic boot-stretching liquid if you need to gently expand tight spots.

    5. Are budget hiking boots durable enough for rocky terrain?

    Yes, many budget-friendly options under $150 (such as the Merrell Moab or Columbia Newton Ridge) use durable rubber outsoles and reinforced stitching designed to handle hundreds of miles of moderate backpacking and day hiking.

    6. Do bunions require specialized orthopedic hiking boots?

    Not always. While specialized medical boots exist, many hikers with mild-to-moderate bunions find complete relief simply by switching to footwear with a wide toe box, low-drop design, and dedicated wide sizing.

    7. Why do my feet hurt worse in waterproof boots than non-waterproof ones?

    Waterproof membranes (like Gore-Tex or proprietary liners) slightly reduce the breathability of a boot and can make the upper feel marginally stiffer. Ensuring you wear moisture-wicking merino wool socks helps mitigate heat buildup and friction.

    8. How can I prevent blisters over my bunions on long hikes?

    Apply a strip of moleskin, sports tape, or anti-blister balm directly to your bunion before putting on your socks. This creates a friction-free barrier that prevents hot spots from turning into painful open blisters.

    9. Can I stretch out a waterproof membrane without ruining it?

    Yes, gentle mechanical stretching using a boot stretcher or professional cobbler tools will not compromise most waterproof membranes, provided heat is never applied to force the stretch.

    10. What is the best way to break in wide hiking boots safely?

    Wear your new boots around the house for a few hours a day, progress to short neighborhood walks, and gradually work your way up to longer day hikes before taking them on a multi-day backpacking trip.

    Conclusion

    Living with wide feet and bunions shouldn’t prevent you from exploring the great outdoors. By prioritizing boots with generous toe boxes, dedicated wide widths, and reliable waterproof protection—such as the Merrell Moab 3 Wide or KEEN Targhee series—you can secure all-day comfort without emptying your bank account. Take your time selecting the right fit, prep your feet properly, and hit the trail with confidence, knowing your feet are supported every step of the way.

  • How to clean and waterproof suede hiking boots to make them last longer

    How to clean and waterproof suede hiking boots to make them last longer

    How to Clean and Waterproof Suede Hiking Boots to Make Them Last Longer

    Suede hiking boots are the ultimate fusion of rugged durability and refined style on the trail. Unlike stiff, full-grain leather that requires months of painful breaking in, soft suede molds to your feet almost immediately, offering supreme comfort from mile one. However, suede has a notorious reputation: it is delicate, highly sensitive to moisture, and acts as a magnet for fine dust, stubborn mud, and trail debris.

    If left unmaintained, water stains, fading, and stiffening fibers can ruin your favorite boots in a single season.

    This comprehensive, highly optimized guide will walk you through everything you need to know to properly clean, condition, and waterproof your suede hiking boots. Whether you are trekking through the damp, muddy trails of Washington, navigating unpredictable weather in New York, or kicking up dust on dry California switchbacks, these expert techniques will extend the lifespan of your boots by years.

    Why Suede Hiking Boots Require Special Care

    Suede is created from the underside of animal hide, giving it a characteristic nap—a fuzzy, velvety texture made of fine protein fibers. Unlike smooth leather, suede lacks a protective top grain. This porous structure means moisture, oils, and dirt can penetrate deep into the material quickly.

    When moisture enters suede without a protective barrier, it flattens the fibers and leaves water rings as it evaporates. Furthermore, caked-on mud acts like a sponge, drawing natural oils out of the hide as it dries, which leads to cracking, splitting, and premature aging.

    The Environmental Challenge Across Regions

    • New York & Washington: High humidity, frequent rain, and muddy autumn trails demand rigorous waterproofing to prevent water logging and mold growth.
    • California & San Francisco: Coastal fog introduces heavy moisture, while dry interior trails create fine, abrasive dust that settles deep into the suede nap.
    • Texas: Caliche dust, dry heat, and sudden downpours require a balance of dust removal and durable moisture barriers.

    Essential Tools and Supplies

    Before you begin the restoration and waterproofing process, gather the proper tools. Using the wrong equipment—such as a household scrub brush or standard leather saddle soap—can permanently ruin suede.

    • Suede Brush: Look for a dual-sided brush featuring brass or nylon bristles for heavy mud removal and rubber crepe bristles for restoring the nap.
    • Suede Eraser / Cleaning Block: Perfect for lifting scuffs, salt stains, and stubborn localized dirt without water.
    • Dedicated Suede Cleaner: A specialized, foaming cleaner formulated specifically for napped leather. Avoid multi-purpose detergents.
    • Suede Conditioner / Reconditioner: A spray-on or liquid conditioner designed to replenish lost oils without flattening the texture.
    • Fluoropolymer or Silicone-Based Waterproofing Spray: High-performance formulas designed specifically for suede and nubuck.
    • Microfiber Cloths: For wiping away excess moisture and soap residue.
    • Boot Trees or Crushed Newspaper: To maintain the structural shape of your boots during the drying process.

    Step-by-Step Guide: How to Clean Suede Hiking Boots

    Cleaning suede requires patience and a gentle touch. Never submerge suede boots in water, put them in a washing machine, or dry them next to high-heat sources like radiators or campfires.

    Step 1: Remove Laces and Insert Boot Trees

    Take off the laces so you can clean the tongue and eyelets thoroughly. Insert wooden boot trees or stuff the toes tightly with crushed newspaper. This absorbs internal moisture and prevents the boots from warping as they dry.

    Step 2: Dry-Brush the Surface

    Take your dry suede brush and gently brush the entire boot in one direction to remove loose dirt, dust, and dried mud. For heavily caked mud, let it dry completely first, then gently chip away the large chunks before brushing. Vigorous brushing lifts loose debris before it can be ground deeper into the nap.

    Step 3: Erase Scuffs and Stains

    For localized scuff marks, mud rings, or grass stains, use a specialized suede eraser. Rub the eraser back and forth over the mark with light-to-moderate pressure. Once the stain lifts, brush away the rubber crumbs with your suede brush.

    Step 4: Apply Specialized Suede Cleaner

    If dry brushing and erasing aren’t enough, use a dedicated suede cleaner.

    1. Dampen your suede brush slightly with clean water.
    2. Apply a small amount of suede foam cleaner to the brush or directly onto the boot.
    3. Gently scrub the entire boot in circular motions, creating a light lather. Work systematically from the toe to the heel to ensure even cleaning.
    4. Wipe away the dirty foam immediately with a clean, damp microfiber cloth. Do not let the soapy residue sit or dry on the suede.

    Step 5: Slow Air Drying

    Place your boots in a well-ventilated area at room temperature out of direct sunlight. Let them dry completely for 24 hours. Crucial Rule: Never use a hair dryer, heat gun, or clothes dryer. High heat cooks the leather proteins, causing the suede to shrink, harden, and crack irreversibly.

    Step-by-Step Guide: How to Waterproof Suede Hiking Boots

    Once your boots are 100% dry, the cleaning process is complete, and the suede fibers are clean and porous, it is time to lock out moisture. Waterproofing creates an invisible shield that repels water, mud, and oils while still allowing the material to breathe.

    Step 1: Restore the Nap

    Before applying any spray, take your dry suede brush or crepe brush and vigorously brush the suede in multiple directions. This fluffs up the nap, opening the microscopic pores so the waterproofing treatment can penetrate deeply.

    Step 2: Choose the Right Waterproofing Product

    Select a spray specifically formulated for suede and nubuck. Avoid heavy waxes, pastes, or heavy-duty greases meant for smooth full-grain boots; these will mat down the suede nap permanently and turn your boots smooth and shiny. Look for aerosol or pump sprays containing fluoropolymers or silicone.

    Step 3: Test a Small Area

    Always test your waterproofing spray on a small, inconspicuous spot near the heel of the boot. Let it dry completely to ensure it does not cause unwanted discoloration or darkening of the suede shade.

    Step 4: Apply the First Coat

    1. Take your boots outside or into a very well-ventilated area.
    2. Hold the spray can approximately 8 to 12 inches away from the boot.
    3. Apply a light, even mist across the entire surface. Ensure uniform coverage, paying close attention to seams, stitching, and the rand where the upper meets the rubber sole, as these are the primary entry points for water.
    4. Do not saturate the boot to the point of dripping; multiple light coats are far more effective than one heavy soaking.

    Step 5: Dry and Apply a Second Coat

    Let the first coat dry for 20 to 30 minutes until it feels dry to the touch. Apply a second light coat to ensure complete, microscopic coverage.

    Step 6: Final Curing

    Allow the boots to cure undisturbed for at least 24 hours in a cool, dry place before taking them out onto wet trails. Once cured, give them one final gentle brush with a dry suede brush to restore the soft, velvety nap.

    Advanced Maintenance Tips for Longevity

    To ensure your suede hiking boots survive hundreds of miles of rugged terrain, incorporate these proactive maintenance habits into your routine:

    • Post-Hike Routine: Never store your boots muddy. Brush off dust and dried dirt immediately after every single hike before it sets into the fibers.
    • Reapply Regularly: Waterproofing wears off over time due to abrasion and UV exposure. Reapply your waterproofing spray every 1 to 2 months if you hike frequently, or whenever you notice water no longer beads up on the surface.
    • Storage Matters: Store your boots in a cool, dry, temperature-controlled environment. Avoid damp basements or hot attics, and never store them inside plastic bags, which trap residual moisture and encourage mold growth.
    • Address Salt and Chemical Stains: If you hike in winter conditions where roads or trails are treated with salt, clean the salt stains immediately using a 1:1 mixture of white vinegar and water on a cloth, followed by brushing.

    Frequently Asked Questions (FAQs)

    1. Can I use regular leather conditioner on suede hiking boots?

    No. Standard leather conditioners, mink oils, and heavy waxes will flatten the delicate suede nap, ruin the texture, and permanently alter the appearance of your boots. Always use products explicitly labeled for suede and nubuck.

    2. How often should I waterproof my suede hiking boots?

    As a general rule of thumb, reapply a protective waterproofing spray every 1 to 2 months of active use, or whenever you notice water soaking into the suede instead of beading up on the surface.

    3. What should I do if my suede boots get soaking wet on the trail?

    Remove the insoles, take out the laces, and stuff the boots with dry newspaper or paper towels to absorb internal moisture. Let them air dry naturally at room temperature. Never place them near a campfire, heater, or direct sunlight.

    4. Can I use water to clean mud off suede boots?

    You should avoid soaking suede in water. However, a lightly dampened brush or specialized foam suede cleaner can be used for spot cleaning. Always dab and wipe away moisture immediately with a microfiber cloth.

    5. Will waterproofing spray change the color of my suede boots?

    Some waterproofing sprays can slightly darken the shade of light-colored suede. Always test the product on a small, hidden area near the heel and let it dry completely before applying it to the entire boot.

    6. How do I get oil or grease stains out of suede?

    Blot excess oil immediately with a clean cloth, then cover the stain generously with cornstarch or talcum powder. Let it sit overnight to absorb the oil, then brush the powder away thoroughly the next day using your suede brush.

    7. Why is my suede stiff after cleaning?

    Stiffness usually occurs if the boots dried too quickly under heat or if too much cleaning solution was used without proper conditioning. Use a suede-safe conditioning spray and brush the nap vigorously once dry to restore flexibility.

    8. Are suede hiking boots durable enough for rough terrain?

    Yes, high-quality suede hiking boots are exceptionally durable and often more breathable than full-grain leather. However, they require proactive maintenance and regular waterproofing to withstand abrasive rocks, sharp brush, and wet environments.

    9. Can I wear suede hiking boots in the snow and rain?

    Yes, provided they have been thoroughly cleaned and treated with a high-performance waterproofing spray. Without waterproofing, snow and rain will quickly saturate the suede, ruining the material and freezing your feet.

    10. How do I fix a matted or flat suede nap?

    If areas of your suede look flat or shiny, take a clean suede brush, brass-bristle brush, or even a clean pencil eraser and gently rub the area back and forth to lift and rejuvenate the crushed fibers.

    Conclusion

    Suede hiking boots offer unmatched comfort, flexibility, and rugged charm on the trail. While they demand a little more maintenance than synthetic or smooth leather alternatives, taking the time to properly clean, condition, and waterproof your boots pays massive dividends. By following this step-by-step care routine, you will protect your investment, keep your feet dry through unpredictable weather from coast to coast, and ensure your favorite hiking boots accompany you on countless adventures for years to come.